There are many reasons people choose to build their own golf simulators. It may be because they require a specific size or are trying to save money. Others build their simulators because they want to invest in a more sophisticated long-term system, or maybe they want to see if they can build one themselves.
Regardless of the reason, there are a few things to know before getting started.
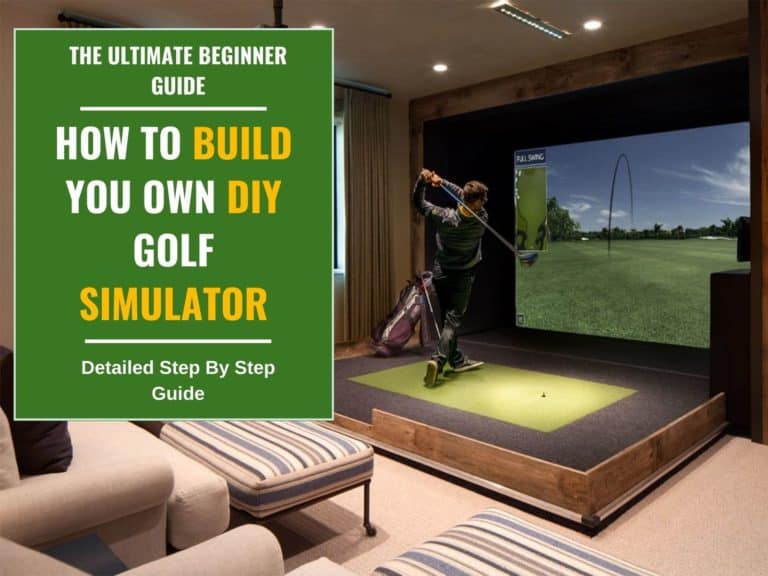
This article is a guide to setting up a Do-It-Yourself Golf Simulator, including advice on buying the proper hardware and software and putting it together, with a detailed overview of the steps you will need to take to achieve the perfect golf simulator system.
Why Build Your Golf Simulator?
So, you’ve decided to build your own golf simulator, but you’re not sure why you should bother. You can buy a simulator from the store, right? What’s the advantage of building your own?
Building a DIY golf simulator is a pretty big project, but the benefits are numerous. Creating your simulator setup enables you to customize the environment to fit your needs. You can choose the size, shape, features, and colors to suit your space at a fairly reasonable cost. Plus, building a golf simulator is a pretty cool DIY project that most fellow golfers have probably never tried.
There are many reasons you may want to build your own system. The primary reason most often attributed to the project is the cost of the sim package. Commercial golf simulators are pricey. Their price may easily exceed $30,000 for top-tier models. You can go as ambitious as you want with a custom-built setup, though saving money is usually the foremost concern if you choose to go the DIY way.
Here is a short video (12 minutes 46 seconds) by Handicap Golf showing how enjoyable and fun it is to build your own golf sim enclosure.
A golf simulator is simply as good as the course and environment it provides, which is why the best setups are those that are custom-made by users. The most significant advantage of building your golf simulator is the ability to create a highly accurate system. This will allow you to recreate the course you play regularly and try courses you would like to play in the future.
Buying a ready-made golf simulator package can be the fastest way to get a golf game going, but building your own may be cheaper and way more fun.
What Is Your Budget to Build This Golf Simulator?
Fixing a budget for your golf simulator is one of the first things to do as all the subsequent tasks depend on it. A basic and low-budget simulator can cost anywhere between $700-$1000, medium-budget packages may cost $5000 or less, while sophisticated models can cost up to $25,000-$30,000 and even more.
The biggest factor that drives the cost is the overall technology. While the cheap golf simulators measure only a few data points, the costlier systems provide a comprehensive review of your swings.
Another factor that plays a deciding role in fixing the budget is the cost of various pieces of equipment required for setting up the golf simulator.
If you are on a tight budget, you can choose to use a simple golf mat with a net and see your shots on a computer screen. On the other hand, if you have a slight wiggle room, you can opt for a high-resolution projector, projector screen, and a high-quality hitting mat.
Additionally, the various features incorporated in the golf simulator, like skills challenges, multiplayer options, multiple golf courses, etc., can also drive up the price. However, the good news is that there is a golf simulator available for every budget. Therefore, do your homework well, compare the prices, and build your indoor golf simulator system based on your budget.
What Equipment Do You Need for a Home Golf Simulator Setup?
To build a home golf simulator, you will need 5-6 components. These include the simulator, netting, mat, and software. For most lower-priced simulator packages, you will need to buy a projector and PC separately. In each category of components, you will find products of varying costs depending on their durability and quality.
As a golf simulator can be a big investment, you need to compare different options to determine which one is most appropriate for you. After all, golf simulators are relatively cheap (depending on how ambitious you are) and easy to build, and you don’t need to be a professional to build your own golf simulator. All you need is a little time, some basic tools, and the willingness to learn.
Tracking System
This is the technological core of your system, the most critical and probably the most expensive element in your setup.
With a golf launch monitor, you will be able to analyze your golf swing, measure the speed and accuracy of your shots, and find out how to correct your mistakes.
The best launch monitors measure vital metrics, including the clubface angle [1], ball speed, clubhead speed, and carry distance [2]. Enterprise solutions from Foresight Sports and Trackman can reveal additional information like club head data, offline, and dispersion numbers.
While you might think you swing at a certain speed, golf launch monitors can show you that you may be swinging much faster than you think or much slower. The most significant benefit of using a golf launch monitor is that it can help you find out how to correct your swing mistakes.
Typically, there are two major technology standards of launch monitors on the market, those using the Doppler radar technology [3] and photometric-based golf simulators and launch monitors.
It is essential to understand the differences between Doppler radar and Photometric camera golf launch monitors if you are looking for the best golf launch monitor for your setup. Both devices work on the same basic principle: measure the golf ball and/or club parameters.
Doppler radar measures the speed of the golf ball immediately after it leaves the clubface by bouncing microwaves off the golf ball.
On the other hand, photometric launch monitors use high-definition cameras to capture images of the ball immediately after impact, providing more accurate axis tilt and ball spin measurements.
There are many golf launch monitors on the market today, but they all have their advantages and disadvantages. Your choice will depend mainly on your needs and budget. Here are a few options to consider, ordered by preference:
- Uneekor QED. A powerful camera-based tracking system mounted on the ceiling; $7000.
- Uneekor EYE XO. similar to the QED but provides more parameters; $10,000. Check out our Uneekor EYE XO review here.
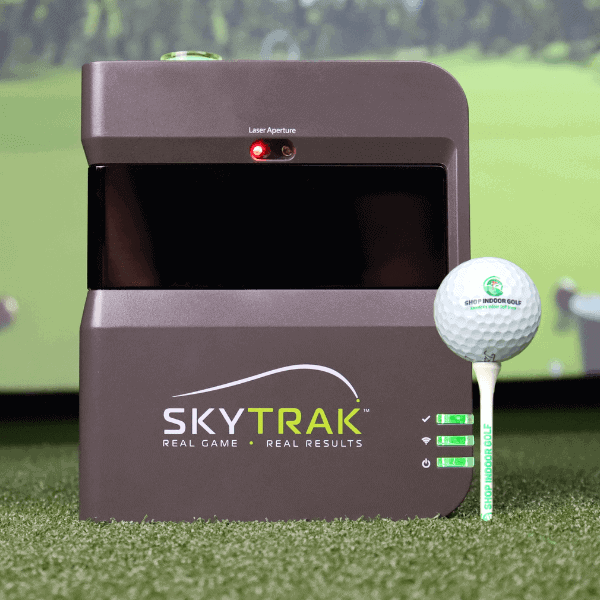
- SkyTrak. The most popular & successful launch monitor since 2014. Read our detailed SkyTrak Review.
- Foresight Sports GC3. The latest photosynthetic technology, with a triple camera system to detect numerous data about your ball and club head; see our Foresight Sports GC3 review here; $8000 with software included.
- FlightScope X3. Capable of measuring over 50 full-swing, chipping, and putting data parameters, the FlightScope X3 provides the most extensive game analysis on the market. It includes chipping and putting support; see the detailed FlightScope X3 review here, starting from $15,000.
- Foresight Sports GCQuad. The only monitor in the golf industry to feature a quadrascopic imaging technology, three-time Golf Digest Editors’ Choice Award Winner for a reason. $14,000.
- Garmin Approach® R10. The First Launch Monitor Under $1000 To Have Golf Simulation Capabilities. Plenty of parameters and integration with the best software on the market; find our Garmin Approach R10 review here; $599.
Choosing a golf launch monitor can be difficult – especially if you’re new to the game. There are tons of various features you should consider before you make your purchase. Accuracy, ease of use, multiplayer capability, appearance, course simulations, technology, and portability are a few things to consider in your decision. If you have ambitious plans for your setup and need a fancy long-lasting simulator, then you should consider a larger budget.
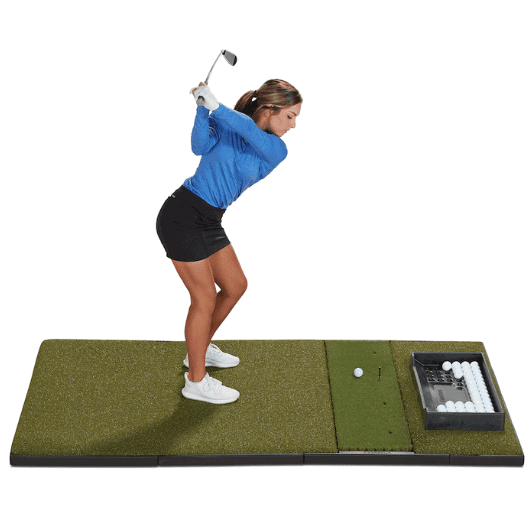
Golf Practice Mat
It would help if you choose a golf mat that suits your gameplay and style. This is important because having a good quality golf mat simulates the feeling of playing the game on natural turf. Therefore, if not the best, invest in a good mat and do not hit the golf balls from an old carpet or worn doormat!
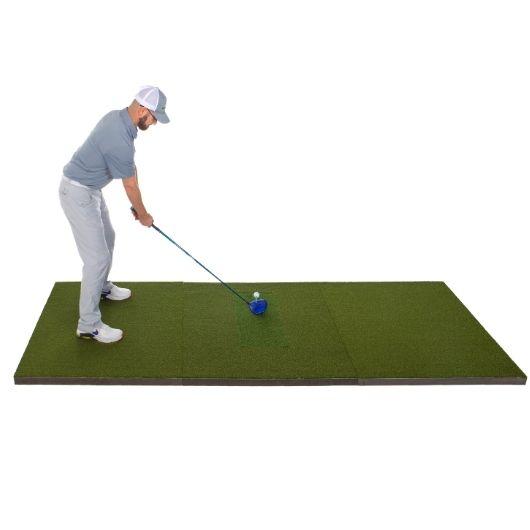
Owning a great golf mat can help you practice and improve your skills. When you are in the market to buy a golf mat, be sure to purchase it from a trusted seller that sells top-quality goods. If not, you run the risk of damaging your clubs with an ill-constructed hitting surface.
Premium golf mats with good craftsmanship and acceptable quality are available on a budget of $300. Though pricey, consider it an investment that will last for years to come. The best ones can cost as high as $4,000.
Check out this article on the 10 best golf hitting mats to help make your choice.
The cons of building your DIY golf mat are that you run the risk of ending up with inferior quality. Making your mat may save some money upfront, but considering there are quality mats available for only $100-$200, they may be worth the slightly higher cost.
Golf Simulator Projector
The next thing you need to decide is whether you want to purchase a golf simulator projector or not. Using a projection screen will considerably improve your indoor golf experience. Seeing your ball fly on a big screen makes your system a lot more realistic. However, adding a high-quality impact screen and projector instead of your computer screen, TV or iPad will be an additional cost to your setup.
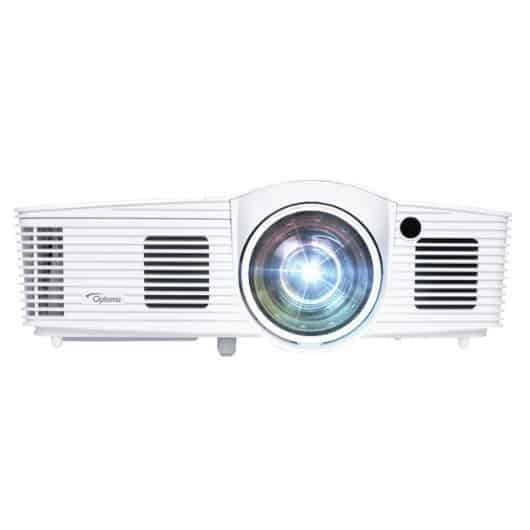
If you opt for a projector setup, deciding which one to pick for a golf simulator can be confusing. The market is saturated with different brands and technologies, and you must take many factors into account before making your decision. To choose the best projector you must consider the below points:
Resolution: It refers to the number of pixels the projector can project onto the screen. Select one with a higher resolution as the picture will be clearer.
Frame Rate: This indicates how quickly the projector can display a new image. The higher, the better.
Brightness: It refers to how much light the projector can project. It is measured in lumens. If you plan to use the projector in a bright room during the day, buy a projector with a high lumen rating.
Aspect Ratio: It is the ratio between the height and width of a screen or image. Projectors that use a 4:3 ratio are common and tend to work the best. 16:9 and 16:10 ratios provide a wide-screen experience.
Short-throw projectors: Short-throw projectors are designed to project an image closer than the common distance used with most projectors, which will provide the best image for the golf simulation.
Here is a short video guide (4 minutes 19 seconds) from Carl’s Place YouTube channel explaining some confusing terms related to aspect ratio and resolution.
All projectors are not created equal. While some score high on quality, others are more affordable. Some are ideal for beginners, and others are more suitable for professionals.
Check out our selection of the best golf simulator projectors before making up your mind.
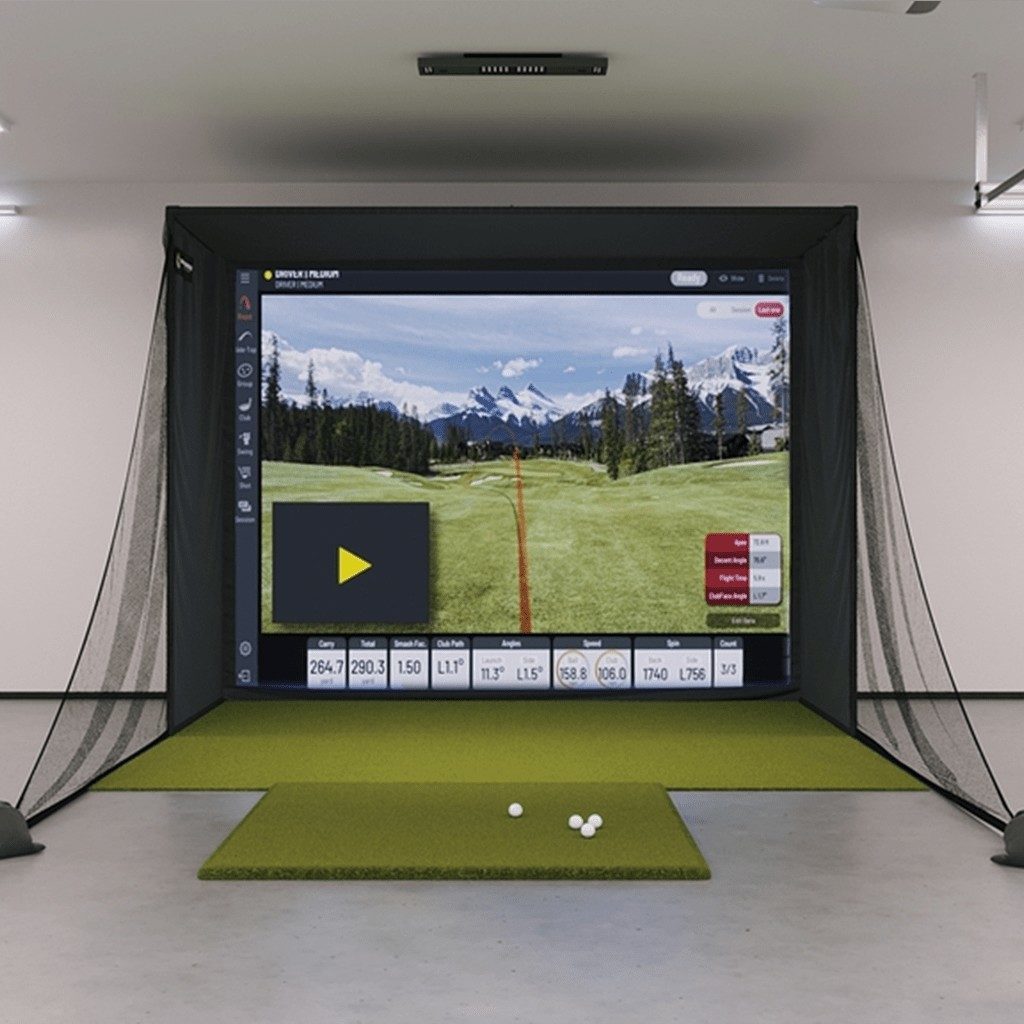
Impact Screen and Frame
The screen is the most crucial part of the simulator as it will be the surface that is struck. The screen is essential to the accuracy of the simulator. It must be made of durable material and must withstand the impact of being hit by the ball.
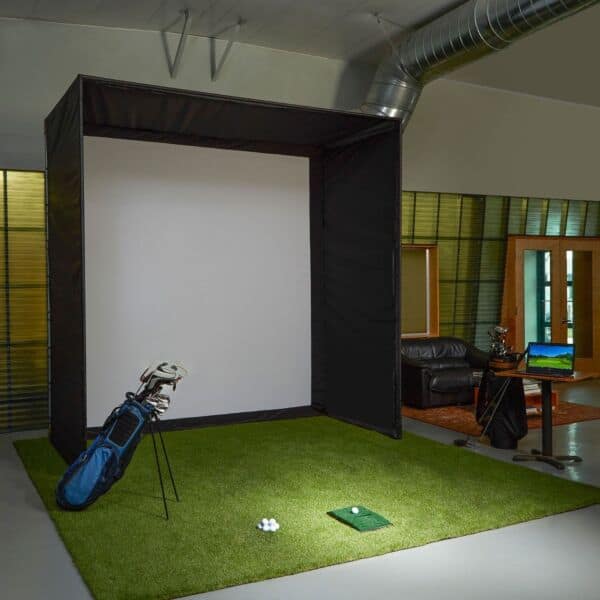
A good impact screen acts as a barrier for the ball, preventing it from hitting the plywood or the wall. Golf simulator impact screens are available in a wide range of sizes, including small, medium, and large.
The screen is typically made from high-density polyester, polyurethane, or very durable vinyl material. Its high-contrast, open design should be super bright, allowing you to see and track the ball easily.
Buying a good golf simulator screen is vital as it bears an impact on the whole experience. Invest in a screen built using quality materials to withstand a real golf ball’s impact. If you try to cut corners and purchase a screen that is of the wrong size or not well-made, you may have to deal with accidental damage caused when the ball misses the screen.
Therefore, choose one that is made of durable materials and can generate clear, bright images from the projector. Also, look for screens that come with an enclosure as it offers the below advantages:
- The golf simulator enclosure catches the ball when the player hits an errant shot and misses the screen.
- It helps to block the ambient lighting of the room so that you get a brighter picture.
One of the other essential pieces of the puzzle in your golf simulator system is the screen frame. The frame needs to be durable and withstand the force of the golf ball.
We have a dedicated guide where we review the best golf simulator screens and enclosures to help you choose the best one!
Golf Simulator Software
The next essential thing on the list is the golf simulator software itself. To get a good indoor golf experience, you need to invest in quality software. If the software you bought does not have many sought-after features like multiplayer or skills challenges, it can be a big letdown.
Here are some factors you must take into account while making your decision:
Compatibility: It is essential to verify that the software you are interested in is compatible with your golf simulator. Also, ensure that your iPad, computer or gaming laptop has the minimum specifications to run it.
Features: Different Softwares offer varying features. Therefore, you need first to identify your purpose for using the software and then look at what it offers. If you desire to play multiplayer modes, online tournaments, or quirky mini-games, look out for those features in the software you finally choose.
Graphics: If you want a photo-realistic experience while playing on replicas of famous golf courses, graphics must be an essential factor to consider. But remember that highly demanding graphic software will require powerful computer hardware configurations too.
iPad or Computer
Although featuring last on the list, an iPad or computer is necessary to build a home golf simulator. This works as a bridge between the various components of the golf simulator. We suggest you use one with sufficient memory and high speed so as not to worry about sluggish performance.

You can run a launch monitor on a smartphone or a tablet, but you will need a computer with at least 8 GB of RAM and a quad-core processor if you want the most accurate readings.
The minimum hardware requirements for a desktop computer are Windows 7 / 8 / 10, 3GHz quad-core processor, 6 GB RAM, pixel shader 3.0, and 512 MB graphic card.
As for the storage, you will need at least 20 GB of free storage space. If you plan on storing much more historical data, you will need to invest in a larger storage drive. Generally, a 1 TB HDD will be more than enough for your setup.
It is also not hard to run a golf launch monitor on an iPad or smartphone, but it’s always recommended for stationary systems to use a computer for the best results. Several brands such as Optishot, SkyTrak, and Foresight have their golf launch monitor apps for iOS/Android systems.
iPad Air or newer, iPad Mini 2 (with Retina Display) or newer and iPad Pro are some iOS devices that can be used for setting up a golf simulator at home.
The choice between using an iPad or computer for your golf simulator primarily depends on your personal preference and the specific requirements of your simulator software.
While an iPad offers the advantage of portability, a computer, especially a high-performance gaming laptop, can provide more power and versatility.
Gaming laptops are designed to handle complex graphics and can effortlessly run most golf simulator software. To better understand which laptop may be right for your needs, refer to our article on the 10 Best Gaming Laptops for Golf Simulator.
Typical Setting of Your Golf Simulator
Now that you are equipped with all the necessary parts to build your golf simulator let’s do some measuring and put it all together.
Golf Simulator Space Measures
The space available to set up the golf simulator is a crucial factor to consider before you go ahead and make your decision. Your simulator system should be placed in an area where there is no risk of damage, and where you will be able to swing freely.
If you want to ensure that you have adequate room to comfortably swing the club, it is highly recommended to measure the area you want to use for your setup. This will help you to determine if the model you want can easily be accommodated in the space you have. Room width, depth and ceiling height are the other things that have to be taken into account. Most golf simulators find their place in basements and garages, but you can design your system even for smaller spaces. You will also find more detailed explanations in our dedicated guide for sim room size requirements.
Here are the recommended dimensions for one of the most popular golf simulator setups.
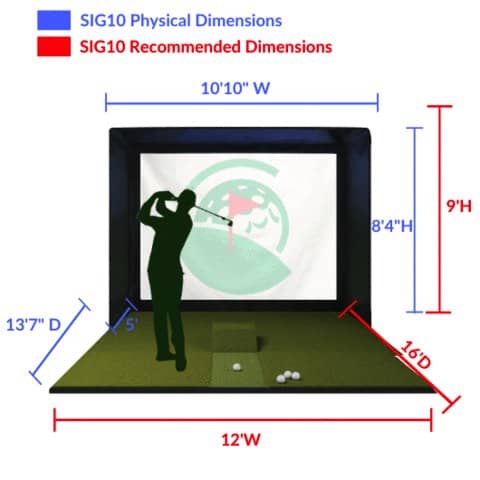
Here is a brief explanation of the three most vital parameters:
Room Width
Golf simulators are often large. Therefore, when buying one, you must consider the width of the room to determine if it can be set up in the space you have. You must also keep in mind the space occupied by the sensors and the screen.
Generally, this will be approximately 10 feet. Do remember to leave a couple of extra feet as it is required to take a shot comfortably. Another point to consider is that left and right-handed players tend to have varying space requirements.
All in all, 12 feet is usually considered the ideal room width by many indoor golf experts. The safest width is around 15 feet. It is also sufficient for both left and right-handed players.
While 12 feet is considered ideal, some golfers may be working with limited space. Can you comfortably swing a club in a golf simulator with only 10 feet of width? This is a common question, and there are solutions to maximize your golfing experience even in a confined space. For a more in-depth exploration of this topic, see our article: Is 10 feet width enough for your golf simulator?
Room Depth
The next factor to consider is the room depth. As a general rule of thumb, the room must provide enough space for the net or screen and the space required to take a full swing with your driver.
Most experts suggest that the depth of the room must be at least 12 feet. This takes into account the space between the wall and the impact screen and the distance between you and the impact screen while still leaving sufficient space behind you. The safest room depth is around 15 feet. That is 8 to 12 feet between the screen and the tee, 6 feet behind the player, and 1 ft between the wall and the screen.
Ceiling Height
A ceiling with a height of 9 feet provides sufficient clearance space for an average-sized golfer. Although, the ceiling height could be lesser depending on your size and swing.
Additionally, many pieces of equipment that are part of the setup, such as nets, impact screens, projectors, and golf simulator enclosures, have minimum height requirements. So ensure to factor in their heights and compare them with the height of your ceiling before finalizing your purchase.
You can come to know about these details by reading the product specifications carefully. For safely accommodating most of the swings, you need a minimum height of around 9 – 10 feet.
Here is another great video (5 minutes 53 seconds) from James Laidlaw’s channel explaining additional considerations while measuring your DIY golf simulator room:
Screen Frame and Impact Screen
Once you’ve chosen your impact screen, the next thing you need to do is hang or attach it securely, which is an important task to avoid the issues we mentioned above. If you are attaching the screen to a wall, then it is essential to ensure you have a solid surface to mount it.
Some golfers prefer using metal piping for the screen frame. Others use PVC of different diameters. The best is to opt for a 1″ EMT PVC pipe for the frame with pockets on all four sides using 3/4″ PVC covered with foam pipe insulation to keep the screen taught and flat. The PVC pipe on the bottom of the screen may get cracked due to the impact of the golf ball.
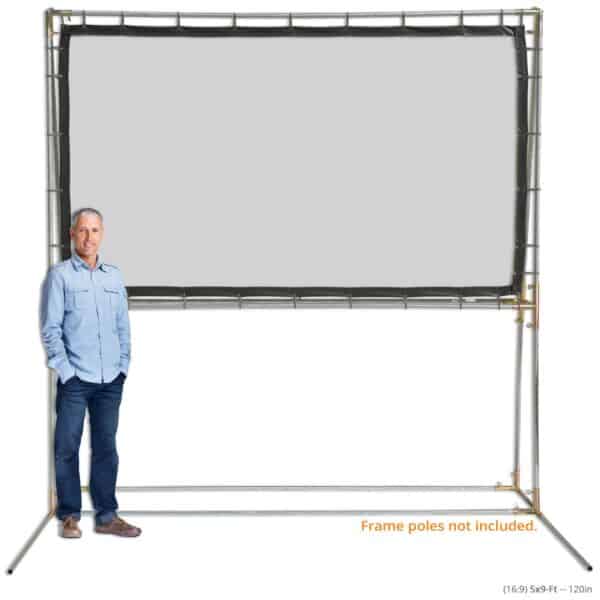
If you prefer saving time and effort over money, you can still opt for a ready-made projection screen kit.
The best way to hang a golf impact screen is by using grommets and eyelets. Grommets are used to hold the tension on the screen. On the other hand, Eyelets are used to connect the screen to the structure that sustains it.
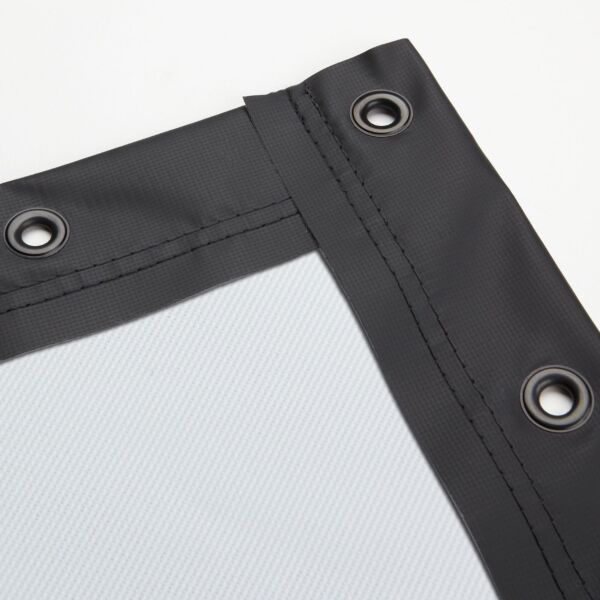
Most golf impact screens are designed to be permanent fixtures. The best option is to use a pre-packaged impact screen that comes with these eyelets already provided, which will allow you to cut down on the amount of DIY work you do and help you save some valuable time. You can opt to check the other simulator screens here.
Ball bungees are next to use; a bungee will create a secure, loose attachment between the impact screen and the enclosure frame.

Things to Consider
When attaching your impact screen to the enclosure, adjust the tension just as needed; only attach it tight enough to be flat and not tighter so you can minimize the ball bounce back and get the best possible image quality at the same time.
Be selective of the screen material when it comes to the ball bounce reduction, it’s recommended to get specialized impact screens designed to reduce the bounce-back.
After hanging the screen, make sure to reduce the screen puckering, which is the annoying slight malformation of the material around the sides where it’s hung from the wall.
The best way to save all the headaches, anyway, is by simply opting for a retractable screen. Those are like the projector screens used in hotels, meetings, and conference rooms. These screens have been created initially for entertainment purposes. They can be rolled down out of their protection when they’re used, and at a click of a switch, they can be retracted when not needed to keep them safe, clean and save some space.
The best retractable screens are supplied with a mounting kit, and manufacturer instructions and mostly use a standard ceiling mount. Installing these retractable screens is a relatively simple operation. However, you need to be cautious and follow the instructions manual, especially when installing anything on the ceiling.
Computer Installation
Computer installation in the golf simulator system is not complicated and does not require any specific technical knowledge. Assuming you now have the proper hardware and software, as we explained above, the next thing is to make some connections to make the system parts of the simulator work together.
First, you can connect the launch monitor to your computer via a USB cable. This is the easiest and most common way in the majority of launch monitors. The launch monitor communicates to your computer as an output device.
As it’s the most user-friendly and highly recommended launch monitor, we will use the Skytrak Launch Monitor as an example for ease of connectivity and setup.
In addition to the unit itself, the Skytrack launch monitor is packed with a wall charger, quick start guide, and a USB cable.
Setting up your SkyTrak for the first time will require you to charge your unit for at least 6 hours before the first connection. The next thing to do is download the SkyTrak app to your device (Available for PC, iPad, and Android phones), then you need to register your SkyTrak unit through the application.
Please note that SkyTrak offers a free 30-day membership trial giving you access to the basic driving range and practice session settings. Once your trial ends, you will need to complete your registration by following the app help and the included guide.
You can then connect your SkyTrak to the PC or iPad in two ways:
- Via a direct Wi-Fi connection or Bluetooth pairing if you are using a laptop or iPad
- Via USB connection in case of a desktop PC connection
Projector Installation
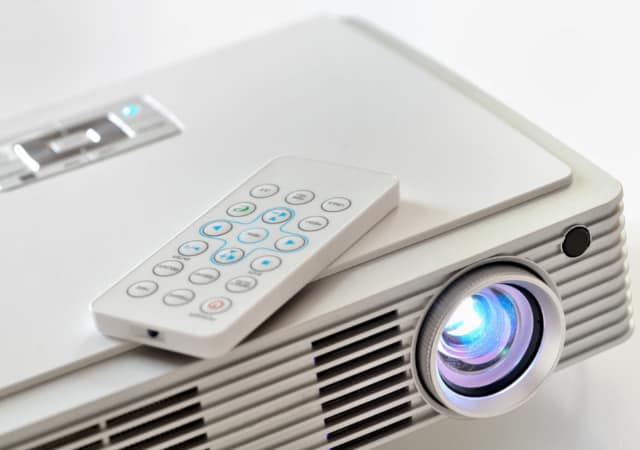
The projector serves as the visual centerpiece, projecting high-quality images onto a dedicated screen or hitting surface.
When installing the projector, several factors need to be considered. First, the positioning of the projector is essential to ensure proper alignment and optimal image quality. It should be mounted securely, typically from the ceiling or a projector mount, at a distance and angle that allows for a clear and unobstructed view of the projected image.
The projector’s throw distance, zoom, and lens shift capabilities should be taken into account to achieve the desired image size and focus.
Adjusting the projector’s settings, such as brightness, contrast, color balance, and keystone correction, is necessary to optimize image quality and eliminate any distortions. Additionally, it is important to consider ambient lighting conditions in the installation area and implement appropriate measures, such as using blackout curtains or ambient light-rejecting screens, to minimize glare and enhance image visibility.
The connection to the projector should come from the computer to the projector using an HDMI cable. The cable should be of high quality and support your desired resolution (1080P, 4K, etc.).
Wireless HDMI kits are also available for around $200 on Amazon; Some customers state a 0.5-second lag in the reviews. If you’re investing a considerable amount in the system, you’re better off running the cable once and ensuring a good experience. Some HDMI cables in the market are very thin and capable of supporting a 1080p signal for a very long distance.
An average golfer with some knowledge of electronics connections can make a proper projector installation with the help of the manufacturer’s guide. Still, it may also be a good idea to call in a professional; an expert can provide you with a better picture and ensure that everything is installed correctly.
Hitting Mat and Side Net Installation
Now you are almost finished with your sim build. However, you will still need a golf mat and net to complete the puzzle. A golf mat is a special surface designed to provide a smooth and accurate experience (close to what you would get on an actual course). The side nets will keep the ball from flying outside the designated area.
Hitting Mat
There are various types of golf simulator mats: magnetic, inflatable, carpet, full-body, imitation grass, and many more. Your particular needs will determine which mat type will work best for you.
Quality hitting mats can be quite expensive. Some sell for up to $900 or more, depending on the fabrics, design, and features. They come in different sizes, and you should make your selection depending on the space you have available.
If you have a narrow space with limited room width, the first thing to check is whether the mat will fit your space or not. Consider other items you may have around your simulator setup.
Ideally, the target line of your mat should be aligned with the center of your impact screen. Unless you have limited space, you’ll have to fix your alignment of the hitting mat’s right-hand edge to the center of your screen.
Hitting directly into the center of the screen will make your shots much more realistic.
Some mats are wider and suitable for left-handed golfers. Some can just be turned, making the teeing area on the other side of the setup.
Golf Net (Optional)
If you’re planning to only view the game on your PC monitor, iPad, or phone, then a standalone golf net will be enough as it will only do its job of returning the ball securely. However, if you’re looking for a more premium indoor practice, you will want to project the simulation results onto a golf simulator screen.
The Net Return Mini Pro Series is an excellent option if you have limited space. It has all of the Pro Series features but in smaller dimensions of 6′ in height, 5′ in width, and 3.6 in-depth. The Mini Pro series retails for $495 and comes with a 250,000-shot guarantee.
Frequently Asked Questions About DIY Golf Simulators
Let’s now try to answer some frequently asked questions about DIY golf sims.
How Realistic Will Your Golf Simulator Be?
Your golf simulator system’s authenticity will be defined by the quality of the components you use, especially the launch monitor accuracy, which will directly affect the data to track your progress. The better quality you have, the more realistic the simulator will be.
What Is the Best Size Screen for Golf Simulators?
In general, a minimum screen size of 9 feet wide by 7 feet tall (2.7 meters by 2.1 meters) is often considered suitable for most golf simulators. This size provides enough surface area to display the virtual golf course and allows players to visualize their shots and track the ball flight effectively. A wider screen can offer a more panoramic view, enhancing the sense of being on a real golf course.
It’s worth noting that the distance between the golfer and the screen also plays a role in determining the appropriate screen size. The closer the golfer stands to the screen, the smaller the screen size required. Conversely, if there is more space available, a larger screen can be utilized to create a more immersive experience.
How Far Should a Screen Be From the Hitting Area?
The minimum distance should be 6-7 feet, and it can go up to 14′ or more.
There is less chance of balls bouncing back, which may increase the risk of injury. Depending on your projector, a 10 ft. distance will also get a better projection image.
So, doing the math, let’s say you need to leave 6 feet behind the ball to make a backswing with your driver. If you put 10 feet in front of the ball to the screen, you will end up with 16 feet in room length. You will then need to leave an additional 1-2 feet behind the screen to absorb impact, So all of this adds up to 17-18 feet.
With 14 feet, you can leave 6 feet back for the backswing, 7 to the screen, and 1 behind the screen.
Final Thoughts
As you can see, building your own DIY golf simulator can be a real challenge, but with enough dedication and research, you can make it. It can even become an enjoyable experience.
You can either go the full DIY route and try to build most components like the screen frame and the mat, or you can choose different components to set up yourself. We do believe going with the second option will be much easier and more enjoyable.
Although building a golf simulator can be a tedious job considering the various choices and features, it is a rewarding experience.
We hope that you now have all the information required to make informed decisions. Feel free to share your valuable comments and any questions you may still have.
Good luck!