Installing a golf simulator can be a great addition to any home or commercial space. It provides a realistic golf experience and offers hours of entertainment.
One crucial part of setting up the simulator is deciding where to mount the projector in order to get the best possible performance.
In this article, we’ll explore where you should place it in order to get the most out of your setup. We’ll discuss different considerations and tips that will help ensure that you can get the perfect picture on your screen every time.
Keep reading to find out how to make sure everything is set up properly.
- 1) What Is A Projector Throw Ratio And What Does It Mean For My Projector Placement?
- 2) What Impact Does Throw Ratio Have On My Setup?
- 3) Best Placement For Short Throw Projector
- 4) What If The Projector Is Too Close To The Impact Screen?
- 5) What If The Projector Is Too Far Away From The Impact Screen?
- 6) How To Position A Golf Simulator Projector In A Limited Height Room?
- 7) What Other Features Of A Golf Simulator Projector Are Important For Positioning?
- 8) Above Central Projector Placement
- 9) Side Mounted Projector Placement
- 10) Floor Mounted Projector Placement
- 11) Recommended Projector Mounts
- 12) Recommended Projectors
-
13)
Frequently Asked Questions
- 13.1) What Is The Best Projector Model For A Golf Simulator?
- 13.2) What Type Of Screen Should I Use For A Golf Simulator?
- 13.3) How Can I Ensure The Projector And Screen Are Secure When Mounted?
- 13.4) How Much Space Do I Need Between The Projector And Screen?
- 13.5) Are There Any Safety Considerations When Mounting The Projector And Screen?
- 14) Conclusion
What Is A Projector Throw Ratio And What Does It Mean For My Projector Placement?
When setting up a projector for a golf simulator, it’s important to understand the different types of projectors and their throw ratios.
Projectors with a lower throw ratio will require a shorter distance from the screen, while those with a higher ratio will need to be placed farther away.
Zoom lenses are also a great way to adjust the size of the image, while still maintaining the optimal projection distance.
Having an adjustable mount will give you the flexibility to make the necessary adjustments to get the right image size.
Projector Types & Throw Ratios
Throw ratio refers to the distance between the projector and screen versus the image width of the projection.
For example, a standard throw projector has a ratio of about 1.5 to 2, which means that for every foot of horizontal image width, you would need your projector located 1.5 to 2 feet away from the screen.
Short-throw projectors have a ratio of 0.4 -1′, meaning it will take less space to achieve the desired results; however, these types are slightly more expensive than those without zoom lenses.
Ceiling-mounted projectors with lens shift can also be used as they provide greater flexibility in terms of placement and image size adjustment without having to move the actual unit itself.
Ultimately, there is no one perfect solution when it comes to choosing a projector type but understanding what each option offers should help guide your decision-making process so you get exactly what you need for your golf simulator setup.
Zoom Lenses & Image Adjustment
Zoom lenses are a great way to adjust the size of your image without moving the projector. This can be especially useful when you need to fine-tune the image size to fit your hitting screen (by making the image larger or smaller).
With zoom lenses, you’ll also have more control over how much space is needed between your projector and screen; this could make all the difference if you’re working in a tight area.
All these features make it easier to achieve optimal projection quality while still allowing enough room for other elements of your simulator setup like cameras or sensors.
What Impact Does Throw Ratio Have On My Setup?
Throw ratio refers to the distance between the projector and the screen (related to image width), and how that affects the size of the image.
If you get the throw ratio wrong, you won’t get the image size you want, so it’s important to measure the distance between your projector and the screen to get it right.
Knowing the room size is also important, as it’ll determine the image size you can achieve with the throw ratio.
The sweet spot is typically a short-throw projector with a throw ratio of 0.40-1.0; this should give you enough range without putting too much strain on your eyesight or obstructing your view from where you’re swinging.
For basic functionality, aim for a minimum 8ft wide x 6ft tall screen, but larger is better for realism as discussed in our detailed aspect ratio and screen size guide here.
Image Size
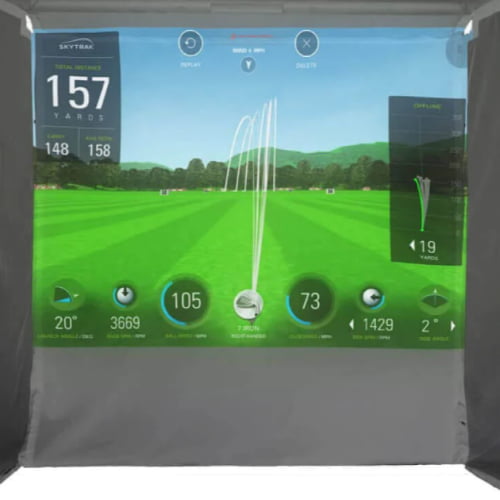
Once you’ve got the right throw ratio for your projector, it’s time to think about image size, which should fill the totality (or most of) of the screen without exceeding it.
The impact screen size should match that of your projections – any discrepancies between the two may cause pixelation and blurriness in the projected images.
Also keep an eye out for image quality, clarity and resolution; a higher-definition projector can help you get better performance from your golf simulator setup.
Lastly, try not to position your projector too close or too far away from the impact screen as this could cause the image to be too small or too large. For achieving the perfect image quality, Lighting essentials for a golf simulator are equally important.
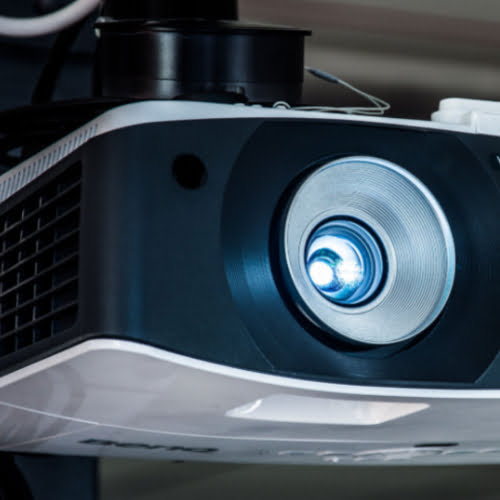
Best Placement For Short Throw Projector
Figuring out the right distance for a short-throw projector is key. It’s important to make sure it’s not too close or too far away.
Short-throw projectors have the advantage of being able to project a large image in a small space. Also, take into account any components that may interfere with the projector’s placement, such as an overhead launch monitor, a light bar, etc.
The height of the projector is important too, as it can affect the clarity of the image. If your ceiling is too high or too low, you can have problems.
A ceiling that is too low will put the projector in harm’s way (swinging club, errant shots, etc.), while a too-high ceiling means you need to use an adapter bracket to mount it properly.
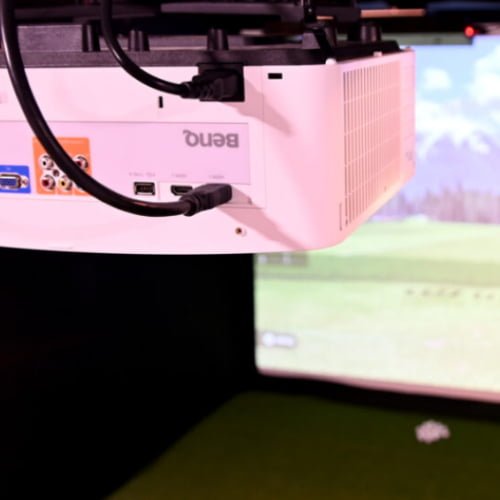
Finally, make sure the projector is secure and that the cables are organized.
Calculating The Right Distance

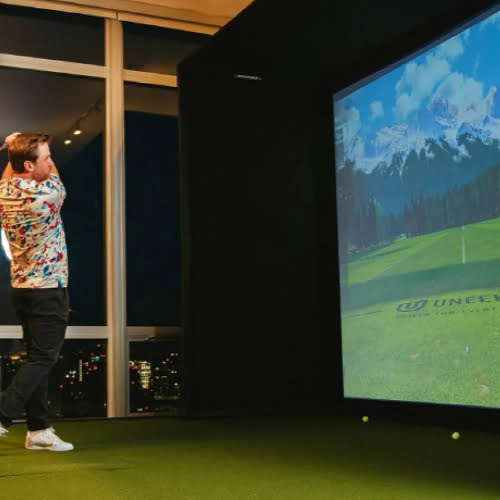
When it comes to setting up a golf simulator, the use of a short-throw projector is essential for an immersive experience.
Your best bet is to opt for a ceiling-mounted option so that there are no obstructions in your view and you can have a more comfortable playing setup. However, this may not be feasible for everyone depending on their budget or space constraints.
Using a short throw projector with a suitable throw ratio like 0.7: 1 gives you flexibility when mounting as the image width will remain 14ft even if placed 9ft 9in away from the screen – which could be ideal for some people who don’t want it too close to the screen and risk hitting it during gameplay!
You can easily calculate how far away your desired size screen needs to be by using this automatic calculator and inputting your projector specs and required screen size. You may even find your model pre-listed without the need to make any calculations.
If you want to make the calculations manually, you can use the following formula:
Throw Distance = Throw ratio x image width
For instance, if you have a projector with a 1:1 throw ratio, and want to display an image that is 10 feet wide, then the throw distance of that specific projector is 10 feet.
Advantages Of Short Throw
Short-throw projectors offer many advantages which make them ideal for use with golf simulators.
They require less space since they can be placed closer to the screen than regular projectors – giving your swing room and preventing accidental damage.
Additionally, their wide-angle lenses create larger images with wider viewing angles so that multiple players can take part in the game comfortably at once.
Finally, they come in various throw ratios so you can find one that best suits your needs and budget while still providing an immersive golfing experience.
Ultra-short-throw projectors require even shorter throw distances (0 to 4 feet); however, they are still very expensive, compared to short-throw units.
Considerations For Mounting Location
When it comes to mounting a short-throw projector, there are several considerations that need to be taken into account.
Firstly, the aspect ratio of the screen is important – you’ll want to make sure your projector can properly display whatever size and shape of screen you use. Standard screens come in 4:3, 16:9 or 16:10 aspect ratios.
Secondly, don’t forget about lighting conditions, as Ambient lighting can affect the image quality of your projection. Consider the natural lighting in the room and whether you’ll need to install additional lighting or light-blocking curtains to ensure optimal image quality.
Thirdly, consider Access to power and connectivity. You’ll need to ensure that the projector is located near a power source and can be connected to your computer or other devices.
Finally, the noise level must be kept in mind, as some projectors can be quite loud, so consider whether or not the noise level of your projector will be disruptive to your golf simulation experience.
What If The Projector Is Too Close To The Impact Screen?
If the projector is too close to the impact screen, a few things may happen and potentially ruin the entire experience.
Risk Of Damage
It’s an absolute nightmare to think of spending all that money on a golf simulator only for the projector to get damaged due to being mounted too close!
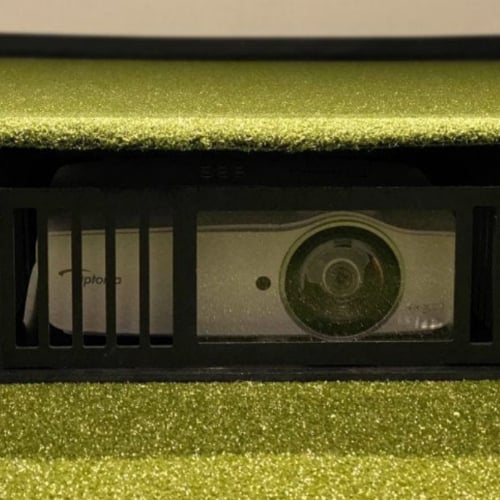
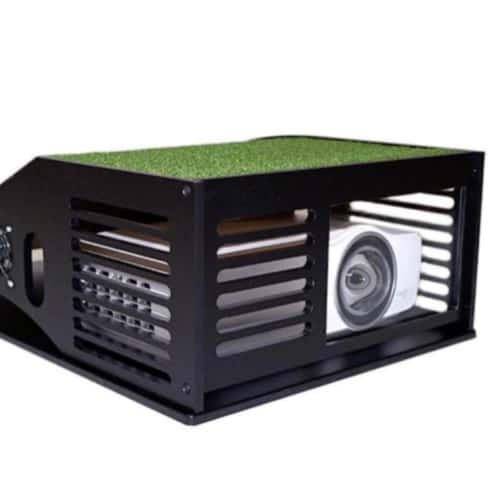
The projector may be hit by a mishit or an errant shot. Usually, placing the unit inside an enclosure minimizes that risk.
Obscuring View
A projector placed too close to the screen may obscure the view, especially if the ceiling is not very high. The projector may be visible on the top part of the screen, which will cause distraction.
If you opt for a floor mount, you may use a floor mount enclosure for extra safety, but this can affect gameplay in that you won’t be able to practice putting appropriately due to the projector enclosure sticking from the hitting mat.
Image Size Distortion
With the projector too close to the screen, your projected image will be too large, and parts of the simulation won’t be displayed. This will negatively affect your virtual practice sessions (you may not see important data or even miss the ball placement because it is not visible with that incorrect configuration.
What If The Projector Is Too Far Away From The Impact Screen?
Placing the projector too far will negatively affect the entire experience.
Throw Ratio
If the projector is too far away, the throw ratio won’t be correct, and the image won’t be sized properly.
Fortunately, there is an option that will provide you with the ideal choice for your golf simulator – understanding throw ratio.
Throw ratio determines how large or small the projected image will be based on its distance from the screen; so if you choose a higher throw ratio it means that the image will be larger at any given distance.
This makes it easier to mount your projector farther away while still creating a crisp, clear picture.
Image Size & Visibility Issues
Mounting your projector too far away from the impact screen can cause the image size to be too small and not suitable for the simulator. This will take away from the realistic and immersive experience.
The smaller image may also not be visible to the player(s), and the experience will be ruined.
Lens shift and keystone correction can help preserve the integrity of the projected image and avoid those issues, so check to see if your projector has those functions.
Shadow Interference
If the projector is too far away, to the point of it being installed behind the tee position (behind the player), shadows from the players may interfere with the projector and the impact screen.
If shadows are visible on the screen, you may be distracted, and parts of the simulation won’t be visible, eventually decreasing the immersiveness and realism of the virtual experience.
How To Position A Golf Simulator Projector In A Limited Height Room?
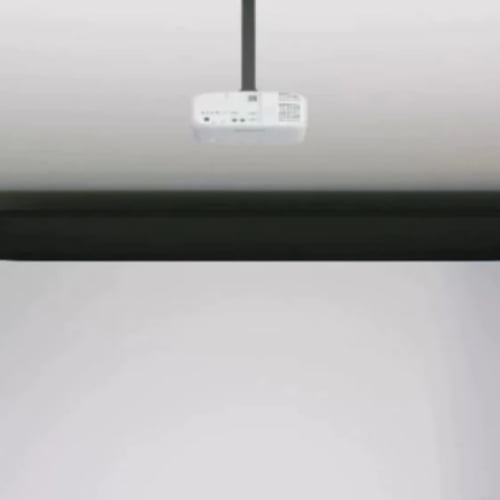
Ceiling-mounting is an option, but if the ceiling’s too low, it won’t work out.
There are still other options for those who have a lower ceiling height.
Floor-Mounting
When it comes to positioning a golf simulator projector in a limited-height room, floor-mounting is an acceptable choice.
With careful planning and installation techniques, floor-mounted projectors are definitely viable options if you’re dealing with low ceilings and they should certainly be considered before giving up hope on creating a great golf simulation setup.
Side-Mounting
Side-mounting is another popular choice for positioning a simulator in a room with a low ceiling.
This type of installation offers more flexibility than floor mounting since you can adjust the angle of the projector to suit your needs. Just make sure your projector supports horizontal (and vertical) keystone correction.
However, it’s important to make sure there’s adequate spacing between yourself and the mounted projector so that you don’t accidentally hit it with your club or other equipment.
What Other Features Of A Golf Simulator Projector Are Important For Positioning?
Here are some additional features that help set up your projector perfectly with the optimal image size and quality.
Keystone Correction
Keystone correction is one of these essential features, allowing the projector to project a completely rectangular image regardless of its angle. This means it won’t matter if you floor mount or side mount your projector – keystone correction has got you covered! But remember, this feature comes at the cost of reduced image clarity as it works by digital alteration.
Additionally, zoom lensing is also useful when positioning your projector as it allows you to alter the size of the projected image without having to change the fixed throw ratio of its optics. Just make sure not to overuse this feature as it could reduce picture quality too!
Zoom Lensing
Once you’ve got keystone correction sorted out for your golf simulator projector, zoom lensing is another useful feature to consider.
With this feature, you can adjust the size of the projected image without having to change the throw ratio of its optics – handy if you need to tweak it a bit!
Just don’t overdo it as too much zooming may result in reduced picture quality. Also, remember that these features come with some trade-offs like lower image clarity due to digital alteration.
In any case, make sure to check which projectors have vertical and horizontal keystone correction and zoom lensing capabilities so that you get the best possible projection setup for your golf simulator.
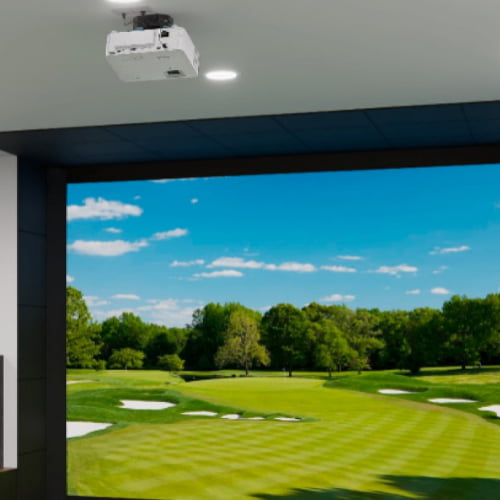
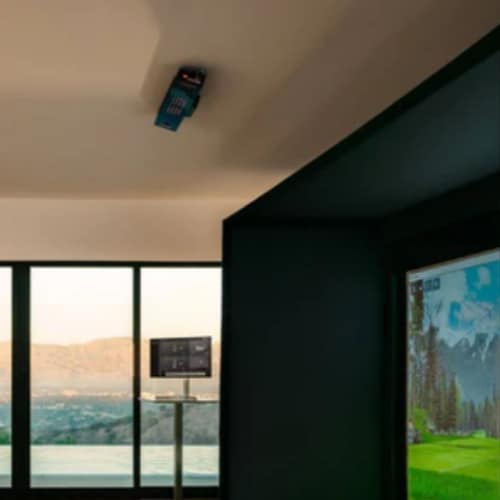
Above Central Projector Placement
One of the best ways to mount a golf simulator projector is above central placement. This method allows for the projector to be installed in the center of the simulator, providing an even and consistent projection on the screen.
The first step is to measure the distance between the projector and the impact screen. This will help in selecting the appropriate throw ratio of the projector.
It is important to choose a projector with a native aspect ratio of either 16:9 or 4:3 depending on the screen size. This ensures that the projector’s output is optimized for the screen’s proportions, resulting in better image quality.
Once the projector is mounted, the height should be adjusted, and the lens shift should be employed (if needed) to improve image clarity. This will make the projector output clearer and more focused, providing a better golfing experience.
Placing The Projector Above And Off Center
This method involves placing the projector slightly to one side of the simulator (off-center) on the ceiling.
The reason for this choice of placement is to prevent the projector from being in the direct line of sight of the ball. It also helps keep the projector safe from long club swings and ensure it doesn’t obstruct the hitting area.
This method is especially useful in case room width is not enough to place the projector in the physical center of the system.
Side Mounted Projector Placement
Side mounting the projector involves placing it off to the side of the simulator, which offers several benefits.
One major advantage of this method is that it provides more space for taller players. With the projector off to the side, players can stand closer to the screen without worrying about hitting their clubs on the projector. This allows for a more comfortable and natural swing, which is essential for an immersive golfing experience.
Additionally, this can provide a larger field of view. Because the projector is not directly in front of the screen, it’s possible to create a wider viewing angle. This makes it easier to see the entire screen without having to move your head or adjust your position.
Another benefit is that it’s often easier to manage cables. With the projector on the side, it’s less likely that cables will become tangled or obstruct players’ movement. This makes it easier to set up and maintain your golf simulator setup.
However, it’s important to note that side-mounted placement requires a projector with horizontal keystone correction. This feature is necessary to ensure that the image on the screen is not distorted or stretched due to the angle of the projector. Some of our recommended projectors that have this feature include the Epson Home Cinema 3800 and the BenQ TH671ST.
Floor Mounted Projector Placement
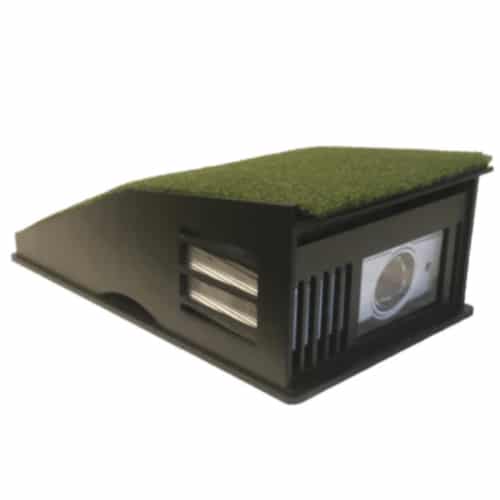
Floor-mounted projector placement is another great option for setting up a golf simulator, especially if there is limited space (height) available or if you want more flexibility to adjust the viewing angle. Here are some steps to properly place and mount a projector for a golf simulator on the floor.
First, choose an ideal location where the projector can be easily adjusted and moved to ensure optimal viewing. This location should be close enough to the screen to meet the minimum distance requirement for your projector’s throw ratio, but not so close that it distorts the image.
Next, measure the distance from the projector to the screen and ensure that the minimum throw distance requirement is met. This distance will vary depending on the type of projector you’re using, so consult your manual or manufacturer’s specifications to determine the ideal placement distance.
When you’ve found the perfect spot, securely attach the projector mount to the floor using screws or bolts. Make sure that the surface where you’re mounting your projector is level, stable, and capable of supporting the weight of your device.
Connect the projector to a surge protector power cord to prevent loss or damage to your device. A surge protector will help regulate the power supply, protect your equipment from electrical surges, and provide a safe and stable source of power for your projector.
Finally, adjust the brightness and keystone correction settings (if needed) to compensate for any lack of space or obstructions that may affect the image quality. Keystone correction will help align the image and prevent distortion, while adjusting the brightness and contrast will make sure that the image is clear and well-defined.
Recommended Projector Mounts
It’s important to consider your specific needs and constraints before making a choice between ceiling, wall, and floor mounting your projector. Make sure to check the recommended mounts we outlined in our golf simulator accessories guide here for more details
Ceiling mounts are the most popular option for golf simulator setups because they are secure and out of the way of the golfer. A range of adjustment options, such as lens shift and keystone correction, can be useful if you have limited space or an oddly shaped room. Some recommended brands for ceiling mounts include Vogels and Chief Manufacturing.
Wall mounts are a good alternative if your ceiling is too low, but they can be more difficult to install and may not offer as much adjustment flexibility. If you do choose a wall mount, make sure that it is capable of supporting the weight of your projector and is securely mounted to the wall. We recommend Vogels EPW 6565 wall mount.
Floor stands are the least popular option, but they can offer more flexibility in terms of placement, especially if you have limited space and cannot mount your projector to a wall or ceiling. However, keep in mind that floor stands may not offer as much stability as other types of mounts and can take up valuable floor space. An excellent floor enclosure is Carl’s Place’s.
Recommended Projectors
A short throw projector is the most popular type of projector to be used in a golf simulator setup as it can produce large images even at a close distance. We have a dedicated article about the best golf simulator projectors, with options for every budget.
Still, here are three quality projectors that we recommend for use in any sim build:
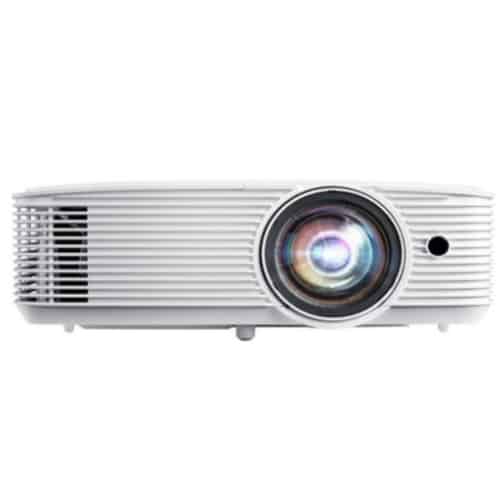
The Optoma GT1080HDR is a popular choice among golf simulator enthusiasts because of its short throw ratio of 0.50:1, meaning you only need to place it 5 feet away from the screen to produce a 100-inch image.
It produces a brightness of 3,800 ANSI lumens, providing vivid and bright images even in a well-lit room. The aspect ratio is 16:9, which is perfect for a golf simulator setup, and the native resolution is 1080p, ensuring sharp and detailed images for your virtual golf sessions.
2. BenQ TH671ST
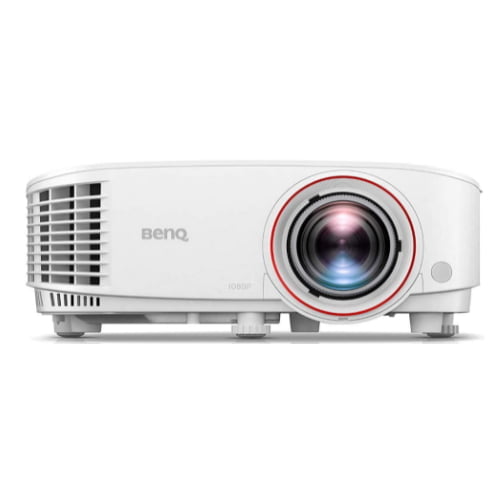
Another great option for a golf simulator setup is the BenQ TH671ST, which has a short throw ratio of 0.69:1, providing a large image even in limited space.
The TH671ST produces a brightness of 3,000 ANSI lumens and has a 1080p native resolution, ensuring clear and detailed images even in ambient light. It has a 16:9 aspect ratio, which is suitable for golf simulation setups.

The Epson Home Cinema 2150 is a top-performing projector that produces bright and detailed images thanks to its brightness of 2,500 ANSI lumens and a resolution of 1080p. It has a short throw ratio of 1.33:1, allowing you to place it close to the screen even in limited space. It provides a vivid image with a 16:9 aspect ratio.
If you want a better option, we recommend the Home Cinema 3800, which is a huge upgrade over the 2150, with 3,000 lumens, 4K resolution and HDR support.
Frequently Asked Questions
Let’s now answer some important simulator projector-related questions!
What Is The Best Projector Model For A Golf Simulator?
The best projectors for simulators are typically short-throw models because of their ability to reduce shadows and glare caused by long projection distances. They also provide a much better value than the pricier ultra-short-throw models.
Short-throw projectors also provide immersive simulations that make golfing more realistic and enjoyable.
Some popular choices include the Epson Pro L1405U, Optoma HD28HDR, BenQ HT2060, ViewSonic PX700HD, and Vivitek Q6356-BK.
What Type Of Screen Should I Use For A Golf Simulator?
A screen made with a high-gain material is best as its reflective properties will allow you to get the most out of your projector’s light output.
We suggest using a white screen (obviously) with blackouts to help the projected image pop in better visual quality and colors.
How Can I Ensure The Projector And Screen Are Secure When Mounted?
Using the right type of wall anchors and screws will help keep the projector in place, no matter how much movement there is during play.
Make sure you’re using an appropriate size drill bit as well so the holes aren’t too big or small for your hardware.
It may also be beneficial to use some kind of adhesive to make extra sure that nothing moves when the simulator is being used.
The user manual usually provides more than enough guidance to make the mounting as secure as possible.
How Much Space Do I Need Between The Projector And Screen?
The space left between the projector and the screen depends mainly on the type of projector you have. That’s the throw distance of your projector. It is also related to the display image width you want to have.
In other words, if you have a regular throw projector with a throw ratio of 2.0, and want to have a 10′ wide image, you need to have your projector mounted 20′ away from the screen.
A shorth-throw projector (a throw ratio of 0.6) will need to be placed 6 feet away from the screen to achieve the same image size (10″ wide).
Ultra-short throw projectors (with throw ratios as low as 1.19) require much less distance to the screen.
Are There Any Safety Considerations When Mounting The Projector And Screen?
Yes, there are some additional safety considerations to keep in mind when mounting the projector and screen for a golf simulator:
Make sure that it’s secure and stable enough to not move or tip over from any amount of force.
Also Make sure that the mounting surface, whether it is a ceiling or wall, is capable of supporting the weight of the projector and screen. Improper mounting can lead to damage or injury.
Check to ensure that all electrical connections are properly installed and grounded, and the projector and screen are connected to a surge protector to protect against electrical surges and prevent damage to equipment.
Fire safety is another concern; so Ensure that the projector and screen are placed away from any potential fire hazards such as curtains, furniture, or other combustible materials.
Additionally, Projectors emit high-intensity light that can damage the eyes. Make sure the projector is not mounted at a height where users can accidentally look directly into the projector beam.
Finally, you must have adequate ventilation for the equipment so it doesn’t overheat.
Conclusion
When deciding where to mount a projector for a golf simulator, there are many important considerations.
We went through all those considerations in detail so that you will have all the necessary information to properly mount your sim projector and have the best possible virtual experience.
By following all of these steps carefully, I assure you that your simulator build will be impeccable and your practice sessions will be very enjoyable.
If you still need assistance or help with anything, feel free to contact us!