If you are considering a new golf simulator package, you need to think about many things, the most important of which is the space you have to install your simulator to avoid wasting money, energy and time!
In this article, our primary focus will be on golf simulator room dimensions and size requirements. We will explore why this is a crucial factor and why having enough space for your simulator setup is vital. We will also help you know what to do and which measurements to make before purchasing a specific package.
Finally, we will answer some of the most frequently asked (and googled) questions related to the topic.
By the end of this article, you will have learned enough information to decide which system will work best for your allocated indoor space.
Keep reading for more!
- 1) Why Allocating the Right Dimensions is Vital for Your Indoor Golf Simulator Space?
- 2) Golf Simulator Room Length
- 3) Golf Simulator Room Width
- 4) Golf Simulator Ceiling Height
- 5) Best Golf Simulator Room Layout Design: Rectangle, Square, or Even Triangle?
- 6) How Much Space Do You Need to Swing a Golf Club Comfortably?
- 7) Is the Minimum Space Good Enough?
- 8) Factors Deciding on Your Golf Simulator Room Size
- 9) Other Space Considerations for Your Golf Simulator Room
- 10) What Are Your Options if You Have Limited Space?
- 11) Final Thoughts
Why Allocating the Right Dimensions is Vital for Your Indoor Golf Simulator Space?
Allocating the right dimensions for your indoor golf simulator space is vital for several reasons:
First of all, a small space for your indoor golf simulator will noticeably limit the choice of your components (launch monitor, enclosure, projector, screen, etc.), as your options will be limited to the ones that can fit in your available space.
For instance, a smaller room will force you to opt for a short-throw or ultra-short-throw projector that can display a good image size while placed close to the screen. These are much more expensive than the regular throw projectors that you can use if you have more space.
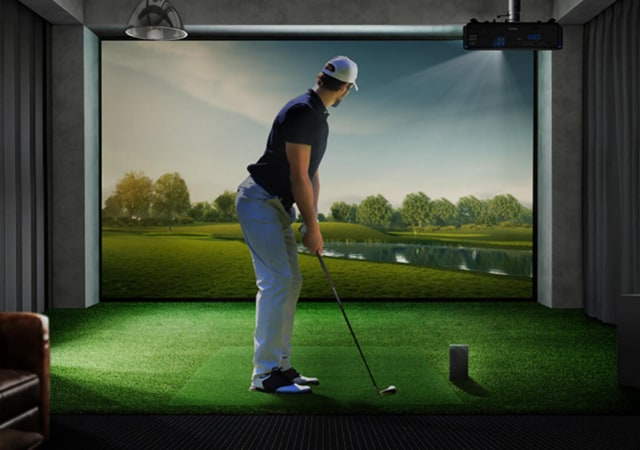
Other benefits of having enough room for the simulator include:
- Swing accuracy: Proper dimensions ensure that the golfer has enough space to make a full swing without hitting any obstacles. This allows for accurate and consistent swings, which ultimately leads to better performance.
- Ball flight simulation: The dimensions of the room play a significant role in simulating the natural ball flight of an outdoor course. A larger room allows for a more realistic simulation of the ball’s trajectory and can provide a more immersive experience.
- Safety: Having the right dimensions ensures that the golfer and anyone else in the room are safe from flying balls and ricochets. Additionally, proper dimensions can prevent damage to the room or any equipment.
- Efficient use of space: Utilizing the right dimensions ensures that the space is used efficiently and that the simulator is set up in the most optimal way. This can help maximize the use of the space and make the most of the simulator.
- Realism: Proper dimensions help to simulate a real golf course as closely as possible, which can help improve the overall experience and make it more realistic.
By taking into account the dimensions of the room and the golfer’s needs, you can ensure that your indoor golf simulator space is set up for optimal performance, safety, and realism.
Golf Simulator Room Length
There are normally no specific rules or numbers to strictly follow when deciding which room length is necessary for a golf simulator, as different packages come in different sizes and forms and may differ in their specific room length requirements.
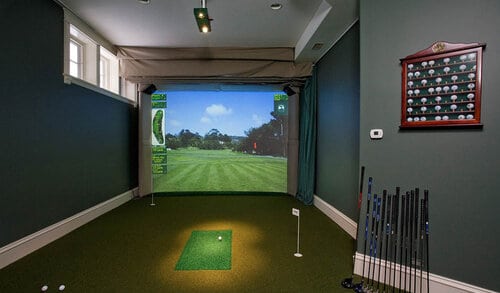
However, taking into consideration the size of modern golf simulators, a rule of thumb is that you will need a minimum of 12 feet in room length.
This space will be devoted to different components such as your hitting mat, your net and screen, enough space for the net and screen to deform and prevent the ball from ricocheting on the wall, and enough room for you to swing comfortably (with proper backswing and follow-through).
Furthermore, you need to have enough space for the ball to fly after impact to allow the sensors on your launch monitor to detect different data about your swing, ball, and club.
Ideally, to be more comfortable while playing virtual golf on your simulator, a room depth of 15 feet is recommended.
The reason is that you will have enough space to properly install all your setup components, and more importantly, will be able to tee it up more comfortably.
How to Measure How Much Room Length You Will Need?
Room length is directly related to the components of your golf simulator. Different projectors require different throw distances; so you need to check the throw distance of your projector and its optimal placement vis-a-vis the screen to know exactly how far from the screen it needs to be placed.
If you have a specific simulator package in mind, then check the official requirements provided by the manufacturer to check if your available room length will be enough for all the components of the package.
Ideally, the length of your room should be a little more than the minimum required numbers for more peace of mind.
Here is a step-by-step video (2 minutes 52 seconds) showing how to measure a room easily and professionally:
Don’t Forget About the Space Between the Wall and The Impact Screen
This is more of a safety precaution. Just imagine a golf ball traveling at high speed and then ricocheting against the wall. The results can be catastrophic, as there could be physical damage to the contents of the room, or to the players themselves (or both).
That’s why you need to include the space between the impact screen and the wall behind it in your calculation of the required room length.
Good-quality impact screens tend to deform less to stop the ball before it hits the wall, and those will usually require less space left between them and the wall.
On the other hand, there are some impact screens that will deform much more before they can stop the ball, and thus require more space left behind them.
If you are planning to buy different components of your simulator separately, then make sure your chosen screen is placed adequately to stop the ball from causing mayhem in the room. If it is a lower-quality screen, make sure you leave more space behind it.
Ideally, you want to have enough space to ensure a safe and realistic golfing experience. To learn more about the optimal distance between the impact screen and the wall, check out our guide.
If you buy a complete setup, then follow the manufacturer’s instructions to stay on the safe side.
Bottom line is that a shorter room will impose specific products and limit your options. You will need to buy a very good screen that needs less space behind it; still, that will cost more money than a regular screen. Having enough room length will help you save some money!
What Impact May a Short Room Have on My Training, Skills, and Equipment Choice?
A short room may have a negative impact on your training, skills, and equipment choice in many ways:
- The main idea behind buying an indoor golf simulator setup is to improve your swing and game. You need enough room (minimally 12 feet) to swing your longest clubs comfortably. If you are a tall person or have a wider backswing, you may need more room length to be more comfortable (otherwise, you may hit the wall behind you).
- Room length is crucial to having full club swings; so, if you are unable to swing your clubs comfortably, you won’t be able to improve your game effectively. In fact, a shorter room can have the opposite effect of ruining your game and swing. That’s the opposite of why golfers invest in simulator packages!
- A short room will also impact your choice of equipment; as we have mentioned earlier, you will need a short-throw projector and a good-quality impact screen, which will add to the amount of money invested in your package.
- A short room will limit the number of cameras, mirrors, or any other equipment that is intended to help you improve different aspects of your game (posture, swing, etc.). As a result, you may not be able to record your swings for future reference simply because you don’t have enough room to set up detection cameras.
- Audio equipment will be affected too, as you can’t install a good-quality surround system (something that helps a lot with immersion). So, instead of a full surround sound system, you may have to do with a simple soundbar or a stereo system at best.
In summary, a short room can limit the golfer’s ability to make proper and accurate swings, negatively impact ball flight simulation, increase the risk of safety hazards and limit the choice of equipment, and decrease the realism of the golf simulator experience. It’s recommended to check the space requirements of the simulator before buying it.
Golf Simulator Room Width
Room width is another important factor that affects the quality of your golf simulation. Once again, you need to take into consideration the recommended width specifications provided by the manufacturer if you are buying a complete simulator package.
The minimum room width for any given simulator setup is around 10 feet. A taller person or someone with a wider backswing will surely need a bit more space.
However, the recommended room width for a simulator package is about 15 feet. This will allow you to have a centered aim; that is the teeing area of the hitting mat that is exactly facing the middle of the screen. Everything will be aligned correctly (projector, hitting mat, teeing area, impact screen).
One huge benefit of aligning everything correctly (same space left to both sides of the tee) is that the setup will be usable for both right and left-handed players without too much (or no) movement of the components of the simulator.
How to Measure How Much Room Width You Will Need?
You will need to ensure you have enough room width for an optimal setup, depending on what kind of simulator setup you opt for.
First, if you want to buy a complete package, then you will get the required width from the manufacturer. You need to make sure that your room is wide enough to fit everything.
Also, you need to pay attention to the placement of your launch monitor, as different monitors require to be placed at different distances from the hitting (teeing) area. So, make sure you have enough room width to (ideally) have a centered aim while being able to place the launch monitor at the specified distance from the tee to ensure optimal detection of your shots.
Luckily, some golf launch monitors (radar-based & overhead) can be installed in a way that they don’t need any placement shift regardless of whether the player is a right or left-handed golfer.
If you are choosing your components individually, check the dimensions (mainly the width) of the hitting mat, screen and enclosure you choose as well as the required placement of your launch monitor, and make sure everything will fit in your available space.
What Impact May a Narrow Room Have On My Training, Skills, and Equipment Choice?
A narrow room can have a huge negative impact on your whole golf simulator experience. It can even be worse and affect the way you play on an actual golf course.
If your room is too narrow to have a centered aim, you will end up having trouble swinging your longer clubs because they may hit the wall next to you. In the end, you will be left with only two options to choose from:
First, don’t swing your longer clubs at all, which will be unrealistic since you need to practice and improve your game using different clubs.
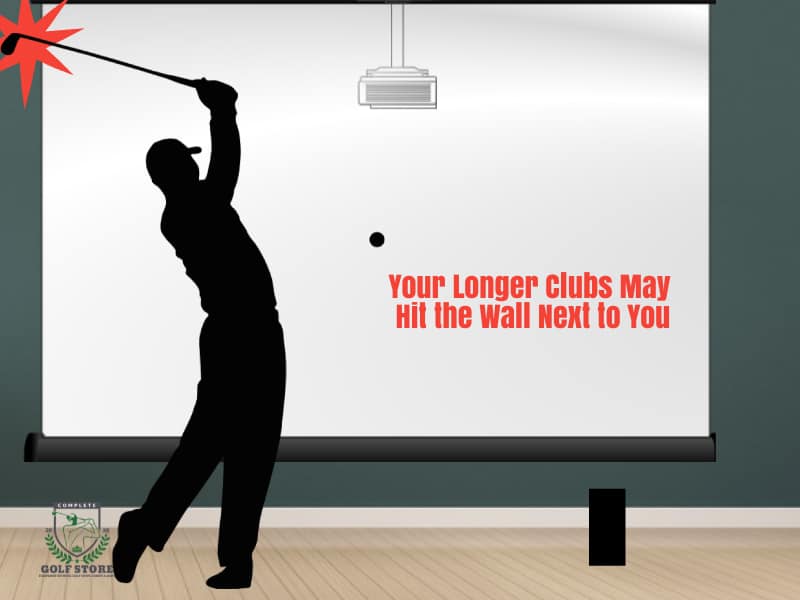
Second, switch your setup to one side of the room (and forget about centered aim). If you are right-handed, then your ball should be moved slightly to the right side of the room to get enough space for full swings (and appropriate backswings) even with longer clubs.
If you have a narrow space and still want to enjoy a realistic golfing experience, consider investing in a golf simulator that can fit in 10 ft wide spaces without compromising on quality or performance.
If you are a lefty, then you need to do the opposite (left side). The result is that your shots will be off-center.
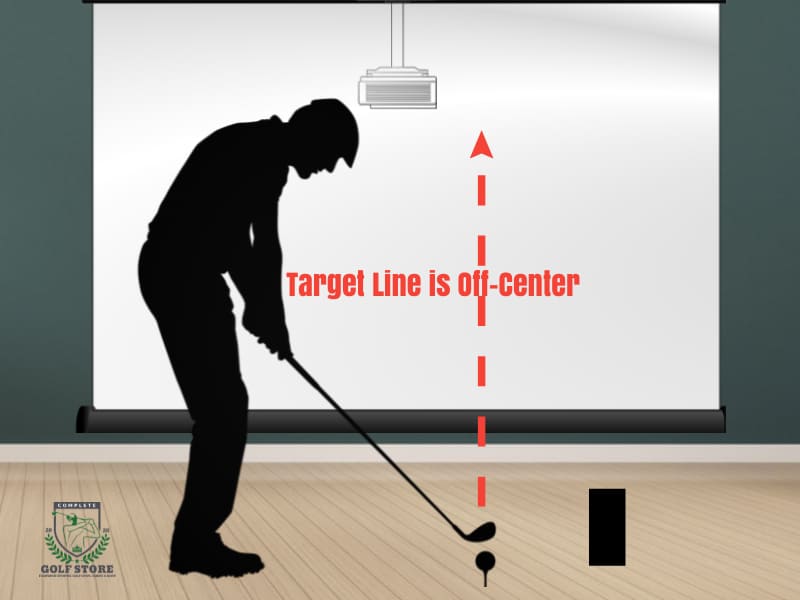
Even though the second option may sound a bit more realistic, it still causes other issues that can affect your game and swing style even on real courses. To make up for the slight changes in your hitting (and ball) position, you may need to modify your swing and attempt to hit the center of the screen.
In the long run, you may end up developing the habit of hitting your balls off-center (while making necessary changes to make up for it); this can help fix the issue you have with your simulator because of the narrow room, but in reality, you may end up getting a lot of fades or slices when playing on an actual course.
Instead of helping you improve, a simulator located in a room that is too narrow may actually ruin your swings.
Golf Simulator Ceiling Height
Room height is probably the most crucial of all the dimensions we are discussing here.
If you can’t swing your longest golf club comfortably because the ceiling is too low, then there is no workaround to fix this (at least not effectively).
You simply can’t have an indoor golf simulator if you don’t have the required room height, especially if you are planning to use a ceiling mount for your golf simulator projector or an overhead launch monitor.
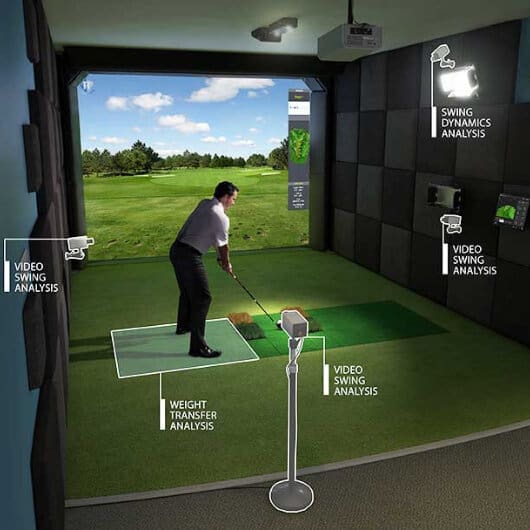
Typically, the minimum ceiling height to install a simulator is around 9 feet; of course, if you are taller, you will certainly need more height.
So, if you want to be comfortable while playing your favorite game, then a ceiling height of more than 10 feet is recommended.
What Impact May Low Ceiling Have on My Training, Skills, and Equipment Choice?
A low ceiling will negatively affect your virtual golf experience in more than one way:
For starters, you will need to make alterations to your swing style to adapt to the situation, which can cause more harm than benefit.
You may try to have a more flat swing to avoid hitting the ceiling while swinging, but that’s not what a golf simulator is meant for. It’s supposed to help you progress more easily using your optimal swing plane, not bring more variables that you have to keep in mind while swinging.
In short, if you already have a flat swing (that’s your swing style), you will be a bit more comfortable swinging under a low ceiling; however…
If you feel that you need to make some modifications to your swing, then you may end up developing habits that can affect your whole game (even on an actual course).
Moreover, your selection of equipment will be limited because of the low ceiling. You may not be able to go for a ceiling mount and enclosure for your projector and/or monitor, as the risk of hitting it will be greater.
Also, if you want to buy a complete golf simulator enclosure, then you need to check and ensure it can fit inside your room. In case you want to build your own DIY enclosure using pipes, then you can measure and cut them accordingly.
Ways to Predict How Much Ceiling Height You Will Need?
Before buying a simulator, try to swing your golf clubs in the space where you want to set up the package. Pay special attention to your longer clubs, as you need to swing them comfortably without any concerns about ceiling height.
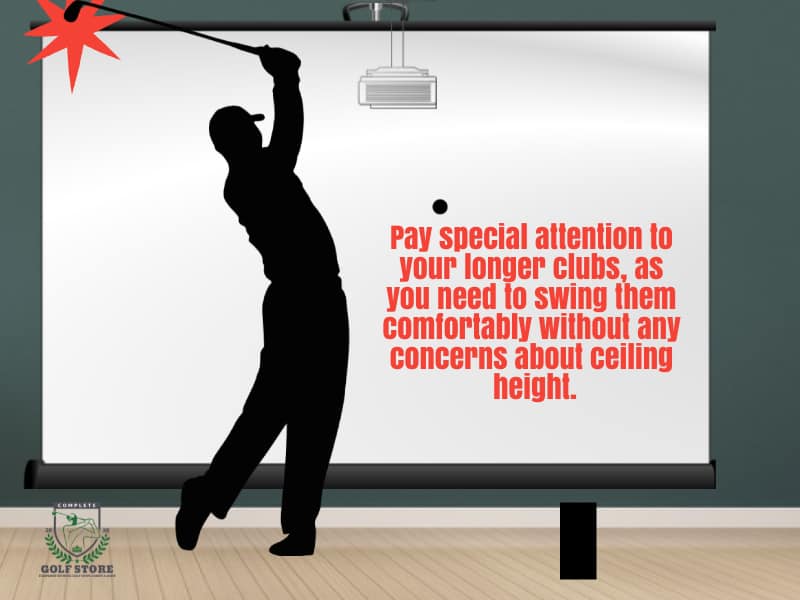
If you feel that your longest clubs touch the ceiling or get uncomfortably close to it, this may indicate that your room is not high enough to build a golf simulator in it. In such a case, there may be a half-solution to choose from; we will explore it below.
If you have no issues swinging your clubs in the devoted space, then you can move on to the next step: Choose a golf simulator setup that will fit in your room. You can check simulator manufacturers’ websites to see which ones you can have in your room.
Your room needs to strictly meet the minimum height requirements or preferably exceed them to ensure you will be comfortable with your new setup.
The halfway solution we have mentioned earlier consists of buying specific components of a golf simulator and using your partial package to practice with your shorter clubs.
Some golfers may not agree with this workaround, but it will still be better than nothing, especially during the cold days of winter!
This kind of setup won’t be considered a simulator per se, but it will help you practice your game when it’s not possible to play on the golf course (albeit with a limited number of clubs).
This setup will consist of a hitting mat, a net, and a golf mat. You can add a separate launch monitor to provide feedback on your swings with your shorter wedges and irons.
Also, you can add some mirrors and cameras around the room to work on your swings and see what you are doing right or wrong.
We have to admit that this is not a perfect solution, but it is still better than nothing. It will even be cheaper because no screen, projector, additional simulation software, or computer will be required.
Best Golf Simulator Room Layout Design: Rectangle, Square, or Even Triangle?
Virtually, a golf simulator package can be built in any available space, as long as it is wide, long, and high enough for the package components you choose.
The best golf simulator room layout design will depend on your own preferences, but the most important one is whether you want your room to be wide or long.
In most cases, a rectangular shape is better because it is the most versatile design that allows you to move around the simulator space easily and place the screen in the center of the room without obstructing your view.
Still, if you have a small space available, a square or even a triangular layout might work better. Every layout design has its own benefits (and potential drawbacks).
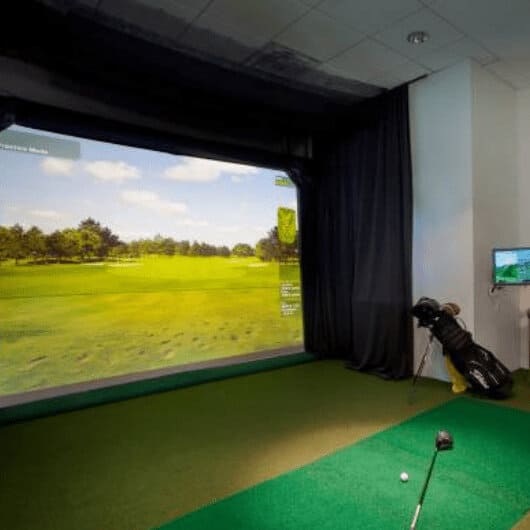
A wide room allows you to accommodate a lot of players and accessories, while a tall room limits the number of players.
A square or rectangular room is great for a number of reasons. It is easy to build and requires no special materials. It is also a good size and allows for a lot of space around it.
Triangles are less common than other shapes, but they do make the most efficient use of space. Plus, they’re easier to design and build than squares or rectangles.
Ultimately, the best golf simulator room layout design will depend on a number of factors, including how many players you want to accommodate.
If you’re planning on hosting a tournament or an event where there are multiple players, consider building a wide room. And if you plan to host only one or two players at a time, try a tall room with a couple of rows of seating along the walls.
So, if you’re looking for the best golf simulator room layout design, consider these factors before you make any final decisions. It’s also a good idea to consult with a professional who specializes in designing golf simulator rooms, as they can help you create the best layout for your specific space and needs.
If you are looking for different golf simulator room design and layout ideas, the following video (05 min. 55 sec.) will certainly help you out:
How Much Space Do You Need to Swing a Golf Club Comfortably?
The space you need to swing a golf club comfortably highly depends on your swing arc.
The average golfer has a comfortable swing arc that ranges between 5’4″ to 6’3″ (160 cm to 180 cm). A swing arc is the distance the club travels between the top of the swing and the ball when it makes contact with the ground.
Based on those average numbers, The golf simulator industry uses a “swing arc” range of about 6.6 to 6.9 feet (around 200 to 210 cm), which exceeds the average golfer’s swing.
As a result, we can confidently say that the minimum space requirements provided by golf simulator manufacturers include enough room for you to play comfortably.
However, this is highly dependent on the player him/herself. As mentioned earlier, a shorter golfer will probably have no issues playing in the minimum space requirements (or even slightly below); but a taller player will need more clearance to swing his/her clubs comfortably. Also, it seems that left-handed golfers need more swinging space than right-handed ones.
With that said, the minimum space requirements to set up most packages are as follows:
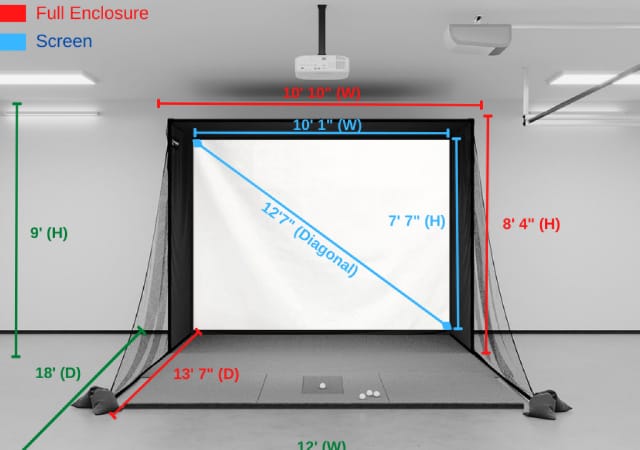
10’W x 10’L x 8.5’H
Ideal dimensions that will allow different players to swing more comfortably are a bit higher: A 15-foot width (for a centered aim), along with a height of 9 feet or more, and a length beyond 10 feet will provide more space and freedom of movement.
In general, the more space you have, the more comfortable you will be, and the more enjoyable the whole experience will be! This is because you will be able to include more components and gear into that space. You can also add sofas and tables for players to use while waiting for their turns (or if you want to use the room as a home theater too).
All in all, having access to more space allows for unlimited options and opportunities!
Is the Minimum Space Good Enough?
The minimum space requirements may be enough for you if you are a shorter player. But if you are taller, have longer arms, or use a more open swing, then the minimum space may not cut it for you.
Also, if you are planning to mount the projector or monitor on the ceiling, you will certainly need a higher ceiling; otherwise, you may cause damage to your precious piece of equipment.
Similarly, the minimum space will affect the number of players that can be with you at the same time, as well as the types of equipment you can use.
In other words, you will be obliged to buy a good hitting net and a short-throw projector to make things work. As these are usually more expensive, then you will invest more money in your simulator package.
That’s why the more space you have for your setup, the better it will be, and the less it will cost because you can invest in cheaper components like a cheaper hitting screen or net and a regular-throw projector.
Factors Deciding on Your Golf Simulator Room Size
The very first thing to pay attention to if you opt for a complete simulator setup is the manufacturer’s specified requirements for the model you intend to buy. Those space requirements are based on the actual sizes of different components of the package.
If your room meets the manufacturer’s space requirements, then you’re most probably good to go; however, we recommend having a little extra space for peace of mind.
To explore some options available today, including in-depth comparisons across different price points, check out our detailed article on top golf simulators for home.
You also need to understand that the specified requirements include the components of the package solely.
If you plan to add any extra components or invite many players or use the room for extra purposes, you should check if the room will fit all the additions.
If you don’t calculate everything beforehand, you may end up investing a lot of money in additions you can’t even benefit from.
Space Requirement for Golf Simulators Based on the Launch Monitor Type
Your golf launch monitor is one of the most important components of your simulator package. It is the unit that does all the detection and key calculations that the simulation software turns into virtual golf.
Understanding the type of technology that your launch monitor uses for detection can help you know which type will work best in your dedicated space.
Some high-end simulator packages mix more than one type of detection technology to do the detection (Photometry, Doppler Radar and Infrared).
Photometric

Photometric launch monitors use a high-speed camera(s) system to detect the slightest details of your swing. This is the technology that most golf simulators use for many reasons.
First, Photometric detection works better in smaller spaces, making it perfect for use with golf simulators. A photometric launch monitor will provide extremely accurate readings and data related to your swing, club, and ball flight. It can also provide video playback of your practice swings with data overlay to help you understand your strengths and weaknesses.
Examples of excellent photometric systems include Foresight Sports GCQuad & GC3, HD Golf, Skytrak, Uneekor EYE XO, Trugolf Apogee, etc.
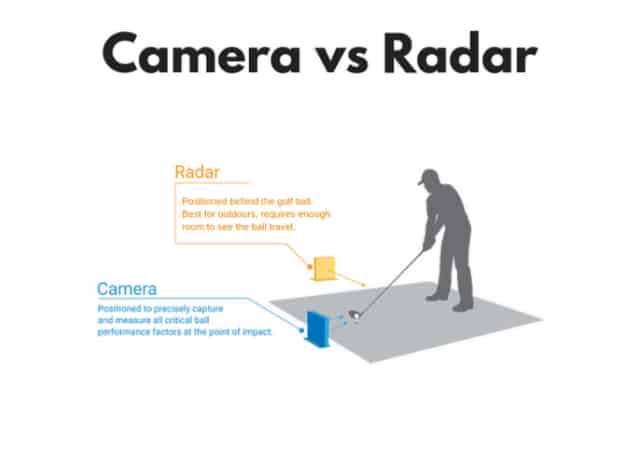
Radar
Radar Doppler technology emits microwave signals that bounce off moving objects (The golf balls in this case) to determine their velocity. This is the most accurate detection technology used by launch monitors to provide different readings of your swings.
The issue with radar launch monitors is that they may not be very accurate in very small spaces. They require a specific space (around 16 feet) for the detection to be most accurate, which makes them more suitable for outdoor use than indoor.
One of the most popular golf simulators that use radar Doppler technology is the Trackman, a very expensive package that a lot of professional golfers swear by. It is worth noting that the Trackman website states that their launch monitor requires to be placed at around 16 to 18 feet away from the net to work best.
As a result, if you have serious space constraints, then simulator packages that employ radar Doppler technology should probably be ruled out. They only provide the most accurate readings from a longer distance (compared to other types).
With that said, popular radar-based (and more affordable) systems include the Flightscope X3 & Mevo+, Garmin Approach R10, the Full Swing Kit, etc.
Infrared
This is the oldest detection technology of the three. It uses infrared sensors to detect movement. Infrared systems are usually less accurate than the other two types of technology, but they are also much cheaper. Also, they work better in smaller spaces, making them usable with golf simulators. However, infrared launch monitors provide limited data and readings of your swings.
Price is probably the most attractive factor of this type of technology. So, if you have space limitations as well as budget limitations, then opting for an infrared system may be a good way for you to enjoy virtual golf on a limited budget.
The most popular infrared simulator, which also provides the best value, is the Optishot 2, available in many packages all based on the same Infrared Optical Swing Pad.
Space Requirement for Golf Simulators Based on your Material Choice
Different hardware components will require some space not just for installation, but in between specific components to ensure optimal operation. For example, you need to take into account the distance between the wall and the hitting net, between the screen and the hitting mat, between the projector and the screen, and between the tee and the screen (5 to 6 feet on average). You need to be careful when purchasing individual components as you may end up needing more space!
Size of the enclosure. A specific simulator enclosure will require a specific space in terms of height, width, and depth. Make sure you have enough space for your chosen enclosure.
Short-throw VS regular and long-throw projectors. Regular-throw projectors require more distance (10 feet or more) from the screen, while short-throw projectors can be placed closer (but cost much more).
Projector/ monitor mount type. A ceiling-mounted projector and/or monitor will add to the required room height more than a floor-mounted one.
Good-quality VS lower-quality hitting screen. A good quality screen will require less space from the wall because it doesn’t deform too much to stop the ball. A cheaper hitting screen requires more space to avoid chaotic ricochets!
Photometric VS Radar VS Infrared launch monitors. Photometric and infrared launch monitors work better in smaller spaces (with a huge price gap between the two). Radar Doppler launch monitors do require much more space to work best (to be avoided if you have space constraints).
Larger VS smaller hitting mat. Obviously, choosing a larger mat will require more space than a smaller one.
Space Requirement for Golf Simulators Based on the player
We have mentioned this earlier: The player him/herself is a determining factor when it comes to the required space for a simulator setup. Shorter players will usually be more comfortable in a smaller space, and can even build the setup in the minimum space required by the manufacturer.
However, taller players need to be more careful with their available space, as the minimum will most probably not be enough for them to fully benefit from their indoor simulator setup.
Simply put, here are different factors that may indicate that you need more space than the minimum designated by the manufacturer:
- If you are a tall person.
- If you have long arms.
- If you have a more open swing plane.
- If you are a lefty. Believe it or not, left-handed players usually need more space to swing their clubs comfortably (up to 14 feet wide) compared to right-handed ones (9 to 10 feet wide).
- The number of people using the simulator. This only makes sense: The space that one or two people need to play and move freely won’t be the same as what six or more players will need.
Other Space Considerations for Your Golf Simulator Room
There are other factors that you need to take into consideration before you build your setup. You need to give enough thought to these to see if you can fit everything you have in mind into your available space.
Here are a few questions you need to answer before getting a package:
Will You Have Some Space for Seats and Other Items?
Do you want to use the room for golf simulation exclusively, or do you want to use it as a multi-purpose area?
If you are solely planning to play virtual golf, then you can limit the calculated space to the actual requirements of your chosen package (or different components if you buy them separately). Even then, you need to check if you want to add any extras, such as mirrors, additional cameras, etc.
However, if you intend to use the room as a gaming room or a home theater (among other possibilities), then you may need to take that into consideration. You have to include the space of a few seating rows as well as tables to use while enjoying your favorite movies or games on the big screen.
You also need to consider how much space you want to dedicate to each function of the golf simulator. For example, if you want to put a large TV set in the middle of the room, you’ll need to leave some space around it. If you don’t, you’ll have to squeeze all the items together, which could make it difficult to access certain parts of the room.
Who Will Use the Golf Simulator?
You don’t want any of your guests to feel uncomfortable or uneasy while enjoying a virtual golf game, do you?
That’s why it is necessary not only to know how many people will be using the simulator at the same time but how tall they are and their golf swing type as well.

If you want to occasionally invite your friends or family members over for a round of virtual golf (an invitation that most will gladly accept), you need to ensure that your guests will be comfortable playing and using the available space.
That’s why it will be better to consider the height of anyone you know that you might invite so that they don’t feel cramped inside the room.
Use the height of the tallest person that might play virtual golf with you (or who has the widest swing arc) as the main criterion of how much height you need to have for your setup.
Will You Be Using Your Simulator for Both Lefties and Righties?
We did mention this earlier: Lefties and righties have different swing styles. Usually, lefties have a more open swing, requiring more room width to swing without problems.
Another issue that you may encounter with a narrow room is that you may have things set up for righties, but you need to alter the setup to allow a left-handed friend to play.
You may not have enough width to do this properly, as your lefty friend may find him/herself facing the left side wall, or even worse, your precious projector may get damaged.
It’s all a gamble (that you most probably don’t want to take): your room may be just wide enough for your lefty friend too, or the whole setup may be unusable for him/her.
That’s why you need to check the usability of the setup for both righties and lefties beforehand to avoid any bad surprises.
How High Will You Mount the Projector?
This is another important factor you have to consider before building your simulator package. Do you want to mount the projector on the ceiling? If so, what specific ceiling mount do you want to use?
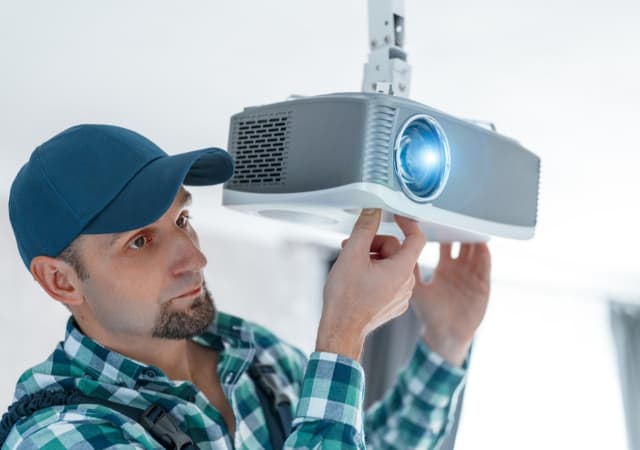
There are multiple ceiling mount options for your simulator for a wide range of budgets; they are available on Amazon and Shop Indoor Golf.
If your room is not high enough, then you don’t have to focus much on aesthetics; you’d better choose a ceiling mount that works for you.
In other words, the projector mustn’t be hanging too much down the ceiling to the point of obstructing the view or putting it in the way of a destructive swing!
Choose wisely if you have room height issues.
Will You Be Using Mirrors, an Extended Audio System, and Corner Cameras?
Everything you want to add to your simulator room, regardless of its size or shape, needs to be included in your calculations (as every single item will take some space).
Take the spaces these items will occupy into consideration especially if the system is for business use. Don’t wait until everything is built to start choosing your accessories and additions, as you may run out of space to install everything.
So, if you plan to add any mirrors, (surround) audio system, corner cameras, etc., you will have to plan the placement of every single item as well as its different mounting and connection options.
For example, you need to know where everything will be placed and how the wires (power, display, sound, etc.) will be routed to make the setup look as tidy as possible.
What Are Your Options if You Have Limited Space?
What options are available for individuals with limited space for their virtual golf simulator setup?
Despite the importance of having ample space for all components, there may be instances where additional space is not an option.
However, there are solutions that can be implemented to still enjoy virtual golf in a limited space setting. Let’s explore some of these options.
SkyTrak Flex Space Package Golf Simulator
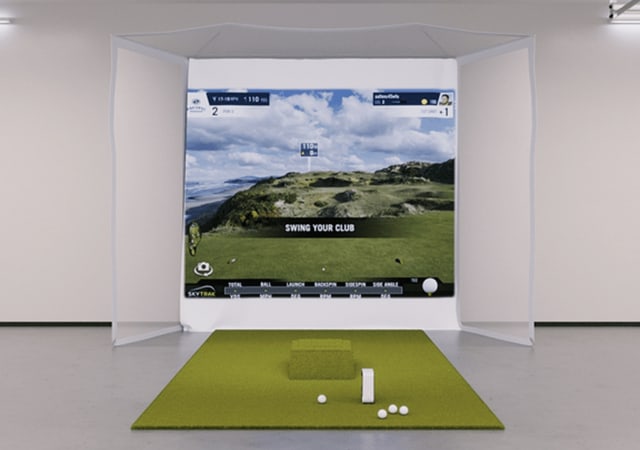
The SkyTrak Flex Space Package Golf Simulator is Skytrak’s answer to people wishing to have a golf simulator in a smaller space.
This is a compact simulation package based on the SkyTrak launch monitor that includes everything you need for virtual golf. It also requires less space than other regular packages. The minimum available space must be 8 feet in height, 10.6 feet wide, and 10 feet deep.
This package still has another trick up its sleeve: It is retractable, meaning that you can easily retract or deploy the screen in a mere 30 seconds. It also offers different projector mounting options, with an included ceiling mount.
The simulator allows you to play on a 3D virtual Driving Range in addition to some world-famous courses such as Pebble Beach, Wolf Creek, Erin Hills, etc. You also get multiplayer functionalities for up to 6 players.
Retractability is the most useful feature of this golf simulator, as it allows for installation in different small spaces; you may even install the package in a wide hallway to play, retracting it once the round ends.
Partial Simulator Setup
If it’s not possible for you to fit all the simulator components into the available space, then having a partial setup will still be better than giving up on your dream of having an indoor golf simulator!
Many players may disagree with this suggestion, but it will allow you to practice your swings even during times when your local golf course is inaccessible.
The idea is as follows: If your room is too tight to swing your longer clubs freely, then you may adapt it for shorter club practice. All you will need is a hitting net and a golf mat to practice your swing.
You won’t need a projector, screen, or golf simulation software, but you do need to buy a separate golf launch monitor to provide readings of your ball speed, club speed, angle of attack, carry distance, as well as a multitude of other important data to help you fix any issues you might be having.
Most of these devices offer Bluetooth connectivity to your smartphone or tablet to display the readings of your shots.
Using a Portable Setup
This could be your last resort if you don’t have enough space to dedicate to a permanent setup: opt for a portable package that you can install and disassemble easily.
This type of package can usually be installed anywhere, both indoors and outdoors. As a result, you can enjoy your virtual golf round in the living room and disassemble everything once you’re done.
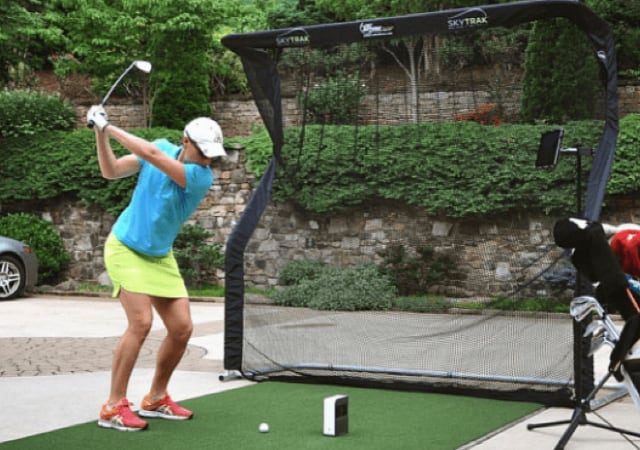
One of our favorite portable golf simulator packages is the SkyTrak Golf Simulator Training Package. It is a highly portable and quite affordable package that you can install anywhere inside (or outside) your home without too much thinking about its dimensions.
The process is extremely easy: Install, play, and disassemble! Repeat whenever you feel like it!
Check out the SkyTrak Training Package for more details.
If you are not convinced by the Skytrak outdoor package, then there are options from other manufacturers. For instance, you can choose from the simulator packages from OptiShot depending on your available space.
Using Your Garage or Basement (If Available)
Using your garage space or your basement to set up your simulator package may be a good idea.
You will be able to turn a usually unused, neglected, and potentially scary space into a pleasurable area where you can practice your favorite sport.
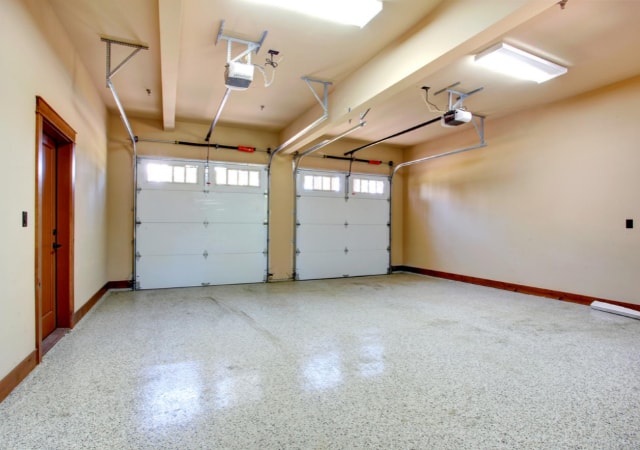
The biggest benefit of going with one of these two options is that your practice area will be separated from the rest of the house.
The wife will be happy because your package is not taking any actual real estate from the house and all the noise of clubs hitting balls will be much lower or even nonexistent (if you choose to insulate the space).
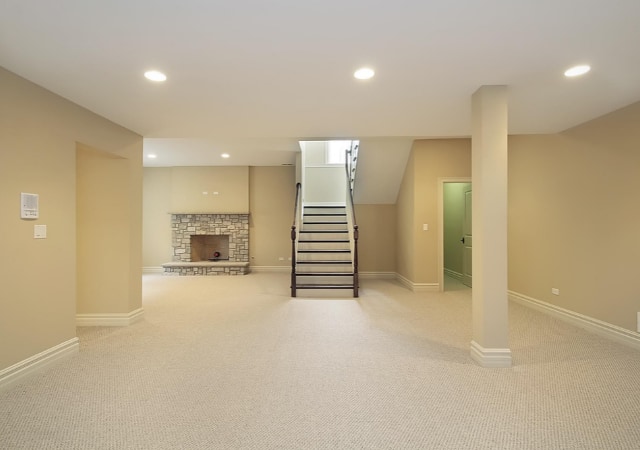
Here are some benefits of using your garage or basement space to build a golf simulator:
- Make great use of the extra space by turning it into your favorite spot in the house.
- No more issues with unwanted damage to the contents of the house; everything is safe from any errant balls.
- You will be isolated from distractions and able to focus more on your game.
- No more complaints about the noise you make while playing virtual golf.
- The house will be tidier with the simulator built in a separate space.
- The lighting is usually perfect for a simulator projector (mostly in basements. For the garage, you may need to keep the door closed).
However, there are certain drawbacks to this type of setup that you need to pay attention to:
- Both the basement and garage can get extremely cold during winter (making them unusable for golf simulation). You need to plan air conditioning solutions to make the area more comfortable.
- Most basements lack the necessary ceiling height required for your golf simulator. This is usually not an issue with garages.
- Garage space tends to be less expensive than basements, but they do require a lot of work to convert into usable areas.
- If you are building a new house, digging enough for the basement ceiling to house a golf simulator can be very costly.
Final Thoughts
Whether you are planning to build or buy a new house or devote some extra space to your favorite sport, you will need to make a lot of calculations to ensure you won’t have any bad surprises while setting up your golf simulator.
Your devoted space must meet the minimum requirements of the package you want to purchase. Ideally, you will have a bit of extra space to be more comfortable while playing.
In this article, we went through everything you need to know about golf simulator space requirements. We discussed how everything should be calculated, and the different options you will be left with in case your available space is too tight.
We hope that you have benefited from the provided information and that you will be able to make the right decisions regarding space calculations and the choice of different hardware components.
If you still have any questions, feel free to contact us. We will surely assist you the best we can!


Looking for some help, I bought a Pro Series Golf Enclosure 12ft wide 9ft tall 5ft deep bought Bravo 21 ceiling mount camera looking to find out how far back from an how from building wall or enclosure wall to mount Bravo unit. I have unlimited room building set up in is 40ftx68ftx16ft ceilings. Like to get height from floor or hitting mat top to middle of camera to be mounted also. Also same for my Projector mounting I bought a BenQ LU930, height, distance, width from screen wall or Enclosure wall to mount on ceiling. I appreciate your time THANK YOU JIM
Hello Jim,
Thanks for reaching out to us concerning your recently purchased simulator.
Concerning the installation of your projector, we advise you to visit this page: https://www.projectorcentral.com/BenQ-LU930-projection-calculator-pro.htm#calc
It will help you calculate the perfect placement and throw distance of your specific projector depending on things like image size, aspect ratio, etc.
Concerning the other question, our testing team has never worked with a Bravo simulator before, and thus can’t be sure of the perfect installation in your dedicated space. We’re sorry we can’t provide a quick answer right now; but rest assured, our testers will be doing their homework and research to provide the best possible answers to your queries. We will get back to you as soon as possible.
Thanks again for your comment.