Golf launch monitors can provide you with a wealth of information about your swing, ball flight, and club performance. They are (almost) compulsory items to have if you are serious about improving your game.
However, reading and understanding launch monitor data can be a bit overwhelming, especially if you’re new to the game. Unless you can make sense out of the provided data points, the entire investment will be a waste of money!
In this article, we’ll explain all the parameters you’ll come across when analyzing launch monitor data.
We’ll break down each parameter and explain what it means and how it can help you improve your game. By the end of this article, you’ll have a better understanding of launch monitor data and how to use it to your advantage.
Let’s get started!
- 1) How Do Launch Monitors Work?
- 2) Clubhead Velocities
- 3) Distances and Rhythm
- 4) Angles data points
- 5) Spin data
- 6) Club Data
- 7) Skill Measurement Metrics
- 8) Chipping and Putting Data
- 9) How to Properly Set Up Launch Monitor Parameters?
- 10) Why Is Launch Monitor Data Highly Valuable
- 11) Wrapping Up
How Do Launch Monitors Work?
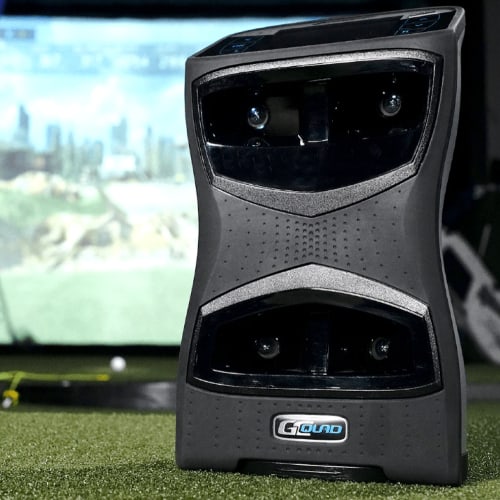
Before breaking down the parameters provided by launch monitors, it’s important to understand how these devices work.
Launch monitors use a combination of sensors and optical tracking technology to measure the speed, direction, and spin rate of golf balls off the clubface. This data is then used to provide you with detailed information about your swing and ball flight.
Quality launch monitors use high-speed cameras, radar, or infrared sensors to track the club and ball’s position and velocity. After that, advanced algorithms are used to plot the ball’s flight after leaving the clubface. Some advanced launch monitors combine more than one type of tracking technology to maximize the accuracy of their readings: Radar+camera, Infrared + camera, etc.
From this data, launch monitors can determine shot shape, distance, and accuracy. A golfer can use this information to analyze their swing and adjust accordingly. For example, a golfer with a high spin rate may need to work on their technique to reduce it, while a golfer with a low launch angle may need to adjust their ball position at address to increase it.
Clubhead Velocities
The following parameters are all related to your club head speed and how it affects different game aspects.
Smash Factor
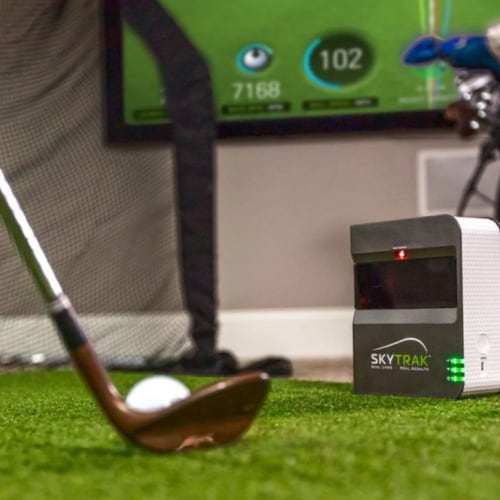
Smash Factor, also called efficiency, is a concept in golf that measures the efficiency of how the clubface and ball interact during impact to produce ball speed. It is a crucial metric in understanding how well your golf swing is performing, as well as determining the right equipment for your game.
Factors that affect Smash Factor include the player’s swing speed, the type of club and ball used, and the angle of attack. A faster swing speed and a higher-lofted club tend to increase Smash Factor, while a lower swing speed and using a less-lofted club decrease it.
The ideal target range for Smash Factor is between 1.45 to 1.50. This means that for each mph of clubhead speed, the ball should travel 1.45 to 1.50 times faster off the clubface. Achieving this range ensures maximum distance and accuracy in your shots.
By analyzing your Smash Factor, you can gain insights into your golf swing and make adjustments to improve your efficiency and ball speed. Knowing your Smash Factor can also help you make informed decisions when selecting golf clubs and balls that work well with your swing.
Club Speed Profile
Club Speed Profile measures the speed of the club throughout the swing, from takeaway to impact. By analyzing this information, you can gain insight into your tempo and timing, and identify any inconsistencies or inefficiencies in your swing.
The Club Speed Profile is closely related to other data points collected by the launch monitor, such as ball speed and spin rate. By comparing these metrics, we can determine if a golfer is generating enough club speed to achieve maximum distance, while also maintaining optimal launch conditions.
As a golfer, you can use Club Speed Profile data to make improvements to your swing. For example, if a launch monitor reveals that your club speed is inconsistent through the swing, you may benefit from practicing with a metronome to improve your tempo. By making adjustments to your swing based on this data, you can achieve more consistent outcomes and improve your overall game.
Clubhead Speed
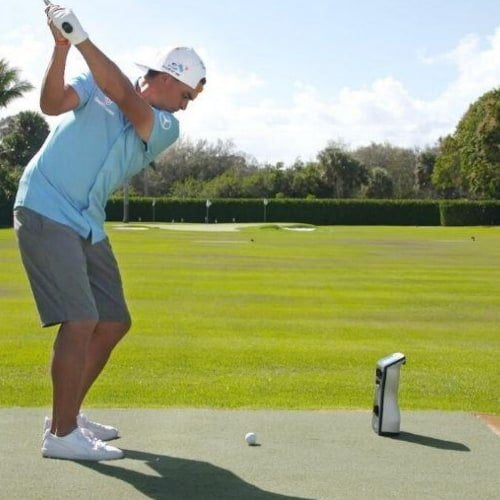
When reviewing clubhead speed data from a launch monitor, it is important to understand that it refers to the speed at which the clubface is moving at the moment of impact with the ball. Clubhead speed is a crucial metric for golfers as it has a direct impact on ball speed and distance.
To interpret clubhead speed data, it is important to consider both the average and maximum speed achieved during different swings and with different clubs. This can help golfers understand their overall swing mechanics and identify areas for improvement.
It is also important to consider how clubhead speed corresponds to swing tempo and rhythm. Consistency in tempo and rhythm can help maximize clubhead speed and improve overall swing mechanics.
Acceleration Profile
The acceleration profile measures the speed at which the club is accelerated during the downswing. It can provide valuable insights into a golfer’s swing and identify any issues that may be affecting their clubhead speed and ultimately their distance.
A smooth acceleration profile is indicative of a well-executed swing, where the clubhead is gradually accelerated from the top of the swing until impact. Eccentric acceleration profiles, on the other hand, show sudden changes in acceleration and may indicate that a golfer is experiencing a “casting” motion during their downswing.
By analyzing your acceleration profile, you can identify the specific areas of your swing that need improvement and make the necessary changes to improve your overall swing. Moreover, improving the acceleration profile can ultimately lead to better distance control, which is vital in any golf game.
Distances and Rhythm

The following metrics are ones related to and affecting your achieved distances and how they are related to your rhythm. Rhythm refers to the order in which different parts of your swing move (from takeaway to follow-through).
Roll Distance
Roll Distance is all about the combined effects of velocity and spin rate. Specifically, the launch monitor calculates the vertical angle and speed of the ball at impact, along with the initial spin rate, to determine both carry distance and spin rate after the ball lands. This allows it to accurately predict the total roll distance of the shot (how long it rolls on the ground after landing).
To help you understand how this works, here’s a simple breakdown:
| Measurement | Description |
|---|---|
| Velocity | The speed at which the ball is traveling when it leaves the clubface. |
| Spin Rate | The speed at which the ball spins around its axis. |
| Vertical Angle | The angle at which the ball leaves the clubface, relative to the ground. |
By knowing these measurements at impact, the launch monitor can then calculate how far the ball will travel through the air (carry distance), as well as how much spin it will have when it lands. This spin rate plays a major role in determining how far the ball will roll after landing, which in turn affects the total Distance of the shot.
Apex Height
Apex height is the maximum height of the golf ball’s flight, usually measured in feet above the ground. Your apex height can tell you a lot about how well you hit the ball.
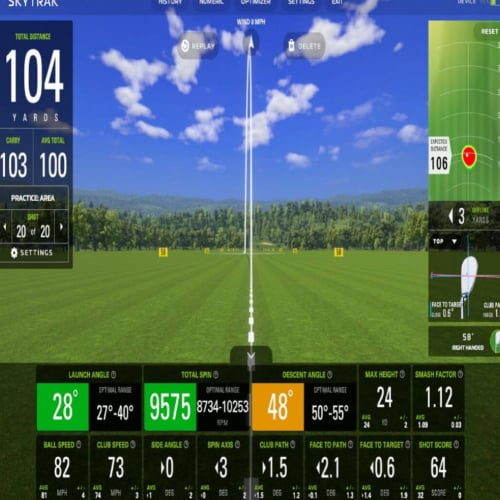
A high apex height can indicate a powerful shot, while a low apex height can indicate a poorly hit shot. Generally, a higher apex height is more desirable because it means the ball traveled higher and stayed in the air longer, allowing for better distance and control. However, this may depend on the distance and type of club used.
To accurately interpret the apex height data, it is important to consider other metrics, such as the ball speed, launch angle, and spin rates. These can help determine if a high apex height was achieved due to a well-hit shot or if it was a result of incorrect launch conditions.
Here is an example to help you understand the importance of analyzing multiple metrics when looking at apex height:
| Shot | Ball Speed | Launch Angle | Apex Height | Spin Rate |
|---|---|---|---|---|
| A | 120 mph | 10 degrees | 90 feet | 3000 rpm |
| B | 122 mph | 11 degrees | 85 feet | 2500 rpm |
Shot A has a slightly lower ball speed and launch angle than Shot B, yet it achieved a higher apex height. However, Shot B had a lower spin rate, which indicates less spin on the ball and more distance.
In conclusion, when analyzing your apex height data from launch monitors, it is important to take into account the ball speed, launch angle, and spin rates to gain a clear understanding of your shot. This information can help you improve your game and achieve more consistent results.
Total Distance
Total distance refers to the distance the ball travels from the moment it’s struck until it lands on the ground.
This metric is determined by launch angle, ball speed (and club and swing speed), spin rate, and the angle of descent. However, it is crucial to keep in mind that the total distance is not synonymous with carry distance, which is the length the ball is in the air before it hits the ground.
To increase total distance, improving swing speed, optimizing launch angle, and reducing spin rates are all crucial. By working on these factors, golfers can achieve longer distances off the tee. Additionally, paying attention to ball position and striking the ball in the sweet spot can also help achieve maximum total distance.
Carry Distance
Carry distance (ball flight time) refers to the amount of time the golf ball stays in the air from the moment it is hit until it lands. This data is vital in determining the ball flight and total distance.
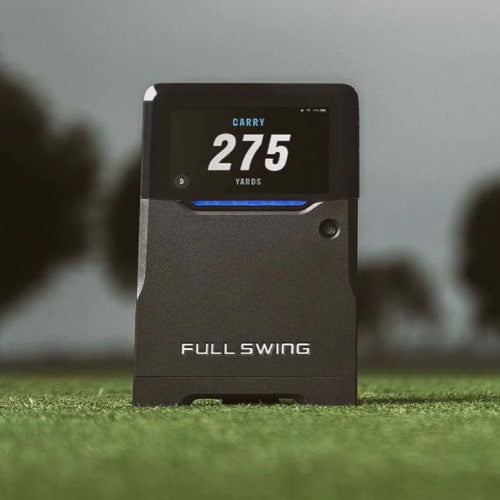
The launch monitor measures the time between the ball leaving the clubface and landing on the ground to determine the carry distance accurately. Evaluating this data helps to analyze a player’s swing efficiency, and identify areas of improvement.
Launch angle, ball speed, and spin rate are factors that can affect flight time. High launch angles will result in higher flight times, while a low launch angle will lead to a shorter flight time. The ball speed and spin rate can also impact the flight time.
A proper understanding of flight time data helps golfers improve their game by identifying the root cause of any inconsistencies in their swings. It’s a crucial piece of information that can help players seek ways to optimize their launch monitor data to improve their game.
Angles data points
Let’s now focus on all types of angles provided by your launch monitor!
Side Angle / Azimuth
Side angle is also known as horizontal launch angle, deviation angle, or Azimuth; it measures the direction in which the ball is traveling relative to the target line after impact. It is closely related to the club face angle and dispersion rate, as having a square, open or closed club face at impact will determine the degree of deviation the ball will have (if any).
By identifying the side angle of a golf shot, you can better understand the factors that contribute to its trajectory and adjust your swing accordingly. For example, data on side angle can help golfers identify and correct swing flaws that produce undesirable slices or hooks (like club face angle).
But the significance of side angle goes beyond correcting swing flaws. It also has a direct impact on shot dispersion and distance control. By analyzing patterns in lateral ball movement, you can calculate the average distance your ball travels off-course, and use this information to improve your accuracy and consistency on the course.
Lateral Landing
This data point refers to how far the ball travels horizontally away from the target line after it lands and is key to understanding shot dispersion. To utilize lateral landing data effectively, it’s important to pay attention to the clubface angle, club path, and angle of attack.
The clubface angle at impact can significantly affect the lateral landing distance. A closed club face angle (facing toward the left of the target line) can result in the ball going left (for a right-handed player), while an open angle (pointing toward the right of the target line) can make it go right.
Similarly, the club path also plays a critical role in shot dispersion. An inside-out club path can cause a ball to go right, while an outside-in path can make it turn left.
Lastly, the angle of attack influences the lateral movement of the ball. A descending angle of attack will cause the ball to spin more, resulting in a flatter ball flight and fewer lateral movements.
Angle Of Attack
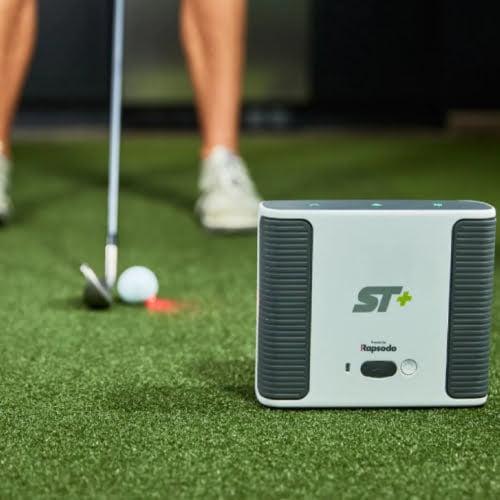
The angle of attack refers to the vertical angle at which the clubhead approaches the ball at impact. It is measured in degrees and varies depending on the type of shot being hit. For example, an iron shot typically has a steeper angle of attack than a driver shot.
Achieving the optimal angle of attack is essential for maximizing distance and accuracy. When the angle of attack is too steep (i.e. hitting too much down on the ball), the golfer may experience a lower launch and decreased distance. Conversely, when the angle of attack is too shallow, the golfer may experience a higher launch and decreased accuracy.
To determine your angle of attack, consider using a launch monitor or analyzing your ball flight to identify the optimal angle for each shot. Monitoring and optimizing your angle of attack can help you achieve better ball flight, longer carry distances and more consistent shots.
Angle of Descent
This measurement refers to the angle at which the ball descends toward the ground after reaching its highest point in the air (Apex height).
A steep Angle of Descent can be a good sign and can indicate improved accuracy, particularly on approach shots and short game shots where distance control and accuracy are essential. When the ball descends steeply, it has less of a chance of rolling or bouncing further than intended upon landing, increasing the likelihood of the ball staying closer to its target.
However, it’s important to note that the Angle of Descent can vary depending on the club used, as different lofted clubs will produce different angles. When interpreting this launch monitor data, consider the club used and how the club face was presented at impact.
Spin data
Now, down with different spin data that can be provided by golf launch monitors
Side Spin
Side spin shows the amount of spin that causes the ball to curve to the left or right during its flight. In other words, how much the ball spins sideways on its vertical axis.

Side spin can be beneficial in achieving certain shots. For instance, side spin is what’s used by advanced and pro players to hit a draw or fade shot shape (controlled ball sideway curve). However, too much side spin is what can cause those ugly hooks or slices.
To address side spin, you should focus on your swing path and clubface angle at impact. A clubface that is closed at impact will produce more left-to-right spin, while an open face will produce more right-to-left spin. Therefore, it’s essential to ensure that your clubface is square to the target at impact, which can be achieved by proper grip and body alignment.
Swing path also plays a role in producing side spin. An outside-in path leads to a left-to-right spin, and an inside-out path leads to right-to-left spin. If you’re producing side spin in your shots, try adjusting your swing path to eliminate the unwanted spin.
Spin Loft
Spin loft refers to the measurement of the difference between your angle of attack and dynamic loft (discussed below in the section dedicated to club data). It plays a significant role in determining the spin rate and launch angle of your shots.
The spin loft is calculated by subtracting the angle of attack from the dynamic loft. It represents the amount of spin that can be generated on the ball. A larger spin loft generally results in higher backspin, while a smaller spin loft leads to lower spin.
To optimize spin loft, golfers can adjust their technique and equipment. For example, a steeper angle of attack combined with a higher dynamic loft can increase spin loft and produce more backspin.
On the other hand, a shallower angle of attack with a lower dynamic loft can reduce spin loft and result in lower spin rates.
Spin Axis
Spin axis refers to the axis of rotation of the ball as it spins through the air, and it can have a significant impact on the resulting ball flight.

For example, a positive spin axis (with the ball spinning to the right) will cause the ball to curve to the right for a right-handed golfer, while a negative spin axis (left-spinning ball) will cause the ball to curve to the left. Understanding the spin axis can help you diagnose ball flight issues and make the necessary adjustments to your swing.
It is also important to note that other factors, such as the angle of attack, can affect the spin axis. When analyzing launch monitor data, take note of the spin axis to better understand the ball flight and identify areas for improvement in your swing.
Please note that spin axis corresponds to and combines both side spin and backspin.
Club Data
The following are data parameters related to your golf club.
Face To Path
Face to path is the difference between the clubface and the club path at impact. Understanding this measurement can help you to identify why a ball may curve to the left or right during flight.

The clubface angle plays an important role in determining the direction of a shot. If the face is closed, the ball will tend to go left, producing a draw, while the ball will tend to go right and produce a fade if the clubface is open. A square club face at impact will produce a straighter shot.
The relationship between face to path and ball flight is significant. By analyzing this data, you can figure out how to adjust your swing to achieve the desired outcome.
Dynamic Loft
Dynamic Loft refers to the amount of loft delivered to the ball at impact (at the moment of max compression). It is different from static loft, which is the loft of the clubface at rest. Dynamic loft is measured with the club in motion and can be affected by your attack angle and the degree of club shaft flex and ball compression.
This measurement is significant because it determines how much lift a club will put on the ball and how high or low it will fly.
A high Dynamic Loft value means that the clubface is pointing up at impact, producing more lift on the ball, resulting in a higher ball flight.
On the other hand, a low Dynamic Loft value means that the clubface is pointing down at impact, producing less lift on the ball, resulting in a lower ball flight.
Once you know your Dynamic Loft value, you can adjust your swing accordingly to optimize your launch conditions.
For instance, if you’re struggling with too high or too low ball flight, you can modify your swing to improve your Dynamic Loft value and achieve the desired outcome.
Lie Angle
Lie angle is the angle between the club’s shaft and the ground when the club sole is touching the ground while hitting a ball.

A lie angle that is too upright (the toe points upright) may cause the ball to go left as the sole hits the ground. On the other hand, a lie angle that is too flat (with the heel pointing off the ground) may cause the ball to go right because the toe will hit the ground first.
Pay close attention to lie angle measurements. If your shots consistently miss right or left, the lie angle of your club may be the culprit. Make necessary adjustments to your equipment or seek professional advice to correct the issue and improve the accuracy of your shots.
Here’s a table to help you understand how lie angle affects golf shots:
| Lie Angle | Effects on Shots |
|---|---|
| Too Upright | Ball tends to go left (for right-handed golfers) |
| Too Flat | Ball tends to go right (for right-handed golfers) |
| Properly Fitted | Straighter and more accurate shots |
Face Angle
Face angle is the direction in which the clubface is angled at impact relative to the target line. The club face can be closed if it’s facing to the left of the target line, and it is open if it is pointing toward the right of the target line (for a righty).
For example, if your ball flight is slicing to the right, a positive face angle value could be the cause. If it’s hooking to the left, a negative face angle value might be to blame.
Analyzing face angle data can be tricky. You must consider not only the position of the clubface but also the impact point on the clubface and your angle of attack.
For instance, a square clubface angle could still lead to slicing if the impact point is on the heel side of the clubface.
Impact Point
Impact point, also called impact location or strike pattern, is where the ball makes contact with the clubface, and it plays a critical role in the spin and direction of the ball.
A ball hit on the clubface’s center- the sweet spot- will have less spin and a straighter flight compared to one struck on the toe or heel.
This data allows you to identify your impact point, determine consistency, and make adjustments to your swing to improve your ball flight.
By analyzing the impact point, you can also identify if your swing path is on the right track toward improving your golf game and distance control.
Curve
The curve data provided by a launch monitor indicates the left or right direction the ball will travel in the air. This information can help you identify issues in your swing (like slices or hooks) and improve your shot accuracy.

A curve can be controlled and used to achieve a draw or a fade (achieved by more talented golfers), or they can be extreme and go out of hand and cause disasters like hooks and slices.
A hook is when the ball curves sharply (and suddenly) to the left, while a slice is when the ball curves to the right. Paying attention to the curve data will help you determine which of these categories your shots fall into.
When interpreting curve data, consider the following factors: clubface angle, swing path, and impact point.
A closed clubface angle can create a hook, while an open clubface can result in a slice. Your swing path can also contribute to the curve, with an in-to-out swing path creating a hook and an out-to-in swing path resulting in a slice.
Club Loft Angle
Club loft angle refers to the angle between the clubface and the shaft and is essential in determining the initial vertical trajectory of the ball and how high it flies in the air.
Different clubs have different loft angles, with drivers having the lowest and wedges having the highest. Knowing the loft angle of each club can help you analyze ball flight and make better club selections based on the distance, trajectory, and shot shape required for a given shot.
For instance, when hitting a tee shot, a club with a lower loft angle will create a lower initial trajectory, allowing for extra roll yardage. Conversely, a higher lofted club will launch the ball higher, making it ideal for shots that require stopping quickly.
Club loft angle is an underrated factor that can meaningfully influence ball flight, distance, and shot shaping. By understanding the impact of clubface, shaft, and loft angle, you’ll be better equipped to make informed decisions on club selection for different shots.
Swing Plane

The swing plane is an imaginary line that represents the path of the club as it moves through the swing. Launch monitors can track the movement of the club throughout the swing and provide data on the swing plane angle.
Here’s how to interpret swing plane data on a launch monitor to improve your swing:
- Look at the club path: The club path is the direction the clubhead is moving at impact. A positive number means the clubhead is moving out to in, while a negative number indicates an in to out path. Ideally, you want the club path to be straight down the target line for the most efficient ball flight.
- Check for consistency: Consistency throughout the swing is key to effective club movement. Pay attention to the changes in the swing plane angle, and focus on keeping it consistent throughout the swing.
- Aim for efficiency: Efficient use of the swing plane can lead to more consistent and accurate shots. Focus on swinging on a consistent plane with the same angle of attack and dynamic loft to maximize your ball’s trajectory and distance.
Low Point
This is the lowest point your club reaches during the swing. Ideally, you want to reach your low point after impact, when the ball is already launched off the club face.
If you reach your low point before impact, this may indicate the you are hitting up on the ball – probably with a driver- or otherwise having a fat shot by hitting the turf before reaching the ball.
By analyzing the position of the clubhead at different points in the swing, the software can pinpoint exactly where the low point occurs. This gives you valuable information about the timing and consistency of your swing.
Knowing your low point can be particularly helpful if you struggle with ball-flight consistency. If you tend to hit the ball thin or fat, it could be because your club is making contact with the ground at the wrong point in the swing.
Improving your low point can affect the launch angle, spin, and distance of your shots. By fine-tuning your swing to achieve a consistent low point, you’ll be able to hit the ball more accurately and with more power.
Skill Measurement Metrics
These data parameters reflect and measure skills improvement.
Shot Dispersion
Shot dispersion refers to the consistency of a golfer’s shots in terms of angle and distance from the target. It reflects how close to the target each shot ends and how far away from the target line (to the right or left) it lands.

To analyze shot dispersion, you can plot each shot’s point of landing on a target sheet, then use statistical software to identify patterns. Pay attention to the size and shape of the dispersion circle, as well as any outliers.
The dispersion circle represents the spread of your shots and shows how consistently you hit the ball. The smaller the circle, the more consistent your shots are.
Outliers, on the other hand, are shots that are significantly outside the dispersion circle. Identifying and analyzing outliers could give clues to issues with swing mechanics or club choice. By understanding shot dispersion data, golfers can develop their skills and optimize their strategies to improve their game.
Skills Scoring
Advanced launch monitors usually include features to help you understand and monitor your progress; they do this through compiling all the data and making sense out of it. Consider skills scoring like what a coach can do. When analyzing launch monitor data, it is important to consider multiple factors.

Firstly, shot dispersion and consistency are essential. Shot dispersion refers to how close or far apart the shots land from each other, and consistency is how close each shot is to the average. A tight dispersion and consistent shots indicate a high level of skill and control.
Another factor is distance control and ball flight. Distance control refers to the ability to hit specific distances with each shot, while ball flight refers to the shape of the ball’s trajectory. A player with good distance control and the ability to shape the ball flight can more effectively navigate the golf course.
Spin rates are also important to evaluate. Spin rates determine the ball’s backspin and sidespin, affecting the trajectory and how the ball reacts on the green. Understanding a player’s spin rates can help in determining which clubs to use in certain situations, as well as determining where to aim shots.
Lastly, accuracy and precision around the greens, including chipping and putting abilities, are crucial when analyzing launch monitor data. Short-game performance can significantly impact a player’s score and is an essential skill to develop.
Use the table below as a guide in interpreting launch monitor data.
| Factor | What to analyze |
|---|---|
| Shot Dispersion | How close or far apart shots land from each other |
| Consistency | How close each shot is to the average |
| Distance Control | Ability to hit specific distances with each shot |
| Ball Flight | Shape of the ball’s trajectory |
| Spin Rates | Determines the ball’s backspin and sidespin |
| Accuracy and Precision Around the Greens | Chipping and putting abilities |
Chipping and Putting Data
Improving your short game is vital for lowering your scores. By using a launch monitor to measure and analyze your chipping and putting, you can identify areas of strength and weakness in your game to improve your consistency.

Launch monitors can track a variety of metrics for chipping, such as launch angle, speed, and spin. For putting, the most important metrics are ball speed, rotation, and skid. These metrics provide valuable data that can help you refine your short-game technique and improve distance control and accuracy.
Here are some of the most important metrics to pay attention to when analyzing your chipping and putting skills:
- Launch angle: The angle at which the ball leaves the clubface.
- Speed: The speed at which the ball is traveling.
- Spin Rate: The rate at which the ball is spinning.
- Rotation: The amount of backspin or topspin on the ball.
- Skid: The distance the ball travels before it begins to roll (ideally kept to the minimum)
By using golf simulation technologies data to analyze your short game, you can improve your consistency and accuracy on the green. Focus on refining your technique based on the metrics that the launch monitor provides, and you’ll be on your way to lowering your scores in no time.
How to Properly Set Up Launch Monitor Parameters?
Setting up your launch monitor properly is critical to ensure accurate and repeatable results. Proper adjustments to the monitor’s settings can significantly affect the accuracy of the data. Here’s what you need to know.
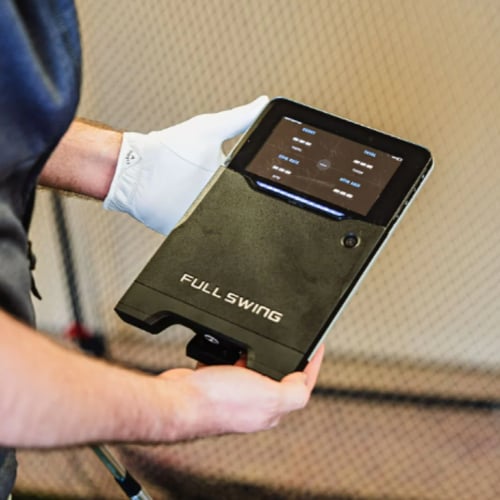
To begin, ensure that the monitor is correctly oriented with respect to the golfer and target line. This may involve measuring the distance from the monitor to the tee or hitting point. This depends on the tracking technology (Radar monitors must be placed behind the tee point, while photometric units need to be placed perpendicular to the target line- facing the ball).
After that, you will most likely need to calibrate your launch monitor; most units come with calibration sticks for easier calibration.
Next, set up the monitor to detect the club head at impact by selecting the appropriate club type and tee height. It’s essential to choose the one that best matches your equipment to ensure accurate readings. Some units automatically detect what club you’re using just by briefly placing the club head in front of the tracking device.
Additionally, adjust the monitor’s settings to reflect the current weather conditions. Air density affects how the ball travels and can significantly affect the data obtained. So, it’s crucial to adjust the monitor’s settings to account for the weather conditions accurately.
Remember that each launch monitor comes with a set of instructions to ensure optimal performance and accuracy. Make sure you go through the instructions manual to know how your specific model should be set up to provide the most accurate data possible!
Why Is Launch Monitor Data Highly Valuable
With every swing you make, the launch monitor provides data points that reflect your performance; this data is instantly provided, immediately after the shot is made. No need to wait for any additional feedback from a companion or coach, which will be based on (informed) guesses.

The main benefit of the launch monitor data is that it’s based on actual shots detected by advanced sensors and processed through advanced algorithms to help you understand your strengths and weaknesses.
But what can you do with this data? A lot, actually. Let’s take a closer look.
Firstly, by analyzing your golf ball’s launch angle, spin rate, ball speed, and other factors, you can begin to understand your swing characteristics. This information can help you identify areas you need to improve in your swing to achieve more accuracy and consistency.
Secondly, you can analyze your swing’s speed, path, and release to discover the ideal swing to optimize your launch angles. Make sure you pay attention to the Spin Loft, which measures the amount of spin an individual launch angle can produce.
Thirdly, the launch monitor’s chipping and putting data can be analyzed to help you improve your short game, which is of utmost importance if you wish to be a better golfer.
Wrapping Up
Understanding launch monitor data can greatly improve your golf game. By analyzing the data and understanding the different parameters, you can identify areas of weakness and work on improving them.
It may seem overwhelming at first, but with practice and patience, you can become proficient in reading and interpreting launch monitor data.
Remember to focus on the parameters that are most important to your game and use the data to make informed decisions on club selection and swing adjustments.
Feel free to leave a comment below if you have any questions.
Thanks for reading!


