Approach shots decide your scorecard more than drives or putts. They’re the difference between keeping doubles away and spiraling into mistakes that ruin a round.
Here’s the trick—you don’t need hero swings. You need a go/no-go system that tells you when to fire and when to back off. Think of it like a traffic light: green means attack, red means steer clear.
With a simple checklist, you weigh wind, lie, yardage gaps, and trouble spots before swinging. It keeps you disciplined, gives you clear answers under pressure and helps you avoid the mess that turns a bogey into something worse. This guide shows you how to keep that signal in your head and make smarter choices every time you pull a club.
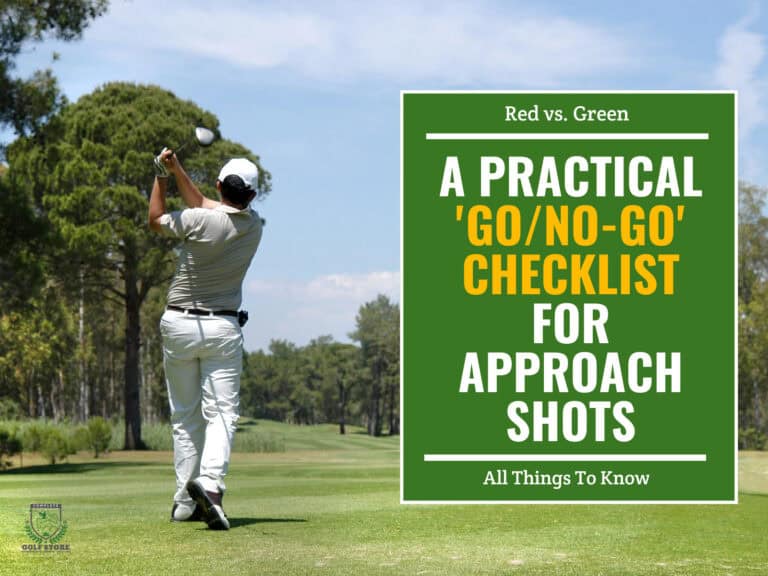
- 1) Red vs. Green: The Go/No-Go Framework
- 2) The Five-Factor Pre-Shot Checklist → One Adjusted Carry Number
- 3) Lie First: The Make-or-Break Factor
- 4) Yardage Gaps & Distance Control (Wedges Through Long Irons)
- 5) Trouble Zones & Miss Management
- 6) Build Your One-Page Caddie Card
-
7)
Frequently Asked Questions
- 7.1) How often should I update my yardage chart and caddie card?
- 7.2) What’s the fastest single practice session to lock in two stock distances per wedge?
- 7.3) How do I adapt the card on a brand-new course with no prior notes?
- 7.4) When is it acceptable to switch from center/back aiming and go directly at a flag?
- 7.5) How can I set a personal no-go rule for strong crosswinds that push toward trouble?
- 7.6) What should my default recovery plan be immediately after a red/no-go decision?
- 7.7) How do I measure whether the card is reducing doubles (what stats to track)?
- 8) Final Thoughts
Red vs. Green: The Go/No-Go Framework
You need a traffic light for your brain. Green means you’re clear to play the smart shot you know you can hit. Red means step off the gas and choose the safer route.
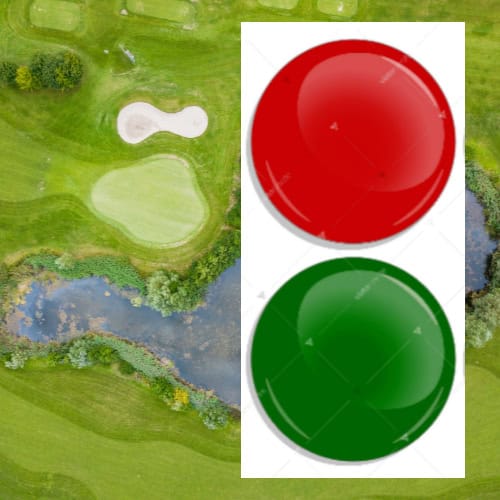
What Green Light Means
Green is confidence with guardrails. You have a playable target, a club you trust and a plan for a friendly miss. You aim at the center or the widest patch of green, not the flag. Boring? Maybe. Effective? Absolutely.
What Red Light Means
Red says the risk of a big number is too high. You pick the safe lane: bigger target, more margin or even a lay-up. Pride stays in the bag. Doubles stay off the card.
The Core Goal
Forget chasing birdies; even the pros average only a few per round. Your job is GIR and “stress-free” pars or bogeys. Think of it like a scoreboard: avoid the crooked numbers and you win the day.
The Default Aim
When unsure, pick center or slightly back-of-green. That cushions thin strikes and shrinks the penalty for small errors. Pins tucked near danger don’t get a vote.
The One-Rule Shortcut
If your plan can handle a typical miss without bringing double into play, it’s green. If your usual miss brings water, OB, or a short-side nightmare into play, it’s red. Say it out loud: “Green or red?” Then commit.
Quick On-Course Script
Ask yourself the following questions:
- “What’s my safe target?”
- “Where can I miss and still be fine?”
- “Does this choice avoid the big number?”
If the answers feel easy, you’re green. If your gut whispers “hero shot,” you’re red.
The Five-Factor Pre-Shot Checklist → One Adjusted Carry Number
Golf punishes guesses. You need one clean number in your head before you swing, not five different voices arguing. The checklist trims the noise and leaves you with a single adjusted carry yardage you can trust.

Start With Exact Distance
Pull the rangefinder or GPS. Get the raw yardage to the flag, but don’t stop there. That number is only the beginning.
Choose Landing Area (Not Just the Flag)
Think about where you want the ball to land, not where the pin is stuck. Center or widest green sections buy you space. If danger lurks long, shave off a few yards.
Elevation Adjustment
Add or subtract based on slope. Uphill shots play longer, downhill shots play shorter. A five-yard swing either way can turn a par chance into a bogey if ignored.
Wind & Weather
Headwind adds yardage, tailwind subtracts. Crosswinds bend the ball off line. Temperature and altitude also matter, as cold air takes distance, while hot or thin air gives it back.
Read the Lie
Fairway, rough or slope all shift the math. A flyer lie means less spin and more rollout. Heavy grass steals carry. Tilted lies change both strike and direction.
Commit to One Number
After the checklist, all those pieces boil into one figure: your adjusted carry. That’s the yardage you own. Pick the club, step in and trust it. Anything less is red-light territory.
Lie First: The Make-or-Break Factor
Every shot begins with the ground under the ball. Before distance, before wind, before target, you have to read the lie. It decides how cleanly the club meets the ball and how much control you keep.

Fairway, Semi-Rough and Rough
From the fairway, you can trust your number. The ball sits up, and the strike stays predictable. In semi-rough, you lose some spin and control.
From deep rough, expect shorter carry and less accuracy. That’s when the safe play often beats ambition.
Slopes and Grain
Uphill lies launch the ball higher and shorten carry. Downhill lies do the opposite, flattening flight and adding roll. Sidehill lies twist the clubface, sending shots left or right.
Grain adds another layer: into the grain grabs the club, down the grain lets it glide.
Managing uneven ground requires specific adjustments beyond club choice and distance. If you want a deeper breakdown of setup techniques for sidehill, uphill, and downhill shots, see our guide on uneven lies golf setup.
Bad-Lie Downgrade Rule
One red flag in the lie, and you downgrade your plan. Instead of aiming at a tight target, pick a larger, safer landing zone. When the ball nestles down, the smart choice isn’t to fight it. It’s to adapt and avoid the kind of mistake that wrecks a scorecard.

Yardage Gaps & Distance Control (Wedges Through Long Irons)
You can’t manage what you don’t measure. Yardage gaps are the blind spots that trip up golfers more than they realize. Knowing the carry distance for each club turns uncertainty into confidence.
Know Your Numbers
Start with a baseline chart. Write down how far each club flies on a clean strike. For wedges, own at least two stock distances: one full swing and one three-quarter or choked-down version. That extra option plugs holes between clubs and keeps you from forcing swings.
Simple Practice Framework
Use interval drills to build feel. Place targets or markers every 10 yards and hit into them, working short to long. The “clock” method also works—tie the length of your backswing to a time on the dial, like 9 o’clock or 10 o’clock, then match that to yardage. Soon, you’ll carry a library of numbers in your head.
Tempo & Grip Pressure Reminders

Distance control isn’t just math; it’s rhythm. A smooth tempo with steady acceleration gives repeatable flight. Grip too tight, and your swing gets jerky. Hold it light (like squeezing a tube of toothpaste without spilling) and the ball responds.
Trouble Zones & Miss Management
Golf doesn’t punish you for missing greens; it punishes you for missing in the wrong spots. Trouble zones are where doubles are born, and your job is to steer clear of them.
Identify “No-Miss” Areas
Every hole has a spot you simply can’t afford to miss. It could be water tight to the green, out-of-bounds lurking left or a steep bunker face. Label those as “no-miss” areas in your mind. The second you see one, the plan shifts to safety first.
Default Safe Targeting
The safe shot may look dull, but it keeps the scorecard intact. Aim for the side of the green that leaves you room, or pick the back yardage that carries you clear of front hazards. You won’t always knock it close, but you’ll still have a swing at par and an easy bogey at worst.
Plan Your Predictable Miss
Everyone has a pattern. Maybe you tend to pull short irons or leak long irons to the right. Build that into your target line. Aim so that even your usual miss leaves a chip or a putt instead of a splash or a punch-out.
Anti-Hero-Shot Rule
The fastest way to add strokes is chasing a shot you don’t have. A gap between trees or a forced carry you can’t clear isn’t courage; it’s gambling. Punch it back, chip it out, lay it up. You’ll keep the round alive and save the big swings for when the light is truly green.
Build Your One-Page Caddie Card

A one-page caddie card trims the decision-making down to a fast checklist you can run before every approach. It’s your pocket-sized traffic light system.
Card Sections & Fast Checks
Break the card into five quick reads:
- Wind/conditions – factor in strength and direction.
- Lie/slope – clean fairway or messy rough.
- Yardage & gap – does the number fit a comfortable swing.
- Trouble map – mark water, bunkers or slopes you must avoid.
- Target & safe miss – pick the spot that forgives your normal mistake.
With practice, you’ll check all five in seconds.
Go/No-Go Decision Line
Once you’ve scanned the card, draw the line. If all signs point green, you fire. If even one category flashes red, you step back and take the conservative option.
That rule keeps doubles off the scorecard more often than any swing tip.
After-Shot Note
Make a quick mental note after each swing. Was your decision sound? Did you respect the red flag, or did ego nudge you into trouble? A single word scribbled on the card helps you track patterns and sharpen discipline.
Frequently Asked Questions
We all wrestle with the same decisions, so it helps to have clear answers before you step onto the course. These points address the most common concerns about using the caddie card system.
How often should I update my yardage chart and caddie card?
Update whenever your distances shift. A new ball, swing tweak or even seasonal weather can change carry numbers. At minimum, refresh it twice a year to keep the data sharp.
What’s the fastest single practice session to lock in two stock distances per wedge?
Head to the range with alignment sticks at fixed yardages. Work on full swings and three-quarter swings until you can repeat two reliable numbers. Write them down, then test them on the course.
How do I adapt the card on a brand-new course with no prior notes?
Use the GPS or rangefinder for baseline distances. Walk the greens early, check pin sheets if available and circle high-risk areas on the scorecard. Build a quick version of your card hole by hole.
When is it acceptable to switch from center/back aiming and go directly at a flag?
Go at the flag only if three things align: short iron in hand, wide bailout space and a green light from your checklist. Otherwise, play the safe target and trust the putter.
How can I set a personal no-go rule for strong crosswinds that push toward trouble?
Decide on a threshold—say, anything over 15 mph pushing toward water or OB is an automatic red. Stick to it, even if you’re feeling bold. Consistency beats ego.
What should my default recovery plan be immediately after a red/no-go decision?
Pick the simplest shot that gets you back in play with a full swing next. A punch to the fairway or a lay-up to your favorite wedge number keeps the hole alive.
How do I measure whether the card is reducing doubles (what stats to track)?
Track greens in regulation, misses in “safe zones” and double bogeys per round. If doubles go down while GIR stays steady or improves, the card is doing its job.
Final Thoughts
Golf gives you more chances to lose shots than to gain them. Approach shots make up most of the gap between good scores and bad ones, and they demand discipline more than daring.
You don’t need perfect swings to keep the card tidy. What you need is a plan: center or back-of-green targets, one adjusted carry number, and lie-first judgment. Pair that with the red/no-go rule, and the doubles that once haunted you start to vanish.
The game becomes simpler. Doubt fades when you know the safe play. Confidence grows when your misses still leave you in play. And the question shifts from “Can I pull off this shot?” to “Will I trust the system when the pressure rises?”
Thanks for reading!