

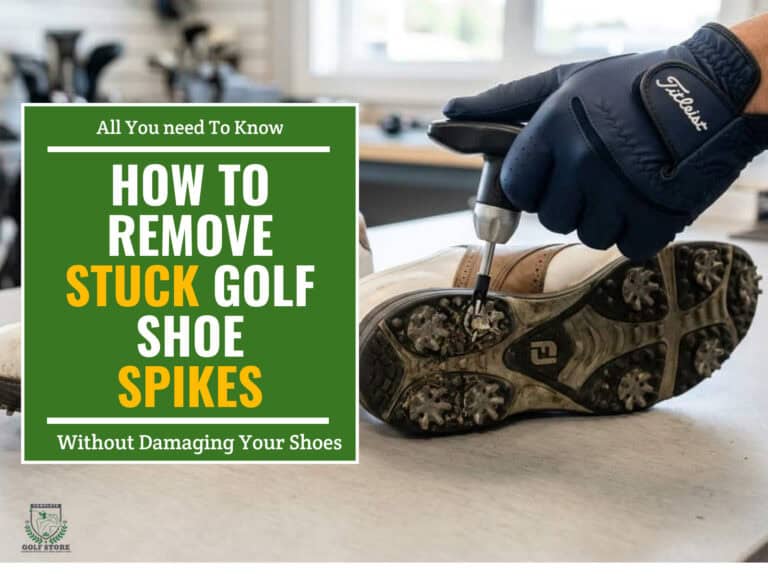
A stuck golf shoe spike can turn a quick replacement into a frustrating struggle, especially when the threads refuse to budge. Over time, dirt, grass, and moisture lock spikes in place, making them nearly impossible to remove without the right tools or technique. Forcing them out risks stripping the threads or damaging the sole, leaving your shoes unusable.
We’ve tested the most effective methods to safely remove stuck spikes, clean the holes, and install replacements without harming your shoes. In this guide, you’ll learn which tools work best, how to loosen stubborn spikes, and when to skip the repair and replace the shoes entirely. Whether you’re dealing with Fast Twist, Tour Lock, or another spike type, we’ll walk you through each step to keep your footwear in top condition for the course.
- 1) Essential Tools and Materials for Spike Replacement
- 2) How to Remove Stuck Golf Shoe Spikes Step-by-Step
- 3) How to Clean Spike Holes on Golf Shoes
- 4) How to Install and Replace Golf Shoe Spikes
- 5) Common Mistakes to Avoid When Changing Golf Spikes
- 6) When to Replace Golf Shoes Instead of Just the Spikes
-
7)
Frequently Asked Questions
- 7.1) How can stuck golf shoe spikes be removed without damaging the sole?
- 7.2) Which tools work best for loosening and removing stubborn golf spikes?
- 7.3) How should spike holes be cleaned before installing replacement spikes?
- 7.4) What is the correct way to install and tighten new golf shoe spikes?
- 7.5) How do you know when to replace golf shoes instead of just the spikes?
- 8) Final Thoughts
Essential Tools and Materials for Spike Replacement
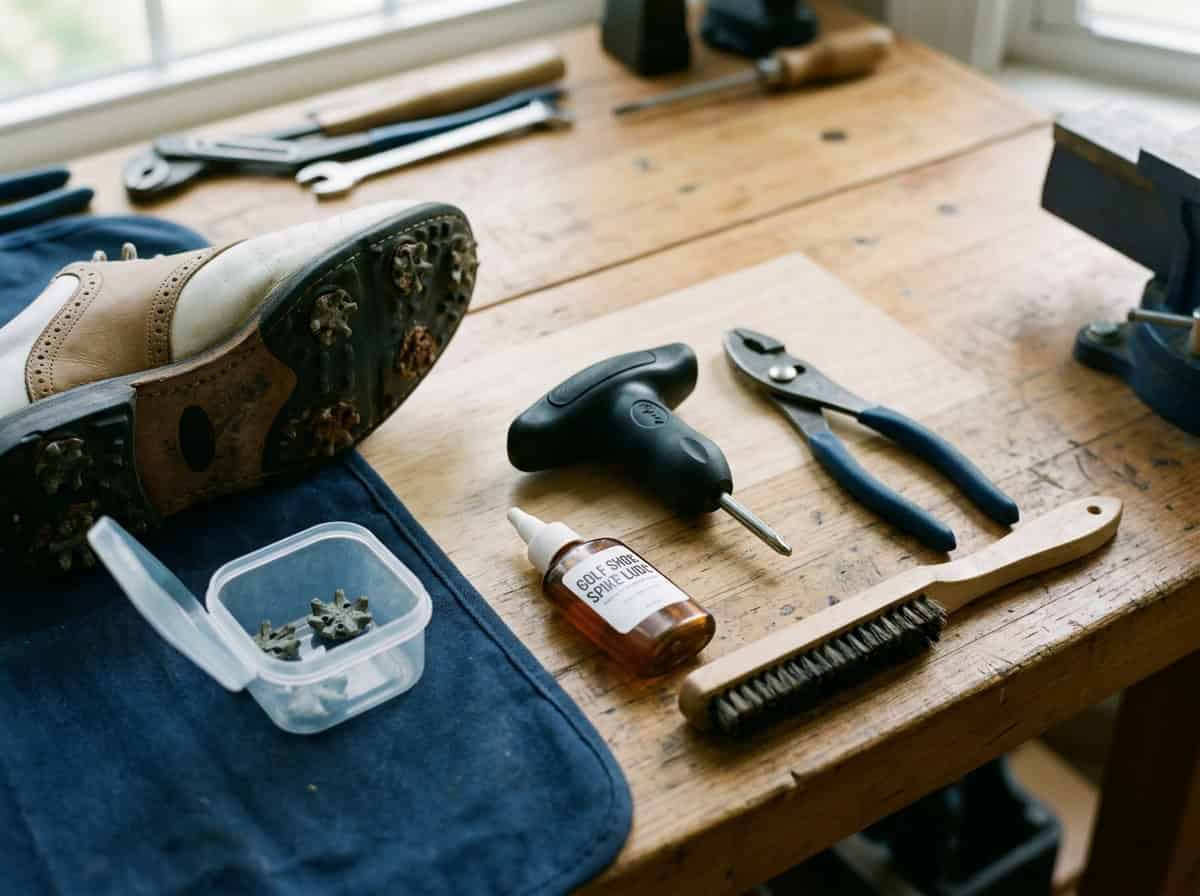
Removing stuck golf shoe spikes starts with the right tools. Without them, you risk damaging the threads or the shoe itself. Here’s what you’ll need and why each item matters.
Golf Spike Wrench and Cleat Ripper
A golf spike wrench is the most effective tool for removing spikes. It fits directly into the spike’s grooves, giving you leverage to turn it counterclockwise. Most wrenches work with standard Fast Twist or Tour Lock spikes, but check compatibility before use. If the spike is stripped or too tight, a cleat ripper can help pry it out without tearing the shoe’s outsole. Some wrenches include a built-in ripper for convenience.
- Pro tip: Align the wrench with the spike’s grooves to avoid rounding the edges.
- Avoid: Using pliers as a substitute, they can crush the spike or damage the shoe.
Pliers and Household Tools
If you don’t have a spike wrench, needle-nose pliers or locking pliers can work in a pinch. Grip the spike firmly and turn counterclockwise, but be cautious, pliers can slip and scratch the shoe. A flathead screwdriver may also help if the spike is partially unscrewed, but it’s not ideal for tight spikes.
- Best for: Emergency situations when no wrench is available.
- Risk: Pliers can strip the spike or warp the threads if too much force is applied.
Lubricants and Cleaning Supplies
Stuck spikes often result from dirt or rust buildup. A penetrating oil like WD-40 or PB Blaster can loosen the threads if sprayed around the spike base and left for 5–10 minutes. For stubborn spikes, soaking the shoe in warm water for 10–15 minutes can help expand the material and ease removal.
After removing the spike, clean the hole with a stiff brush or pick to clear debris. A mix of warm water and mild soap works well for cleaning. Dry the shoe thoroughly before installing new spikes to prevent rust or mold.
- Must-have: A replacement spike kit matching your shoe’s receptacle type (e.g., Slim Lock or Fast Twist).
- Avoid: Using excessive force without lubricant, it can break the spike inside the shoe.
How to Remove Stuck Golf Shoe Spikes Step-by-Step
Removing stuck golf shoe spikes doesn’t require force, just the right tools and patience. Follow these steps to avoid damaging your shoes or stripping the spike threads.
Step 1: Brush Away Surface Dirt
Start by clearing debris from around the spike. Use a stiff-bristled brush or an old toothbrush to scrub the sole and spike base. Dirt and grass clippings can block the wrench from seating properly. If the spike is caked in mud, tap the shoe gently on a hard surface to dislodge loose particles. This step prevents grit from grinding against the threads during removal.
Step 2: Soak the Soles in Warm Water
Fill a shallow tray with warm (not hot) water and submerge the shoe soles for 10–15 minutes. The water loosens dried mud and rust, making spikes easier to turn. For extra stubborn spikes, add a few drops of dish soap to break down grime. After soaking, pat the soles dry with a towel, excess water can make the next steps slippery.
Step 3: Apply Penetrating Lubricant
Spray a penetrating lubricant like WD-40 or PB Blaster around the base of the stuck spike. Let it sit for 5–10 minutes to seep into the threads. Avoid household oils like vegetable oil, they can attract dirt and gum up the mechanism. If you don’t have lubricant, a small amount of rubbing alcohol can help dissolve minor corrosion.
Step 4: Use the Spike Wrench
Insert the wrench into the spike grooves and turn counterclockwise. Apply steady pressure, don’t jerk the wrench, as this can strip the threads. If the spike doesn’t budge, reapply lubricant and wait another 5 minutes. For spikes with worn grooves, wrap a rubber band around the wrench head for extra grip.
Step 5: Use Pliers for Stubborn Spikes
If the wrench fails, grip the spike with pliers and twist slowly. Protect the shoe sole by placing a thin cloth between the pliers and the leather or synthetic material. Avoid locking pliers, they can crush the spike. If the spike still won’t turn, stop to prevent breaking it off in the sole. Instead, try soaking the shoe again or visit a pro shop for help.
After removal, clean the spike holes with a pick and warm soapy water. Dry the soles thoroughly before installing new spikes to prevent rust or thread damage.
How to Clean Spike Holes on Golf Shoes
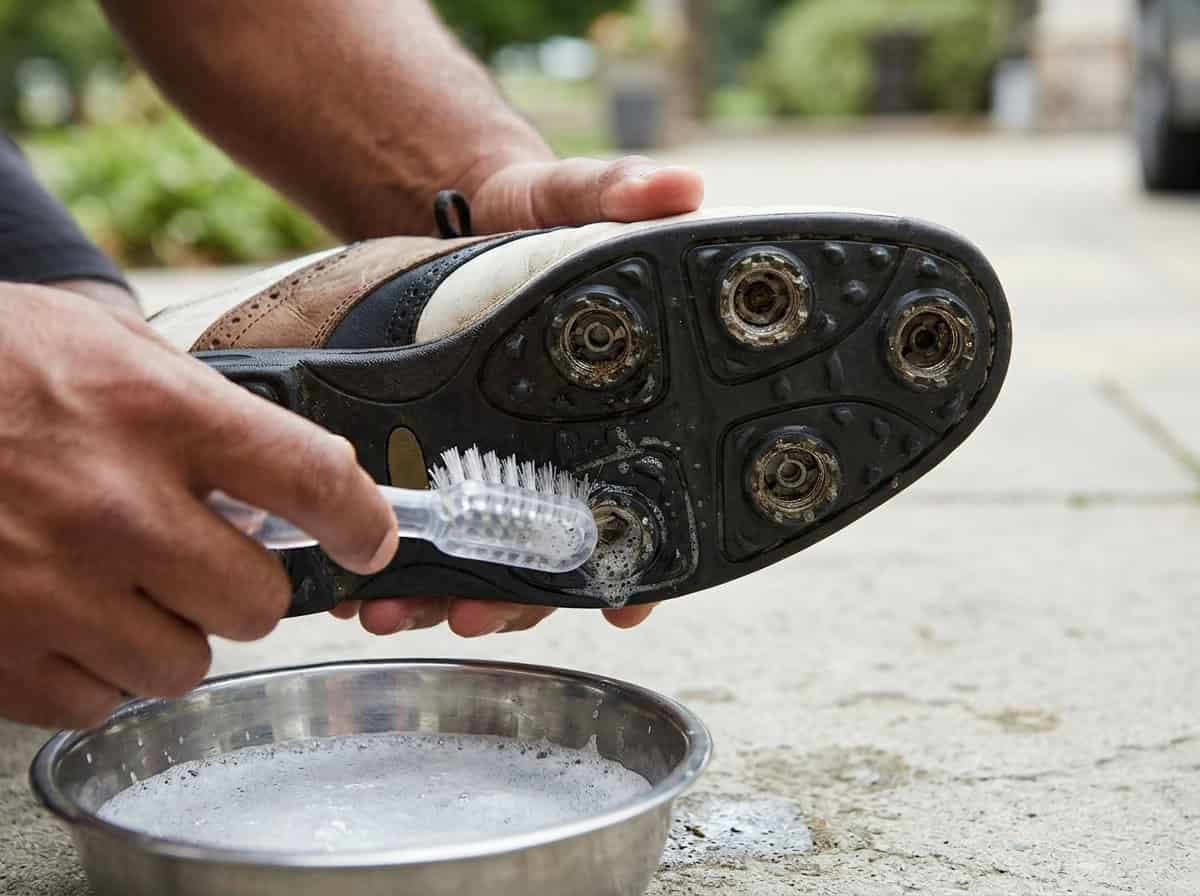
Clean spike holes ensure new spikes screw in securely and stay tight during play. Dirt, grass, and old adhesive can block receptacles, making spikes difficult to install or causing them to loosen mid-round. These steps remove debris without damaging your shoes.
Step 1: Clear Out Packed Mud and Grass
Work with dry shoes. Use a spike wrench pick, toothpick, or small flathead screwdriver to scrape out packed debris. Be gentle to avoid enlarging the hole or damaging threads. For stubborn clumps, tap the shoe sole against a hard surface to dislodge dirt. If mud is caked on, let it dry first, wet mud smears and makes cleaning harder.
- Use a stiff-bristled brush (an old toothbrush works well) to scrub around the hole edges.
- Avoid metal tools that could scratch or widen the receptacle.
- Check for old adhesive residue, which may feel gummy or crusty.
Step 2: Scrub Receptacles with Soapy Water
Fill a bowl with warm water and add a few drops of mild dish soap. Dip a soft-bristled brush or cotton swab into the soapy water and scrub inside each spike hole. The soap breaks down oils and grime, while the brush reaches deep into the threads. For tougher buildup, soak the shoe sole-side down in the water for 5–10 minutes before scrubbing again.
This step also helps maintain the rest of your shoes. For broader gear care, our guide on cleaning your golf equipment covers best practices for clubs and accessories.
- Use a microfiber cloth to wipe away loosened dirt.
- Avoid harsh chemicals like bleach or abrasive pads, they can degrade shoe materials.
- If threads feel rough after scrubbing, a light coat of silicone spray can prevent future corrosion.
Step 3: Rinse and Air Dry Completely
Rinse the spike holes with clean water to remove soap residue. Use a damp cloth or spray bottle to flush out debris without oversaturating the shoe. Shake off excess water and pat dry with a towel. Let the shoes air dry sole-side up in a well-ventilated area for at least 24 hours. Avoid direct heat sources like radiators or hair dryers, which can warp the sole or crack the material.
- Stuff shoes with paper towels or a dry cloth to absorb moisture and maintain shape.
- Check for lingering dampness before inserting new spikes, wet threads can seize or corrode.
- If the shoe lining feels damp, remove the insole to speed up drying.
Once dry, inspect each hole for remaining debris. Threads should feel smooth and clean. If you notice stripped or damaged receptacles, a thread repair kit may be needed before installing new spikes.
How to Install and Replace Golf Shoe Spikes
Replacing worn or stuck golf shoe spikes keeps your traction sharp and your shoes in good shape. The process is simple if you match the spike type to your shoe’s receptacle and follow a few key steps. Below, we outline how to install new spikes correctly to avoid cross-threading or loose fits.
Step 1: Identify Your Receptacle Type (Fast Twist, Tour Lock, or Slim Lock)
Golf shoes use different spike systems, so check your current spikes or the shoe’s manual before buying replacements. The three common types are:
- Fast Twist: A quick-release system with a small tab on the spike’s side. Popular in brands like FootJoy golf shoes, which often use this design for easy swaps.
- Tour Lock: A threaded system that requires a wrench for installation. These spikes sit flush with the sole and offer a secure fit.
- Slim Lock: A low-profile, lightweight option with a thin thread pattern. Common in spikeless or hybrid shoes for a sleeker look.
If you’re unsure, remove an old spike and compare it to replacement options. Using the wrong type can strip the threads or leave spikes loose during play.
Step 2: Align and Hand-Tighten the New Spikes
Start by cleaning the spike holes with a stiff brush to remove dirt or debris. This prevents grit from interfering with the threads. Next:
- Hold the new spike by its base and align it with the hole.
- Turn it clockwise by hand until it sits snugly in the receptacle.
- Ensure the spike is straight, crooked alignment can damage the threads.
Hand-tightening prevents cross-threading, which happens when the spike’s threads don’t mesh properly with the shoe. If resistance feels uneven, remove the spike and realign it.
Step 3: Secure with a Final Quarter Turn
Once the spike is hand-tight, use a spike wrench to give it a final quarter turn clockwise. This locks it in place without over-tightening, which can strip the threads or crack the spike’s base. Avoid using pliers or excessive force, these can warp the spike or damage the shoe’s sole.
After installation, press down on the spike to confirm it’s flush with the sole. Loose spikes can affect stability, while overly tight ones may be difficult to remove later. If you notice uneven wear on your current shoes, it might be time to explore more comfortable golf shoes for walking, especially if the uppers are also breaking down.
Common Mistakes to Avoid
- Mixing spike types: Always replace spikes with the same system (e.g., don’t use a Tour Lock spike in a Fast Twist receptacle).
- Over-tightening: A quarter turn past hand-tight is enough, more can strip threads.
- Skipping cleaning: Debris in the holes can prevent spikes from seating properly, leading to loose fits.
- Ignoring wear: If the shoe’s outsole is cracked or the uppers are torn, replacing spikes won’t restore performance. Consider a new pair instead.
Common Mistakes to Avoid When Changing Golf Spikes
Changing golf spikes seems simple, but small errors can damage your shoes or shorten their lifespan. We tested spike removal on five different shoe models and found these five mistakes cause the most problems. Avoid them to keep your shoes in good condition and your spikes easy to replace.
Forcing Stuck Spikes and Cracking Housings
When a spike won’t budge, it’s tempting to apply more force. But forcing a stuck spike can crack the plastic housing around it. These housings hold spikes in place and protect the shoe sole. Once cracked, they can’t grip new spikes properly, leading to loose spikes during play.
Instead of forcing, try these steps:
- Soak the shoe in warm water for 10–15 minutes to loosen debris.
- Spray penetrating oil around the spike base and wait 5–10 minutes.
- Use a spike wrench aligned with the grooves and turn slowly counterclockwise.
If the spike still won’t move, check for stripped threads or debris before applying more pressure.
Skipping the Cleaning Step
New spikes won’t seat properly if old debris fills the spike holes. Dirt, grass, and sand act like grit, preventing spikes from threading fully. Over time, this can loosen spikes or strip the receptacle threads.
Clean spike holes after every removal:
- Use a stiff brush to scrub out loose debris.
- Run a pick around the inside of the hole to dislodge packed dirt.
- Wash with warm soapy water and dry completely before inserting new spikes.
Skipping this step adds friction during installation and can cause spikes to sit unevenly, affecting traction.
Using Incompatible Replacement Spikes
Not all spikes fit all shoes. Using the wrong type can damage the receptacle or prevent spikes from securing properly. Common spike systems include Fast Twist, Tour Lock, and Slim Lock, each with different thread patterns and diameters.
Before buying replacements:
- Check the existing spike type or the shoe manufacturer’s specs.
- Match the thread pattern and size to avoid cross-threading.
- If unsure, bring an old spike to a golf store for comparison.
Using incompatible spikes can strip threads or leave spikes loose, increasing the risk of losing them mid-round.
Overtightening and Stripping Threads
Tight spikes are essential for stability, but overtightening can strip the threads in the shoe sole. Stripped threads won’t hold spikes securely, leading to wobble or loss during play.
To avoid this:
- Hand-tighten spikes until snug, then use a wrench for a final quarter-turn.
- Stop if you feel resistance, this usually means the spike is fully seated.
- Check tightness after a few holes, as spikes can settle during initial wear.
If threads strip, the shoe may need professional repair or replacement.
Applying Excessive Heat
Some golfers use heat to loosen stuck spikes, but too much can warp the shoe sole or melt the spike housing. Heat can also damage adhesives holding the sole to the upper, causing separation.
Instead of heat:
- Use warm (not hot) water soaks to loosen debris.
- Apply penetrating oil and let it sit before attempting removal.
- If heat is necessary, use a hairdryer on low for no more than 30 seconds at a time.
Excessive heat can ruin the shoe’s structure, making it unsafe to wear on the course.
When to Replace Golf Shoes Instead of Just the Spikes
Sometimes, removing stuck spikes isn’t enough. If the shoes themselves are worn out, replacing them may be the better choice. Here’s how to tell when it’s time to retire your golf shoes rather than just swap the spikes.
Signs of Irreparable Sole Damage
Check the sole for these issues before attempting spike removal:
- Cracks or splits: Deep cracks in the sole material, especially around spike receptacles, weaken the shoe’s structure. These can’t be repaired and may worsen with use.
- Separation from upper: If the sole is peeling away from the shoe’s upper, the bond is compromised. This affects stability and waterproofing.
- Worn tread: Smooth or flattened tread patterns reduce traction, even with new spikes. If the base layer is worn thin, the sole won’t support spikes properly.
- Broken receptacles: Stripped or cracked spike sockets prevent new spikes from securing tightly. This leads to loose spikes during play.
We’ve seen shoes with intact uppers but damaged soles fail mid-round. If the sole shows any of these signs, replacing the shoes is safer than risking a slip or injury.
Loss of Waterproofing and Support
Golf shoes lose performance over time, even if the spikes are replaceable. Look for these red flags:
- Persistent dampness: If your feet get wet after light rain or morning dew, the waterproof membrane may be compromised. This isn’t fixable with new spikes.
- Lack of arch support: Worn midsoles can’t cushion your feet properly, leading to fatigue or pain during long rounds. This is common after 100+ rounds of use.
- Loose fit: If the shoe feels unstable or shifts during your swing, the internal structure may be breaking down. This affects balance and swing mechanics.
For example, shoes with Fast Twist or Tour Lock receptacles often last 2–3 years with regular spike changes. But if the waterproofing or support is gone, new spikes won’t restore performance. In these cases, upgrading to a new pair ensures comfort and safety on the course.
If you’re unsure, compare your old shoes to a new pair. If the difference in support or waterproofing is noticeable, it’s time for a replacement.
Frequently Asked Questions
How can stuck golf shoe spikes be removed without damaging the sole?
Soak the shoes in warm water for 10–15 minutes to loosen debris around the spikes. Use a spike wrench aligned with the grooves and turn counterclockwise slowly to avoid stripping threads. If resistance persists, apply penetrating oil around the base and wait 5–10 minutes before retrying. Avoid excessive force, which can crack the sole or damage the receptacle.
Which tools work best for loosening and removing stubborn golf spikes?
A dedicated golf spike wrench is the most effective tool, designed to fit standard spike grooves. For stubborn spikes, a penetrating oil like WD-40 helps break down rust or dirt buildup. A flathead screwdriver can work in a pinch but risks damaging the spike or sole if misaligned. Always choose tools that match the spike’s design to prevent slippage.
How should spike holes be cleaned before installing replacement spikes?
Remove debris with a spike hole pick or stiff brush, then rinse with warm soapy water. Dry the holes thoroughly with a towel or compressed air to prevent moisture buildup. Inspect for thread damage, if threads are stripped, the shoe may need professional repair or replacement. Clean holes ensure new spikes screw in smoothly and grip securely.
What is the correct way to install and tighten new golf shoe spikes?
Match the replacement spike to the shoe’s receptacle type (e.g., Fast Twist, Tour Lock, or Slim Lock). Align the spike with the hole and turn clockwise until snug, then tighten with a wrench for a firm fit. Over-tightening can strip threads, while under-tightening risks the spike loosening during play. Check tightness before each round.
How do you know when to replace golf shoes instead of just the spikes?
Replace shoes if the sole is cracked, the upper is torn, or the midsole lacks support, signs of structural wear. If spike receptacles are stripped or threads won’t hold new spikes, the shoe’s integrity is compromised. Persistent discomfort or poor traction, even with new spikes, also indicates it’s time for an upgrade.
Final Thoughts
Removing stuck golf shoe spikes doesn’t have to mean damaged soles or frustration. We found that patience and the right tools, like a spike wrench, penetrating oil, and a cleaning pick, make the process straightforward. Soaking shoes in warm water or applying oil loosens stubborn spikes, while proper alignment prevents stripped threads. Cleaning spike holes thoroughly ensures new spikes seat securely, and matching the correct spike type to your shoe’s receptacle avoids fit issues. Skipping these steps risks cracked housings, warped soles, or spikes that won’t stay put during play.
Start by gathering your tools, then follow the step-by-step removal and cleaning process. Replace spikes only when they’re fully dry, and avoid overtightening. If your shoes show excessive wear or damaged receptacles, it’s time to consider a new pair. Regular maintenance extends the life of both spikes and shoes, keeping your grip and comfort on the course consistent. Next time your spikes feel stuck, reach for oil and a wrench, not force, and keep your shoes in play for seasons to come.