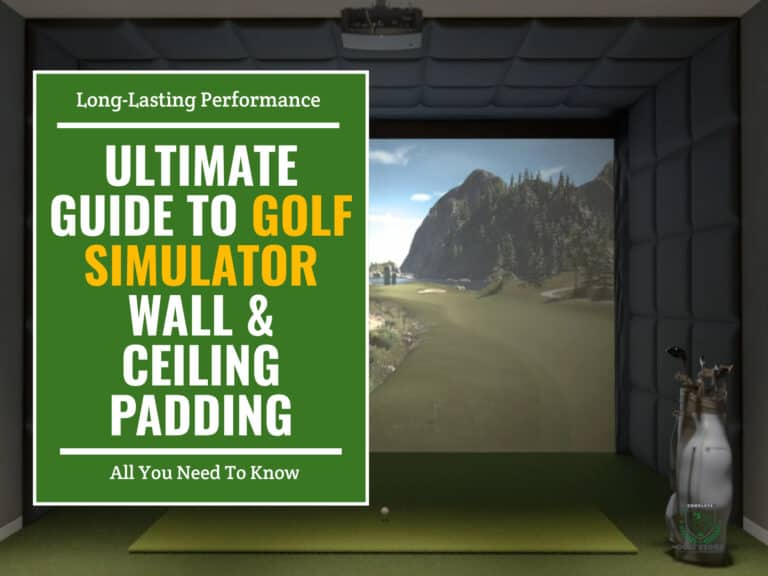
Have you ever sliced a golf ball only to watch in horror as it careens toward a wall or window? In the world of golf simulators, errant shots can spell disaster without proper padding. More than just a safety precaution, the right padding improves the entire simulator experience.
Imagine stepping into your simulator room, surrounded by cleanly mounted pads that absorb impacts, dampen sound and create an immersive ambiance. Suddenly, you’re no longer in your basement – you’re transported to a world-class driving range.
In this article, we’ll go through the essentials of wall and ceiling padding for your golf simulator setup. You’ll learn how to select the optimal materials, properly install pads for maximum protection and maintain them for long-lasting performance.
- 1) The Importance & Benefits of Golf Simulator Wall and Ceiling Padding
- 2) Understanding Golf Simulator Padding
- 3) Installing Golf Simulator Padding
- 4) Maintaining Your Golf Simulator Padding
-
5)
Frequently Asked Questions
- 5.1) How much padding do I need for my golf simulator?
- 5.2) Can I install golf simulator padding myself, or do I need professional help?
- 5.3) What is the best type of padding material for a golf simulator?
- 5.4) How often should I replace my golf simulator padding?
- 5.5) Can I use regular foam padding instead of specialized golf simulator padding?
- 5.6) What are the most important factors to consider when choosing golf simulator padding?
- 6) Final Thoughts
The Importance & Benefits of Golf Simulator Wall and Ceiling Padding
Golf simulator padding is not just a luxury; it’s a necessity for any serious golfer. Protecting your investment should be a top priority. A well-padded simulator room keeps your equipment safe, your walls and ceiling intact and your mind at ease.
But the benefits don’t stop there. Proper padding also enhances your golfing experience by reducing noise and providing a more immersive environment.
Protecting Your Equipment
Your golf clubs are your trusty tools, and they deserve the best protection. High-quality padding absorbs the impact of errant shots, preventing damage to your clubs and the simulator itself.
No more cracked screens or broken sensors – just smooth, uninterrupted play.
Enhancing Your Golfing Experience
Imagine the satisfying thud of a well-struck ball hitting the padding, rather than the cringe-worthy clang of a club meeting the wall.
With the right padding, you’ll enjoy a more realistic and engaging experience, allowing you to focus on your technique and enjoy the game.
Increasing the Longevity of Your Golf Simulator
Your golf simulator is a significant investment, and you want it to last for years to come. By installing quality padding, you’re protecting not just your walls and ceiling, but the simulator itself.
Fewer impacts mean less wear and tear, ensuring that your simulator remains in top condition for countless rounds to come.
Understanding Golf Simulator Padding
Before tackling the installation process, it’s crucial to grasp the different types of golf simulator padding available and the materials used in their construction. This knowledge will help you make the best decision when selecting the right padding for your setup.
Types of Golf Simulator Padding
Golf simulator padding comes in three main varieties, each serving a specific purpose:
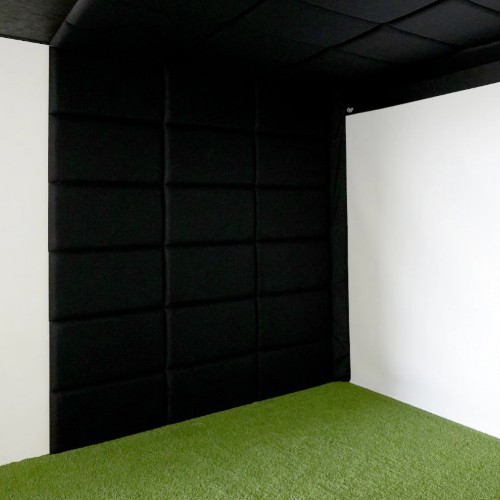
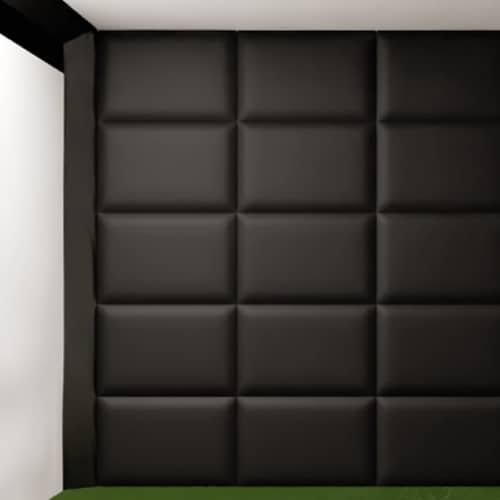
Wall Padding
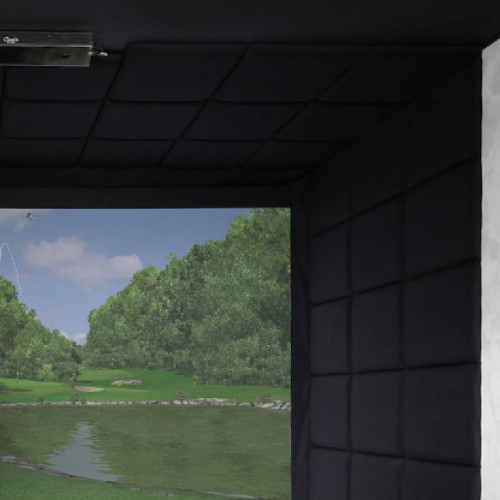
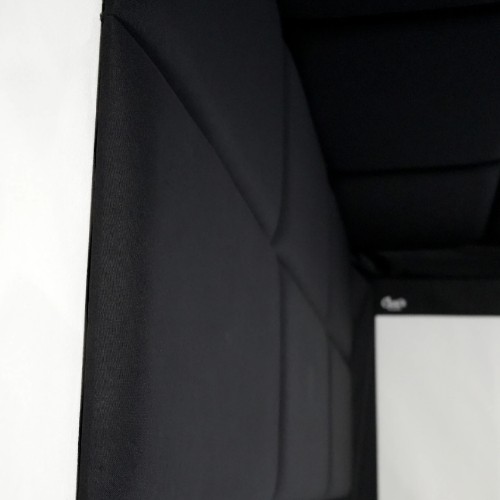
Wall padding is the most common type, designed to protect your walls from errant shots and minimize damage to your clubs. It typically covers the areas behind and to the sides of the hitting screen.
You can find more information on golf simulator wall padding solutions to explore different options and choose the right fit for your needs.
Ceiling Padding
Ceiling padding is essential for rooms with low ceilings or for golfers with a steep swing plane. It prevents damage to your ceiling and light fixtures while also reducing noise.
Floor Padding
Floor padding, although less common, is useful for protecting your flooring from divots and scuffs caused by club heads. It’s particularly helpful if you have hardwood or tile floors.
Materials Used in Golf Simulator Padding
Golf simulator padding is usually made from one or a combination of the following materials:
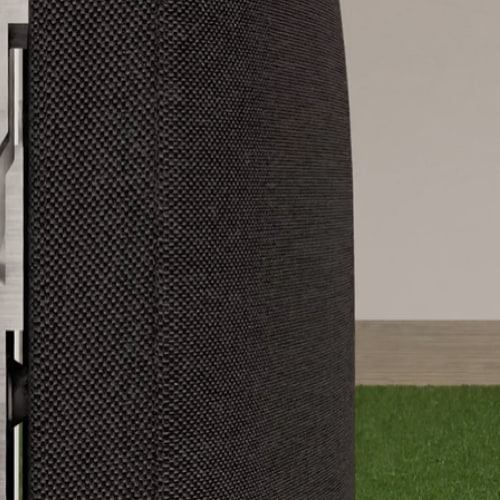
Foam
High-density foam is the most popular choice for golf simulator padding due to its excellent shock absorption properties and durability. It effectively cushions the impact of golf balls and club heads.
Rubber
Rubber padding offers superior durability and resistance to wear and tear. It’s often used in high-traffic commercial golf simulators but can be a practical choice for home setups as well.
Polyester Batting
Polyester batting, commonly found in soundproofing materials, is sometimes used in conjunction with foam or rubber padding to enhance noise reduction and provide a softer surface.
Factors to Consider When Choosing Padding
When selecting simulator padding, keep the following factors in mind:
Thickness
Thicker padding offers better protection but may require more space. Consider the room dimensions and your swing characteristics when deciding on the appropriate thickness.
Density
Higher-density padding provides superior impact absorption and durability, making it a worthwhile investment for frequent use.
Durability
Look for padding materials that can withstand the wear and tear of regular use, such as high-density foam or rubber.
Noise Reduction
If noise is a concern, opt for padding with sound-absorbing properties, like polyester batting or acoustic foam.
What is the Recommended Padding Thickness for Walls and Ceilings?
For walls, a padding thickness of at least 1 inch is recommended to provide adequate protection against ball impacts and club strikes. Thicker padding, such as 2-inch or even 3-inch, offers enhanced durability and noise reduction, making it a preferred choice for high-usage simulators or those seeking a more immersive experience.
When it comes to ceilings, the ideal padding thickness depends on factors such as ceiling height and clearance. A minimum of 1-inch thick padding is necessary to safeguard against errant shots and protect light fixtures. However, if your ceiling is particularly low or you have a steep swing plane, consider opting for thicker padding, such as 2-inch, to provide extra protection and peace of mind.
By understanding the different types of golf simulator padding, materials, and factors to consider, you’ll be well-equipped to choose the best padding solution for your home setup. Now that you have a solid foundation, you’re ready to tackle the installation process head-on.
Installing Golf Simulator Padding
Now that you’ve chosen the perfect padding for your golf simulator, it’s time to roll up your sleeves and get to work. Installing padding may seem like a daunting task, but with the right preparation and techniques, you’ll have your simulator looking and functioning like a pro’s in no time.
Preparing Your Golf Simulator Room
Before you start swinging paddles and sticking padding, take a moment to assess your space and get it ready for the installation process.
Measuring Your Space
Grab your tape measure and jot down the dimensions of your walls and ceiling. This will help you determine how much padding you need and where to place it for optimal coverage.
Cleaning and Priming the Surfaces
Give your walls and ceiling a good cleaning to remove any dust, dirt or debris that could interfere with the adhesive. If you’re working with a particularly smooth or glossy surface, consider using a primer to help the padding stick better.
Installing Wall Padding
With your room prepped and ready, it’s time to tackle the wall padding installation.
Cutting the Padding to Size
Using your measurements and a sharp utility knife, carefully cut your padding to fit the designated areas. If you’re working with patterned or textured padding, be mindful of the direction and alignment of the design.
Applying Adhesive
Depending on the type of padding and adhesive you’ve chosen, you may need to apply the adhesive to the back of the padding, the wall, or both. Follow the manufacturer’s instructions for the best results.
Some types of padding come with pre-applied adhesive, making them easier to install.
Securing the Padding to the Wall
Starting from the top and working your way down, carefully press the padding onto the wall, smoothing out any bubbles or wrinkles as you go.
Use a roller or your hands to apply firm, even pressure and ensure a strong bond.
Installing Ceiling Padding

Installing ceiling padding follows a similar process to wall padding, with a few key differences.
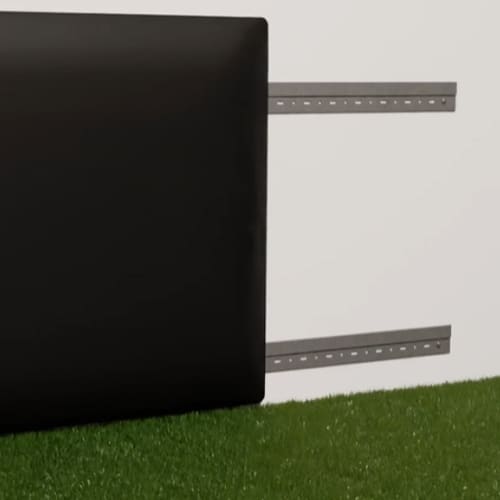
Choosing the Right Suspension System
For ceiling padding, you’ll need a suspension system to keep the padding securely in place. There are several options available, such as wire grids or track systems. Choose the one that best suits your needs and budget.
Attaching the Padding to the Suspension System
Once your suspension system is in place, attach the padding according to the manufacturer’s guidelines. This may involve clipping, snapping or sliding the padding into place.
Tips for a Successful Installation
Keep these tips in mind to ensure a smooth and successful padding installation:
Working with a Partner
Enlisting the help of a friend or family member can make the installation process much easier and more efficient, especially when handling large pieces of padding.
Using the Right Tools
Having the right tools on hand, such as a sharp utility knife, a straight edge and a roller, will make your job easier and help you achieve professional-looking results.
Taking Breaks and Staying Hydrated
Installing padding can be physically demanding, so remember to take breaks as needed and stay hydrated throughout the process.
Maintaining Your Golf Simulator Padding
Congratulations on successfully installing your golf simulator padding! But the work doesn’t stop there. To keep your padding in top shape and your simulator performing at its best, regular maintenance is required. Here’s how to keep your padding looking and functioning like new, round after round.
Regular Cleaning and Inspection
Just like your golf clubs, your padding needs a bit of TLC to stay in prime condition. Set aside some time each month to give your padding a once-over.
Vacuuming the Padding
Grab your trusty vacuum cleaner and give the padding a thorough cleaning. This will help remove any dust, dirt or debris that could cause wear and tear over time. Use a soft brush attachment to avoid damaging the padding surface.
Spot Cleaning Stains and Marks
Noticed a stubborn stain or scuff mark? Don’t panic. Most padding materials are designed to be stain-resistant, but if you do encounter a blemish, address it promptly. Use a mild detergent and a soft cloth to gently dab at the stain, being careful not to soak the padding.
Inspecting for Wear and Tear
While you’re cleaning, examine the padding closely for any signs of damage, such as tears, holes or thinning areas. Catching these issues early can help prevent further deterioration and extend the life of your padding.
Repairing Minor Damage
Even with the best care, accidents can happen. If you notice a small hole or tear in your padding, don’t despair. Many minor issues can be fixed with a little know-how and the right materials.
Patching Small Holes and Tears
For small punctures or rips, a patch kit designed for your specific padding material can be a lifesaver. These kits typically include adhesive patches and instructions for a seamless repair.
Replacing Damaged Sections
If the damage is more extensive or in a high-impact area, you may need to replace a section of the padding entirely. Carefully cut out the damaged portion and replace it with a new piece, following the same installation process as before.
Knowing When to Replace Your Padding
Despite your best maintenance efforts, there will come a time when your padding has simply seen too many swings. Knowing when to replace your padding is crucial for maintaining a safe and effective simulator environment.
Signs of Excessive Wear
Keep an eye out for widespread thinning, multiple tears or holes, or a noticeable reduction in impact absorption. These are all indicators that it may be time to invest in new padding.
Reduced Effectiveness in Protecting Your Equipment
If you find yourself making more frequent repairs or noticing increased damage to your simulator components, it’s a sign that your padding is no longer providing adequate protection.
Don’t wait until it’s too late – replace your padding and keep your simulator in top shape.
Frequently Asked Questions
You’ve learned about the importance of golf simulator padding, the different types and materials available and how to install and maintain it. But, like any savvy golf enthusiast, you might still have some questions. You will probably find your answers in this section of the article.
How much padding do I need for my golf simulator?
The amount of padding you need depends on the size of your simulator room and your hitting area. As a general rule, aim to cover a minimum of 10 feet behind the tee and 5 feet on either side. Don’t forget the ceiling, especially if you have a low clearance or a steep swing.
Can I install golf simulator padding myself, or do I need professional help?
While it’s certainly possible to install padding yourself, it can be a time-consuming and physically demanding task. If you’re handy with tools and have a bit of DIY experience, you should be able to tackle the project. However, if you’re unsure or pressed for time, consider hiring a professional installer to get the job done right.
What is the best type of padding material for a golf simulator?
The best padding material for your simulator depends on your specific needs and budget. High-density foam is a popular choice for its excellent impact absorption and durability. Rubber padding is another great option, particularly for high-traffic commercial setups.
When in doubt, consult with a specialist to find the perfect padding solution for your simulator.
How often should I replace my golf simulator padding?
The lifespan of your padding depends on factors such as usage frequency, material quality and maintenance habits. On average, expect to replace your padding every 3-5 years.
However, if you notice significant wear and tear or reduced effectiveness sooner, don’t hesitate to invest in new padding.
Can I use regular foam padding instead of specialized golf simulator padding?
While regular foam padding might seem like a cost-effective alternative, it’s not designed to withstand the impact of golf balls and clubs. Specialized golf simulator padding is engineered for durability and performance, making it a better investment in the long run.
What are the most important factors to consider when choosing golf simulator padding?
When selecting padding for your simulator, prioritize factors such as thickness, density, durability, and noise reduction properties. Consider your budget, simulator usage and personal preferences to find the perfect padding solution for your needs.
Final Thoughts
As we’ve explored, quality padding not only protects your walls and ceilings from the occasional mishit but also enhances the overall experience by dampening sound and improving the room’s aesthetics. Polyurethane and acoustic foams are the perfect allies in this pursuit, offering superior impact absorption and noise reduction properties.
The beauty of padding lies in its customization potential. With a wide array of colors, prints and shapes at your disposal, you can tailor your simulator room to reflect your unique style and create an atmosphere that inspires your best game.
Now that you’ve explored padding options, it’s crucial to ensure your space can accommodate your dream golf simulator. To guide you through this process, we recommend our resource on indoor golf simulator room dimensions.
We invite you to share your own padding experiences, insights, and questions in the comments below. Your input will help fellow golf enthusiasts create their own virtual golfing sanctuaries.
Thanks for reading!