Mastering the correct putting grip can transform your game, especially if you struggle with consistency. A solid grip is the foundation of a smooth, controlled putting stroke. Without it, even the best stance or swing won’t save you from missed putts and frustration on the green.
Imagine sinking putts with confidence, every stroke feeling natural and controlled. This guide will help you get there by exploring the best putting grips for those struggling to find their rhythm. You’ll discover detailed insights and practical tips to help improve your putting game.
Get ready to revolutionize your approach to putting and start enjoying more consistent, successful rounds on the course.
- 1) The Importance of a Good Putting Grip
-
2)
Common Putting Grip Styles
- 2.1) The Conventional Putting Grip
- 2.2) The Claw Grip: A Solution for the Yips
- 2.3) The Left-Hand-Low Grip: Enhancing Stability
- 2.4) The Pencil Grip: Precision and Control
- 2.5) The Saw Grip: Straightening the Stroke
- 2.6) The Armlock Method: Mechanical Consistency
- 2.7) Oversize Putter Grips: Promoting a Pure Pendulum Motion
- 3) Practical Tips for Improving Your Putting Grip
- 4) Learning from the Pros: Unique Putting Grips
- 5) Common Putting Mistakes and How to Fix Them
- 6) Frequently Asked Questions
- 7) Final Thoughts
The Importance of a Good Putting Grip

A good putting grip is the cornerstone of an effective putting stroke. It’s not just about holding the club; it’s about ensuring every movement is precise and controlled. Your grip can make or break your game on the greens.
Why Grip Matters for a Smooth Putting Stroke?
A solid grip ensures that your hands and arms move as a unit. This unity helps maintain a consistent path and pace, reducing the chances of unwanted wrist action that can send your ball off course.
Think of your grip as the anchor that keeps your stroke steady and true.
Impact of Grip Pressure on Performance
Grip pressure is another critical factor. Too tight, and you introduce tension, making your stroke jerky and unpredictable. Too loose, and you risk losing control of the putter head.
The sweet spot is a light yet firm grip. Imagine holding a tube of toothpaste without squeezing out any paste—that’s the level of pressure you’re aiming for.
Common Putting Grip Styles
Let’s explore the most common grip styles used today. Make sure you experiment with different styles to find the one(s) that best suit(s) your skills and game.
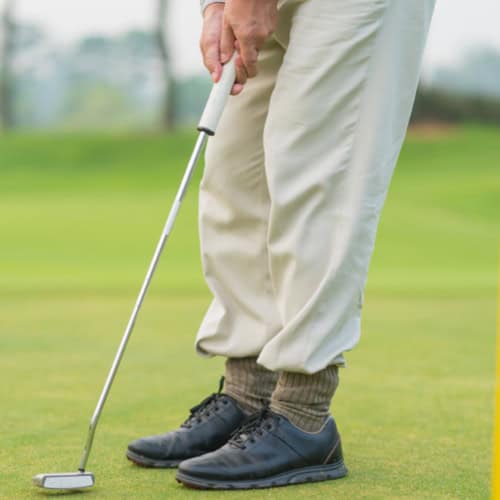
The Conventional Putting Grip
Understanding the conventional putting grip is key to a consistent and smooth stroke. It’s the go-to grip for many golfers, both amateurs and professionals. Here’s how you can master it:
- Position Your Hands Correctly: Start by placing your left hand at the top of the grip, ensuring the grip sits across the palm and the lifeline of your hand. Your thumb should point down the center of the shaft.
- Right Hand Placement: Place your right hand below the left. The grip should rest in the fingers, not the palm. This allows for better control and feel. Wrap your fingers around the grip, with your right thumb also pointing down the shaft.
- Reverse Overlap: The index finger of your left hand should overlap the fingers of your right hand. This helps to unify your hands and prevent excessive wrist movement.
- Alignment: Ensure both thumbs are pointing straight down the shaft, providing a neutral grip that keeps the putter face square.
The conventional grip promotes comfort, consistency and a pendulum-like stroke driven by the shoulders. Avoid gripping too tightly, incorrect hand placement and misaligned thumbs for the best results.
The Claw Grip: A Solution for the Yips
Executing the claw grip is straightforward but requires practice to master. Start with your left hand in a conventional position at the top of the putter grip. Your right hand, however, will take on a new role. Instead of merging with the left hand, position your right hand so that the putter grip sits between your thumb and forefinger. Your right palm should face your body, and your fingers should point down towards the ground.
This grip looks unconventional, but it effectively reduces the influence of your right hand, which is often the culprit behind erratic putts. By minimizing the right hand’s role, the claw grip promotes a smoother, more controlled stroke.
Tips for transitioning
- Practice at home without game pressure.
- Focus on using your shoulders to drive the stroke.
- Start with short putts and gradually move to longer ones.
- Develop a consistent pre-putt routine.
- Stay patient as you adjust to the new grip.
The claw grip can revolutionize your putting by shifting control to your shoulders, leading to improved accuracy and confidence on the green. It stabilizes your hands, prevents wrist movements, and allows your shoulders to lead the stroke. It also helps maintain a square putter face for consistent direction and distance control.
The Left-Hand-Low Grip: Enhancing Stability
When it comes to enhancing stability in your putting stroke, the left-hand-low grip, also known as the cross-handed grip, is recommended. This grip helps lock your hands together, providing a solid foundation for a smoother stroke. Do the following to implement it:
- Position Your Left Hand: Place your left hand lower on the putter grip than your right hand. This might feel awkward at first, but it’s crucial for the stability this grip offers.
- Align Your Right Hand: Your right hand should sit comfortably above your left hand, with the grip resting across the palm and fingers. Ensure your right thumb points down the shaft.
- Interlock or Overlap: You can choose to interlock your left-hand pinky with your right-hand fingers or simply let the left-hand fingers overlap. Both methods work, so pick the one that feels most comfortable.
- Square Your Shoulders: Align your shoulders parallel to your target line. The left-hand-low grip helps achieve this naturally, promoting a pendulum-like motion.
This grip reduces wrist action by anchoring the left hand below the right, encouraging a shoulder-dominated, pendulum-like motion for consistency.
It’s ideal for combatting the yips, improving consistency (especially on short putts) and maintaining control under pressure (by providing the extra stability needed to keep your nerves in check).
The Pencil Grip: Precision and Control
The pencil grip, named for its resemblance to the way you hold a pencil, offers a unique approach to putting. It’s designed to minimize wrist movement and keep the small muscles in your hands from interfering with your stroke.
Start by placing your left hand in a conventional position on the putter. Your right hand, however, will hold the grip like a pencil. Here’s how to do it:
- Left-Hand Placement: Place your left hand at the top of the grip, with your thumb pointing down the shaft. This provides a stable anchor for your putter.
- Right-Hand Position: Position your right hand so that the putter grip rests between your thumb and index finger, much like you’d hold a pencil. Your right hand should be relaxed, with the fingers lightly touching the grip.
- Finger Placement: Allow your right fingers to rest gently on the grip, providing just enough pressure to control the putter without engaging your wrist muscles.
Benefits for Minimizing Wrist Movement

The pencil grip is excellent for golfers who struggle with wristy strokes. By holding the putter like a pencil, you engage larger muscle groups in your arms and shoulders rather than relying on the small, twitchy muscles in your wrists. This results in a smoother, more controlled stroke.
Additionally, this grip helps keep the putter face square through impact, which is crucial for accuracy. By minimizing wrist action, you reduce the chances of opening or closing the putter face inadvertently.
The Saw Grip: Straightening the Stroke
The saw grip is a fascinating alternative for golfers looking to straighten their putting stroke. Its distinctive hand positioning can provide a more direct, pendulum-like motion, reducing the arc and improving accuracy. Here are the steps:
- Left-Hand Setup: Position your left hand at the top of the grip in a conventional manner. This hand will serve as the anchor for your stroke.
- Right-Hand Position: Lay your right-hand fingers across the top of the grip, pointing them toward the target. Your thumb should rest on the side of the putter grip, providing stability.
- Finger Alignment: Your right-hand fingers should be spread out slightly, similar to holding a saw handle. This placement minimizes wrist action and helps maintain a straight stroke.
This grip encourages a straight-back-straight-through stroke by reducing wrist influence and promoting a smooth, consistent motion. It’s beneficial for golfers struggling with a pronounced arc. The saw grip’s unique positioning can lead to improved accuracy and control on the greens for those seeking a straighter stroke.
The Armlock Method: Mechanical Consistency
The armlock method is revolutionizing the putting game for those who seek mechanical consistency over feel. This grip, popularized by professionals like Bryson DeChambeau, offers a structured approach that minimizes wrist action and uses the larger muscles of the arms and shoulders.
Understanding the Armlock Grip
- Grip Positioning: Start by gripping the putter with your left hand in a conventional position. The key difference here is the extended length of the putter. Your putter grip should be longer, allowing it to rest against your left forearm.
- Forearm Contact: Ensure the grip is locked against your forearm. This is crucial as it stabilizes the putter and prevents any wrist movement. Your right hand should then hold the grip lower down, securing it in place.
- Thumb Alignment: Both thumbs should be aligned on the grip, pointing straight down the shaft. This helps maintain a square putter face through the stroke.
Benefits for Golfers Focusing on Mechanics Over Feel

The armlock method shines for those who prioritize mechanical consistency by improving stability (eliminating wrist break) and control (maintaining the putter face square to the target line) and reducing yips.
However, to adjust to the armlock method, you need to do the following:
- Use a longer putter shaft to accommodate the armlock grip
- Adopt a more upright stance for proper alignment
- Practice more to get used to the feel of the armlock method
Oversize Putter Grips: Promoting a Pure Pendulum Motion
Oversize putter grips are thicker and larger than standard grips. They come in various shapes and sizes, but all share a common goal: to reduce the influence of the small muscles in your hands and wrists. By increasing the diameter of the grip, these putters encourage a grip that relies more on the larger muscles of your arms and shoulders.
How to Use a Two-Thumb Grip Effectively?
One effective way to utilize oversized grips is through the two-thumb grip. Here’s how you can master this technique:
- Hand Placement: Place both thumbs side-by-side down the center of the grip. This ensures that your hands are aligned and working together.
- Finger Positioning: Your fingers should wrap comfortably around the sides of the grip. The grip’s oversize nature helps keep your hands from twisting, maintaining a steady position throughout the stroke.
- Shoulder Engagement: Focus on using your shoulders to drive the stroke. The two-thumb grip helps keep your hands quiet, promoting a pendulum-like motion.
Oversize putter grips are particularly beneficial in several scenarios. They can benefit especially beginners by adding consistency, combatting the yips and enhancing confidence and performance under pressure (all thanks to the oversized grips).
Practical Tips for Improving Your Putting Grip

The following are some practical tips to help you get the most out of your putting grip.
- Importance of Light Grip Pressure – Holding the putter too tightly can cause tension in your hands and arms, leading to jerky, inconsistent strokes. Aim for a light grip—imagine you’re holding a bird. This light pressure allows for a smooth, pendulum-like motion, promoting better control and feel.
- Thumb Positioning for a Square Putter Face – Place both thumbs down the center of the grip. This position helps maintain alignment and ensures that your putter face stays square to the target line, leading to more accurate putts.
- Upright Left Arm for Maintaining Putter Plane – Position your left arm so it forms a straight line with the putter shaft. This alignment minimizes the chances of your putter deviating off course, promoting a more consistent stroke.
- Consistent Practice – Regular practice is the key to ingraining these grip improvements into your game. Spend time on the practice green, focusing on your grip pressure, thumb positioning and arm alignment. Consistency in practice leads to consistency on the course.
- Feedback and Adjustment – Pay attention to your performance and make adjustments as needed. If your putts are veering off course, reassess your grip and alignment. Sometimes, small tweaks can make a significant difference.
Drills for a Connected and Stable Putting Motion
Before diving into specific drills, it’s crucial to understand the importance of a solid foundation in putting. Precision golf green exercises for accuracy can significantly enhance your short game. These exercises, combined with the following drills, will help you develop a connected and stable putting motion, leading to improved performance on the green.
Incorporate these drills into your practice routine to improve your grip and overall putting technique:
Gate Drill
Set up two tees just wider than your putter head and practice putting through them. This drill helps ensure a straight stroke and improves your ability to keep the putter face square.
Ladder Drill
Place balls at varying distances from the hole in a straight line and putt each one. This drill improves distance control and consistency.
String Line Drill
Set up a string above your target line and practice putting along the string. This visual aid helps you maintain a straight stroke and proper alignment.
Check Also: 10+ Expert Short Putting Drills For Control and Consistency
Learning from the Pros: Unique Putting Grips

Each pro golfer has a unique style that suits their game, and examining these can help you discover new methods to improve your own putting performance.
Bryson DeChambeau’s Armlock Method
Bryson DeChambeau is known for his analytical approach to golf, and his putting grip is no exception. He uses the armlock method, where the putter shaft is pressed against his forearm.
Jordan Spieth’s Left-Hand-Low Grip
Jordan Spieth employs the left-hand-low grip, also known as the cross-handed grip. By placing his left hand below his right on the putter, Spieth stabilizes his stroke and reduces the likelihood of his wrists breaking down.
Matt Wallace’s Two Thumbs Grip
Matt Wallace uses a two-thumbs grip, where both thumbs rest on top of the putter shaft, parallel to each other. This grip promotes symmetry and balance, encouraging a straight-back, straight-through putting stroke.
Phil Mickelson’s Lefty Claw Grip
Phil Mickelson, a left-handed player, utilizes a modified claw grip. His right hand adopts a claw-like position, with the fingers pointing down the shaft. This grip reduces the right hand’s influence, allowing for a smoother, more controlled stroke. Mickelson’s grip is particularly effective for short putts.
Tiger Woods’ Reverse Overlap
Tiger Woods, one of the greatest golfers of all time, uses the reverse overlap grip. His left index finger rests over the fingers of his right hand. This traditional grip offers a blend of control and feel, helping Woods maintain a consistent stroke under pressure.
Professional golfers often experiment with putting grips to find what best suits their putting style. This can be due to personal preference or even to overcome putting problems.
Common Putting Mistakes and How to Fix Them

Improving your putting grip is crucial, but understanding and correcting common mistakes can elevate your game even further. Let’s go through frequent putting errors and practical solutions to fix them.
Correcting Ball Position
One of the most common mistakes golfers make is incorrect ball position. Placing the ball too far forward or too far back in your stance can disrupt your stroke and affect accuracy.
If the ball is too far forward, you might hit up on it, leading to inconsistent contact. Conversely, placing the ball too far back can cause you to hit down on the ball, which often results in a weaker stroke.
Fix: Position the ball slightly forward of center in your stance. This allows for a natural arc in your putting stroke, promoting better contact and a smoother roll.
Ensuring Proper Hand Placement
Improper hand placement on the grip can lead to misaligned putts and reduced control.
Placing the hands too low can cause the putter to swing on too much of an arc, making it difficult to keep the face square, while overly high hands can lead to a steeper stroke, affecting distance control.
Fix: Ensure your hands are positioned so that the putter shaft points towards your belly button.
Reducing Face Rotation
Excessive face rotation is a common culprit behind missed putts. If the putter face isn’t square at impact, the ball will veer off your intended line.
Fix: Focus on keeping your wrists quiet during the stroke. Use drills like the gate drill (discussed above) to practice keeping the putter face square to your target line.
Achieving the Right Stroke Angle
Many golfers struggle with the angle of their putting stroke, either hitting too steeply down on the ball or too flat, causing poor contact and inconsistent rolls.
Fix: Maintain an upright left arm to help keep the putter on the correct plane. Visualize a pendulum motion driven by your shoulders, not your wrists or arms. Practicing with a putting arc can also help you groove the right stroke angle.
Practicing Consistency

Without a consistent routine and stroke, even minor mistakes can compound, leading to missed putts.
Fix: Develop a consistent pre-putt routine. This might include checking your alignment, ensuring your grip pressure is light and visualizing your putt. Sticking to this routine will help you build muscle memory and confidence.
Feedback and Adjustment
Regular feedback and adjustments are vital. Pay attention to your performance and be willing to tweak your technique.
Record videos of your putting stroke or seek feedback from a coach. Identify any recurring mistakes and work on targeted drills to correct them. Continuous improvement is about making small, consistent adjustments.
Frequently Asked Questions
We have compiled a list of the most commonly asked questions related to putting to help you learn everything about the topic and gradually become a better putter.
What is the best putting grip for beginners?
Beginners often benefit from the conventional putting grip due to its simplicity and ease of use. This grip provides a natural feel, making it easier to develop a consistent stroke.
How can I find the right grip pressure?
Aim for a light grip, as if you’re holding a tube of toothpaste without squeezing out any paste. Practice with different pressures until you find one that allows for a relaxed, controlled stroke.
Should I switch grips during a slump?
Switching grips during a slump can be beneficial. If your current grip isn’t working, experimenting with different styles like the claw grip or left-hand-low grip can offer new perspectives and solutions.
Each grip style addresses different aspects of the stroke, so finding one that fits your needs can help break the slump and improve your performance.
How do I know if my grip style is causing putting issues?
Signs that your grip style might be causing issues include inconsistent stroke paths, frequent missed putts and difficulty controlling distance. Recording your putting stroke or seeking feedback from a coach can help identify if your grip is the problem.
Adjustments in grip pressure, hand positioning or trying a new grip style can address these issues.
Can grip style affect the distance control in putting?
Yes, grip style can significantly affect distance control. For instance, grips like the claw or armlock minimize wrist action, leading to more consistent contact and distance. On the other hand, traditional grips might offer better feel but require more precision.
Experimenting with different grips can help you find one that balances control and feel, optimizing your distance control.
Final Thoughts
Selecting the right putting grip is crucial for improving your game. Each grip offers unique benefits and caters to different styles and preferences. By experimenting with different grips, you can discover what works best for you and enhance your putting performance.
Try out various grips; each has advantages, from natural feel and control to minimizing wrist action and enhancing stability. Implement practical tips like maintaining light grip pressure, proper thumb positioning and practicing drills to improve your putting grip.
For those looking to explore additional putting improvement tools beyond grip techniques, check out our comprehensive guide on putting aids. You can also learn the proper grip fundamentals and how to find the perfect putting grip to elevate your game.
If you follow our tips and advice, we assure you that you will get better at putting in no time. If you still need help or have questions or comments, please leave them in the comments section below.
Thanks for reading!


