
Rain, perspiration, heat, and dirt wear down grips over time. Changing your grips periodically is a cost-effective approach to maintaining your equipment and achieving more consistency and control with your shots.
As a golfer, understanding how to regrip golf clubs is beneficial. While you may not believe it, an out-of-date or worn-out piece of equipment might cost you valuable shots, especially in rainy or hot weather. While cleaning them frequently will assist, they do have a limited lifespan and will eventually need to be replaced.
In this article, we will guide you through the process of regripping your clubs and answer some frequently asked questions about the topic.
8 Steps to Regrip Golf Clubs
When it comes to purchasing some tacky new amazing grips for your golf clubs, you have two alternatives. You can do it yourself or hire someone else to do it for you (for example, a golf professional). If you don’t have a lot of space or aren’t the most dexterous golfer, you’d pay the $4-$8 for each club and leave it to the professionals.
However, if you’re a handyperson or looking to save some money, doing it yourself is entirely possible. Before you begin, ensure that you have the necessary equipment and at least 60-120 minutes to regrip the full set.
Step 1. Prepare Your Supplies.
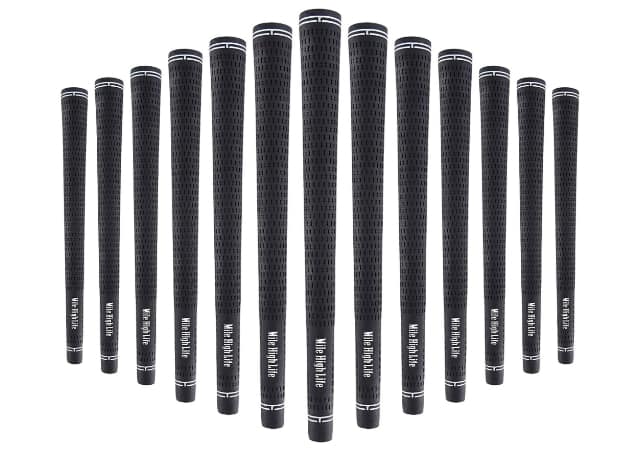
New Grip
Clearly, the most critical item you require is the new grips you’re installing. If you’re new to this and haven’t done it before, we always recommend purchasing a few extra grips. This will assist you if something goes wrong and you have to cut a grip off due to improper placement on the shaft.
The last thing you want is for a few clubs to have mismatched grips due to an error. Spend the extra money and keep in mind that you can always use them in the future if they are not needed.
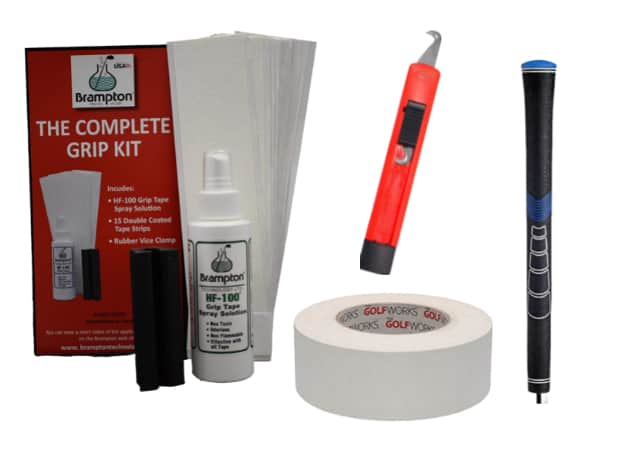
Grip Tape
The sort of grip tape you need is determined by the solvent you intend to use. If you’re going to use water, you’ll need water-absorbent tape. If you’re going to use paint thinner, WD-40, or another type of grip solvent, you’ll need double-sided adhesive tape.
Box Cutter
You’ll need something to sever the old grip. A standard box cutter works well. However, we propose using a golf club grip remover like this one for added convenience.
Golf Club Regripping Kit
If you don’t have all of the supplies on hand, get a golf club regripping kit from Amazon to simplify this procedure. It includes practically everything you need to get started and is really affordable. It comes equipped with a grip solvent, fifteen tape strips, and a rubber vise clamp.
Step 2. Remove Your Old Grips.
Remove the old grip using a straight blade or stripper. Always maintain a safe distance from yourself. Position the cut away from your body. Remove the old grip and grip tape by peeling or scraping. Remove any residue with a towel and Mineral Spirits Grip Solvent.
Avoid damaging graphite shafts by using a utility knife with a hook blade.
Step 3. Remove the Old Tape.
After completely removing the old grip, you’ll want to begin the exciting task of removing the old tape. One common inquiry is whether you can simply stack the fresh tape on top of the old. While this may appear to be an acceptable option (to save time), we nevertheless recommend completely removing the old tape.
Fair warning: Leaving the old tape on may result in the new tape not adhering correctly to the old tape. It may result in unwelcome bulges in your grip. Most significantly, you’ll end up with additional layers of tape, leading to an increase in the grip’s diameter, which may not be desirable.
We suggest using this Tape Removal Tool to make the process much easier.
Step 4. Measure the New Tape.
After completely removing the grip and tape from the shaft, we can prepare the new tape. If you’re using a roll of tape, pull it out and cut the length you’ll need. Generally, it can be equivalent to the length of the grip. If you are using pre-cut tape strips, proceed to step 5.
Bear in mind that it is acceptable if the tape strip is up to 1″ shorter than the grip itself. There will still be sufficient tape surface area to secure the grip to the shaft.
Step 5. Apply the Tape.
After preparing the fresh tape and removing the wax backing, align the tape lengthwise along the shaft, leaving about 1/4″ to 1/2″ sticking out of the shaft’s butt end.
The tape is designed to be sticky on both sides. As a result, you’ll need to remove the wax paper backing. If you’re working with pre-cut tape strips, remember to remove both sides of the wax paper.
Fair reminder: It’s worth remembering that out of every 100 re-grips, there will always be one or two instances where someone forgets to remove the double-sided tape’s wax backing. Tragic, because once placed, the grips are rendered inoperable.
Circumferentially wrap the tape around the shaft. Then, twist and tuck the excess tape dangling from the end into the shaft butt.
Tucking the tape in does three things. To begin, it enables adequate sealing and stickiness at the grip’s butt end. Second, this keeps the solvent out of the shaft. Thirdly (and most critically), it protects the grip from being sliced or damaged by the sharp edge of the shaft when it slides onto it.
Alert: If you do not twist and tuck the tape into the shaft’s butt end, you risk cutting through the grip material during installation.
Step 6. Coat the Inside of the Grip With Solvent.
Spray the shaft thoroughly with grip solvent or mineral spirits, ensuring that all of the tapes are covered and wet. Then, while holding your forefinger on the grip’s cap to prevent solvent from escaping, pour some additional solvent into the grip.
With your other hand, cover the opposite opening of the grip and shake the solvent inside the grip to completely coat the inside surface.
Remove the grip cap and allow any remaining solvent to re-coat the grip tape.
Gentle Reminder: Using insufficient solvent makes it extremely difficult to press the grip onto the shaft and may result in the grip becoming stuck halfway.
Step 7: Apply the New Grip
This can be done in two different ways:
Vise Method
If you have a vise at home, I strongly advise you to use it. It will make it easier to fully retract the grip into its appropriate position. Simply place the rubber insert from the grip kit in the vise and tighten it sufficiently to prevent the club from moving when you apply force to fully depress the grip.
Once the grip is totally tight, you can make minor changes at the last moment. Some individuals like that the logo is correctly aligned on the grip, and you can adjust the position with your fingertips before the grip begins to set.
Additionally, you can tap the grip’s butt on the floor and apply pressure from the top to ensure that it is completely secured to the club’s end and that there is no space between the shaft’s end and the grip’s butt.
The following video (50 seconds) below demonstrates the Vise Method of regripping golf clubs.
No-Vise Method
If you’re not going to use a vise, you’ll need to wedge the club between your feet on the ground. Pay attention not to put too much force on the shaft. You don’t want it to flex to the point of snapping.
The video (51 seconds) below demonstrates the Non-Vise Method of regripping golf clubs.
Step 8: Clean it Up and Let it Set.
Once the grips are installed, it’s tempting to take your clubs out for a test. However, We strongly advise that you wait at least six hours after regripping. The solvent must cure entirely, and you should store the clubs in a dry, cool location during this period.
Golf Grip Cleaning
After replacing your grips, it’s important to keep them clean.
Regular cleaning results in increased performance and service life. Historically, black grips frequently disguise soiling. Today’s vibrant grips call attention to dirt and grime, which is a good thing. Players with vibrant grips may be more willing to clean them.
It is prudent to clean your grips on a regular basis. You can use grip cleaning wipes or a huge pail of warm water. For corded or rubber grips, use a soft-bristled brush; for softer grips, use a washcloth. Rinse each grip with clean water afterward.
We do have a detailed guide on How To Clean Your Golf Clubs if you want to know more.
How Often Should You Regrip?
There is no hard and fast rule about the frequency of regripping your clubs. It depends on many factors, including how frequently you train and play, your grip style, and the conditions in which you play.
We recommend that you regrip every 3-6 months if you’re a frequent golfer, and every 6-12 months if you’re a weekend warrior. If you play only a few times a year, you generally will need to do it every few years.
One approach to extend the life of your grips is to use grip-cleaning wipes once a month to keep them clean and oil-free. These are particularly beneficial if you play in hot or humid weather and perspire a lot. Cleaning grips should be included on your checklist for routine club maintenance.
Why Regrip?
Regripping your clubs is an excellent approach to saving money while maintaining the effectiveness of your clubs. An incorrect or worn-out grip can increase your score by two to five strokes every round!
How to Choose Golf Grips
Changing your grips is a critical decision since it is the direct connection between your body to the club.
Grips have significantly improved lately, and now incorporate a great deal of technology. The fundamental goal of the grip is to keep your hands relaxed and stable while still holding the club tightly enough to execute the swing. To accomplish this, a number of issues must be worked out first.
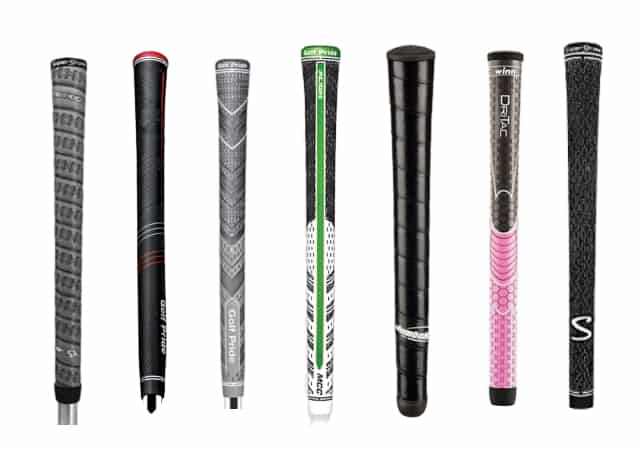
Types of Golf Grips
Over 20% of the top 100 PGA Tour professionals use full cord grips, while another 20% choose hybrid grips with a cord upper section and a standard rubber lower section. The majority of the top 100 players, just over 50%, prefer non-cord grips, with Golf Pride’s Tour Velvet grip being the most popular [1].
Wrapped
Genuine leather-encased grips continue to be popular. Manufacturers, however, also utilize synthetic materials that are more resistant to extreme temperatures and humidity.
Wrap grips feature natural indentations that aid in gripping. They are more similar to rubber than cord grips and can provide a great deal of comfort when holding and swinging the club.
Rubber
Rubber grips are the most frequently used, in part because they are the least expensive. Many sets of clubs offered to average players include rubber grips as standard. Numerous golfers like the stability provided by this grip type.
However, we recommend that you avoid a rubber grip if you do not want to sacrifice comfort for playability. It is less maneuverable and so not a good choice for professional players. Silicon and elastomer are popular substitutes.
Hybrid
Hybrid golf grips combine a strong cord upper part with a soft rubber below for comfort. A hybrid grip is a two-material grip that is meant to provide each hand with a unique yet optimal feel during the swing, helping you achieve perfect balance, speed, and accuracy.
Corded
Coarse, corded grips provide the necessary traction control in inclement weather. They wick moisture away through the cord gaps. Corded grips are preferred by golfers who play in rainy or hot, humid circumstances.
They are also frequently used by players with powerful swings and who create high swing speeds.
Size
The grip size debate rages on. Smaller grips, according to old-school players, encourage wrist movement, resulting in a hook. Larger grips are supposed to encourage a fade in the ball’s trajectory, but contrary to popular belief, they actually promote the reverse.
Golfers who suffer from arthritis may prefer larger grips, according to a group that advocates larger grips. Bryson DeChambeau, the US Open champion, and PGA TOUR Pro is the opposite of that claim, as he has no signs of arthritis and uses bigger club grips throughout his bag.

The thicker the grip diameter, the easier it is to keep “quiet” wrists while playing. More consistent and straight your shots will be if your wrists are more relaxed. It is also good at dampening vibration and reducing shock at the moment of impact.
Swing weight is another consideration when experimenting with different sizes. The club’s feel can be altered if the handle is heavier.
Clubs with a heavier swing weight may feel more stable and solid, but may also be more difficult to control and generate less clubhead speed. Clubs with a lighter swing weight may feel more maneuverable and easier to control, but may also be less stable and generate less power.
Trial and error is the only way to determine which club grip size is best for you. Gripping the club differently can have a profound effect on your swing.
Firmness
There are three main grip firmness levels: Soft, Medium, and Firm.
Grips that are too soft may feel more comfortable, but may also cause you to hold the club too tightly, leading to tension and inconsistency in your swing. Grips that are too firm may feel less comfortable, but may allow you to hold the club more lightly and swing more smoothly.
Overall, the firmness of a club grip is a personal preference, and it is important for you to choose a grip that feels comfortable and allows you to swing smoothly and consistently. You may need to try out different grip firmnesses to find the one that works best for you.
Texture
While grip size, taper, and material composition are predominantly binary choices, the way your club grip feels becomes a multiple-choice exercise. All of these factors come into play: cord, patterns, alignment ridges, wraps, and tackiness.
What is the finest advice? Once you’ve determined the appropriate size and material construction, get your hands on the grips and allow the texture to speak for itself.
Sergio Garcia and other pros prefer the SuperStroke S-Tech Cord club grip for its feedback, control, and all-weather traction. Players who play gloveless frequently prefer the tacky feel of wrap designs, such as the SuperStroke Soft Wrap TC club grip. Others would not consider playing without the reassurance provided by the SuperStroke Traxion Tour’s slight alignment ridge.
Prevailing Weather
Golfers who frequently play in rainy or humid conditions may like a corded grip’s abrasive texture. If you’ve ever seen a club fly from a player’s hands upon impact, you understand the critical nature of a sticky and/or rough grip. Any movement made throughout the swing has the potential to swiftly derail the shot.
However, some players find the texture of a corded grip to be too harsh on their hands, especially if they grip the club tightly. Certain plastic and polymer grips become slippery when wet. Smooth grips may require the occasional use of a tack spray.
Frequently Asked Questions
The following are some frequently asked questions that we answer to ensure you are equipped with all the necessary information you might need in the process of club regripping.
Is It Hard to Regrip your own clubs?
Regripping your own golf clubs can be a moderately challenging task, but it is manageable for many golfers. It requires some basic tools like a grip tape, solvent, and (probably) a vise, as well as a steady hand and attention to detail.
While it may take a bit of practice, many find it cost-effective and convenient to regrip their clubs themselves. However, for those uncomfortable with DIY projects or lacking the necessary tools and skills, professional club regripping services are readily available at most golf shops.
Can you grip a club without tape?
Gripping a golf club without tape is possible, but it’s not recommended for a proper and secure grip. Grip tape is used to provide a consistent and secure bond between the club shaft and the grip. Without it, the grip may slip or rotate during your swing, leading to less control and potentially affecting your performance.
How Many Layers of Tape Do You Need for a Golf Grip?
Typically, you need one layer of grip tape for a standard grip. However, some golfers might use additional layers to adjust the grip’s thickness to their preference.
Can you use masking tape instead of golf grip tape?
Using masking tape instead of golf grip tape is possible but not recommended. Golf grip tape is designed specifically for the purpose of regripping clubs. It provides a secure and durable bond between the grip and the club shaft. Masking tape lacks the necessary adhesive qualities and durability needed for a reliable club grip, and it may result in poor performance and safety concerns. It’s best to use proper golf grip tape for this task.
Final Thoughts
Previously, having your clubs regripped was an unusually expensive process in addition to the cost of the new grips. Thankfully, the going charge for this service has decreased at a number of stores, but that does not mean you should avoid learning how to regrip a golf club yourself.
Not only can learning to regrip your clubs save you money, but it also ensures that your grips are always put just how you like them.
Thanks for reading!
References:
- What Golf Grips Do the Pros Use? Top 100 PGA Tour Player Guide. Golfing Focus. Retrieved from https://golfingfocus.com/what-golf-grips-do-the-pros-use-top-100-pga-tour-player-guide/